Create a Landing Page - Exercise
A nice thing about Revit is that you can actually create a startup page. That means that you can configure Revit to launch a project landing page that can contain vital project information whenever you open a project.
To create a landing page, follow these steps:
- Open Revit.
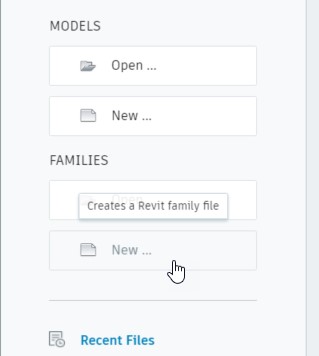
- On the home page, under FAMILIES, click New…
- Navigate to the Titleblocks folder and select E1 - 42 x 30.rft, as shown below.
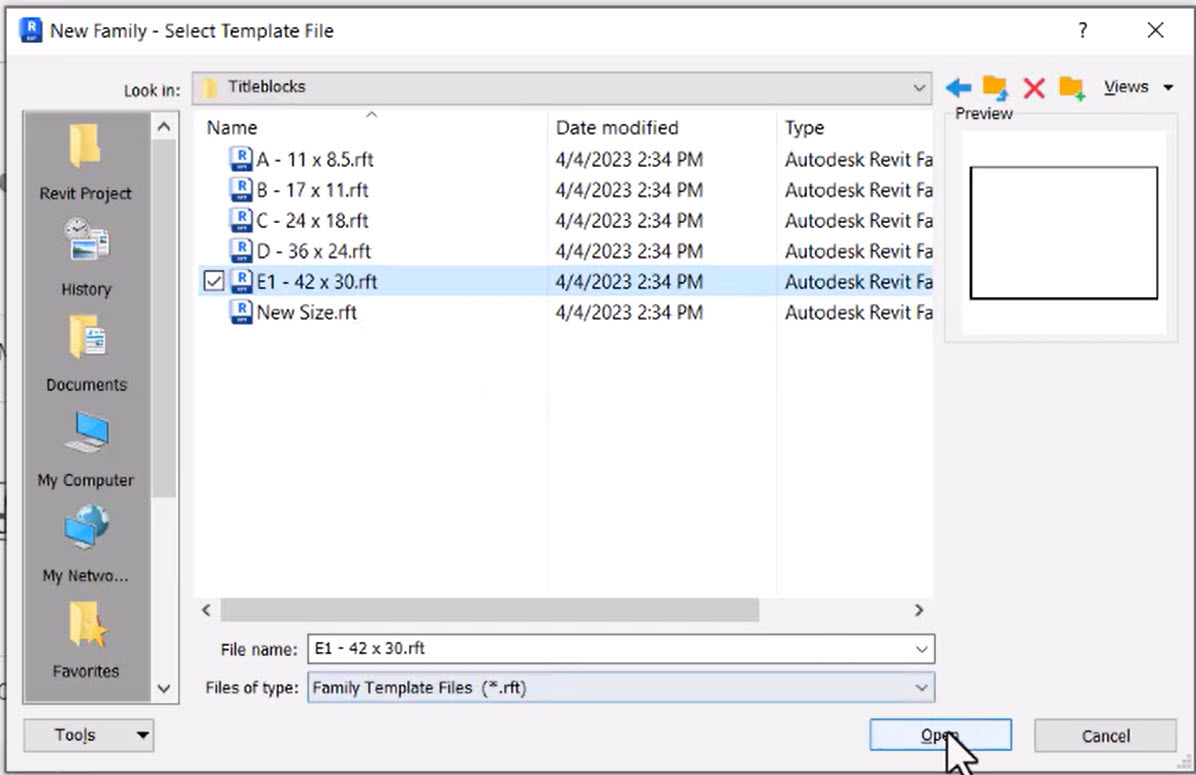
- Click Open.
- In the Create tab>Text panel, click Label.

- In the Edit Label dialog box, select Project Name from the Category Parameters list and click Add parameter(s) to label, as shown below.
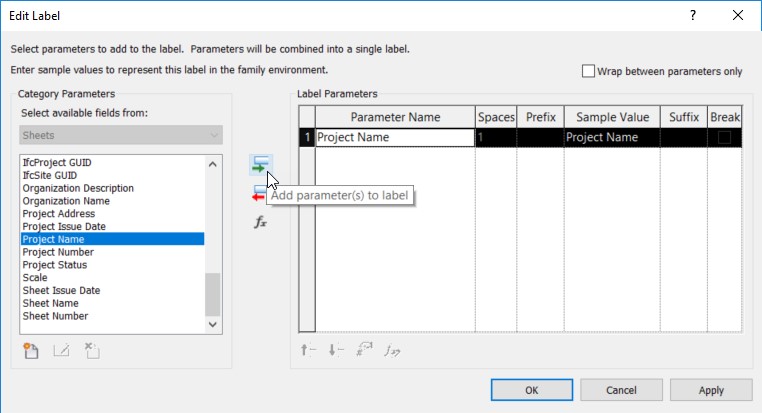
- Click OK.
- Select the label.
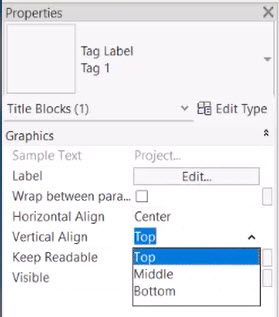
- In Properties, set the alignment as follows:
- Horizontal Align: Center
- Vertical Align: Middle
- Click the grips on the right and left of the label and stretch it to the edges of the window, as shown below.

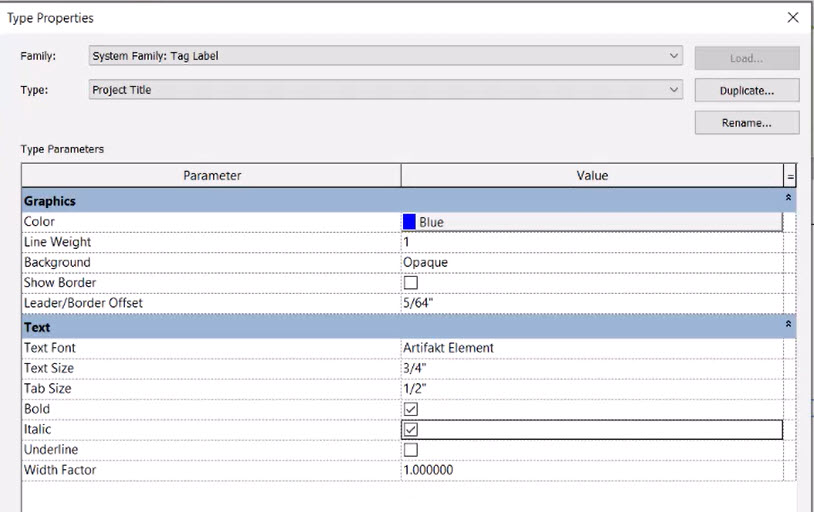
- In Properties, click Edit Type.
- In the Type Properties for Tag 1, do the following:
- Click Duplicate…
- Set the Name to Project Title and click OK.
- Change the Text Font to Artifakt Element.
- Change the Text Size to 3/4".
- Change the Color to Blue.
- Toggle on Bold.
- Toggle on Italic.
- Click OK.
- Use the arrow keys on your keyboard to nudge the label into its proper position.
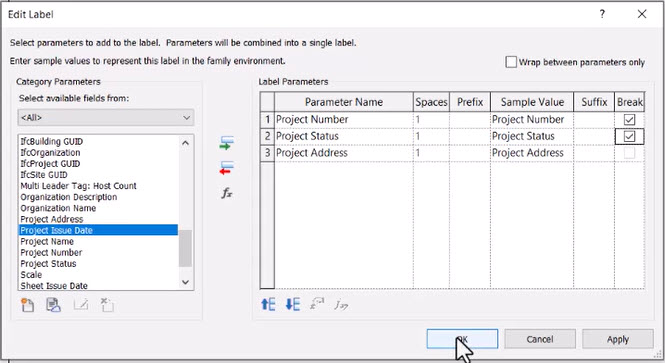
- Add another label as before and include the following parameters:
- Project Number
- Project Status
- Project Address
- In the Break column for Project Number and Project Status, check the checkbox to place them on separate lines. Click OK.
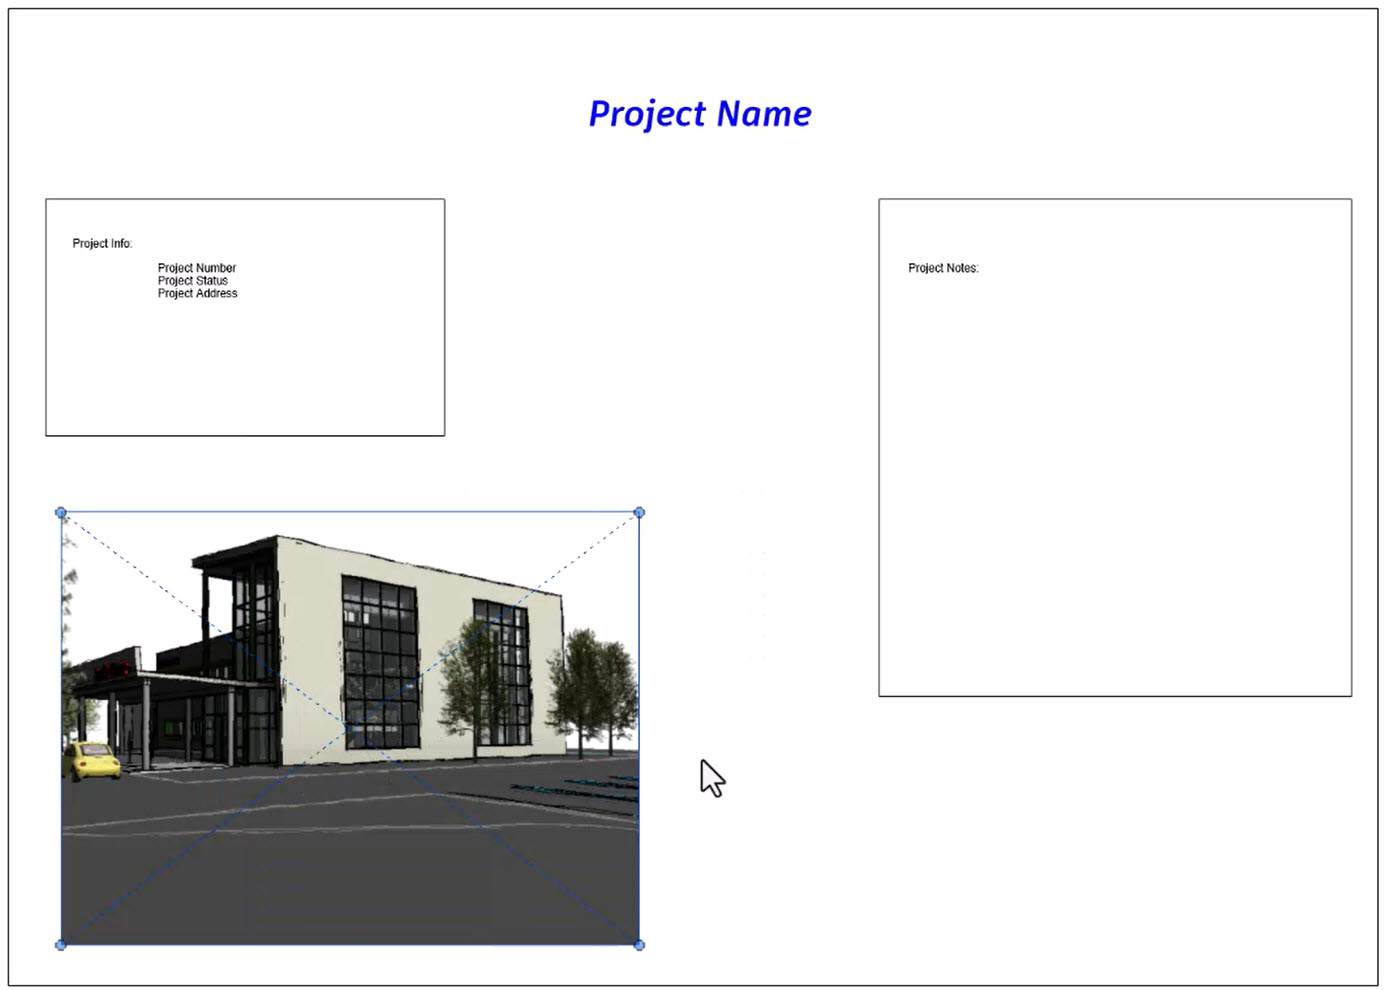
- Draw a rectangle around the labels and create another rectangle to the right.
- In the Create tab>Text panel, click Text. Add Project Info: text to the left rectangle and Project Notes: to the right rectangle, as shown below.

- In the Insert tab>Import panel, click Import Image.
- Browse to the project folder and select the Splash.tif file.
- Position and scale it to be similar to that shown below.
- Save the family as Project Page in the Config folder, but do not close it.
- Open the Small Medical Center model.
- Go back to the Project Page family.
- Click Load into Project and Close.

- In the Small Medical Center model, press <Esc>.
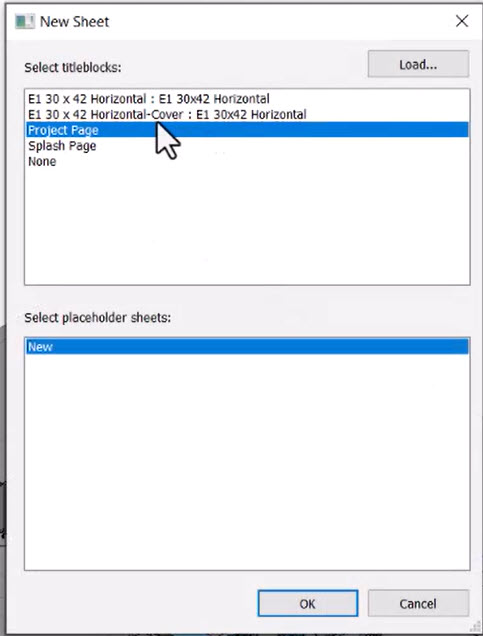
- In the Project Browser, right-click on Sheets (all) and select New Sheet.
- In the New Sheet dialog box, select the Project Page sheet and click OK.
- For Project Notes, insert text and type in "Verify dimensions on site".
- Renumber the sheet to 000 and rename it STARTUP.
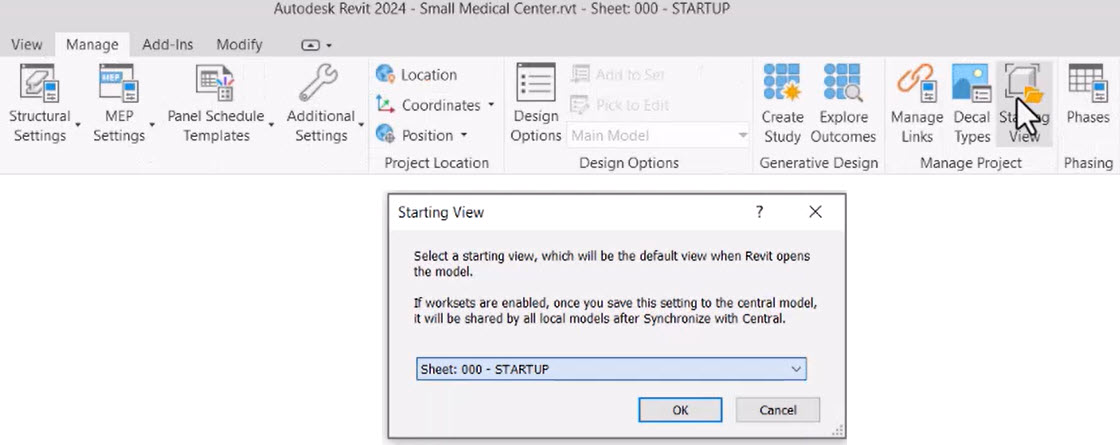
- In the Manage tab>Manage Project panel, select Starting View.
- In the Starting View dialog box, select the 000 - STARTUP sheet as your starting page, as shown below.
- Save and close the project. Your project will now always open with this 000 – STARTUP sheet as the project landing page.


