Applying view templates to views and view types
Applying view templates to views and view types - Exercise
Task 1: Create a view an apply a view template
- Open the practice file 001-Small Medical Center-Template.rvt.
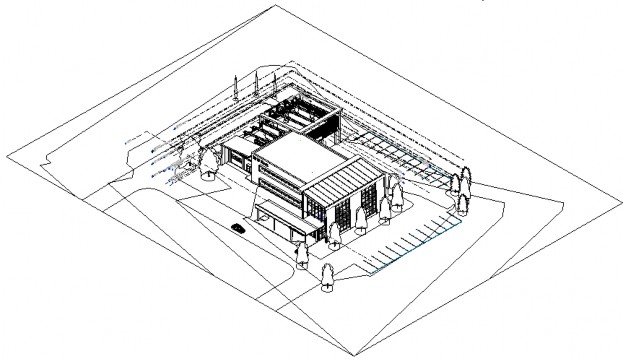
- Create a new Default 3D view. It comes in using the Coordination discipline, as shown below.
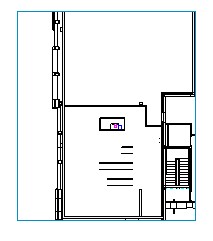
- Right-click on the View Cube and select Orient to View>Floor Plans>Floor Plans: 00 Lower Level HVAC Plan. The view is clipped to that plan view, as shown below.
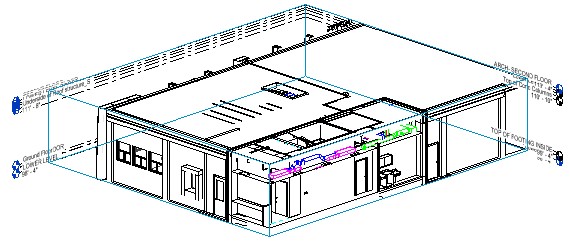
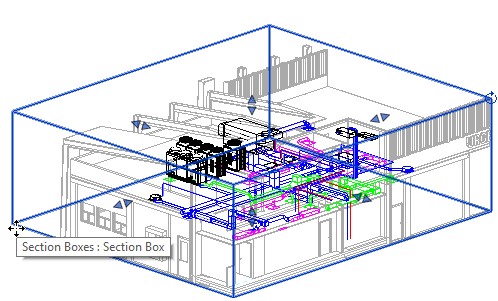
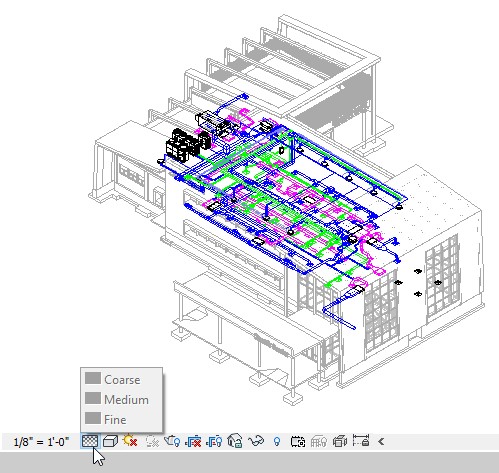
- Zoom in and rotate the view so you can see the HVAC systems, as shown below.
- In the Project Browser, rename the view 3D Lower Level HVAC Plan.
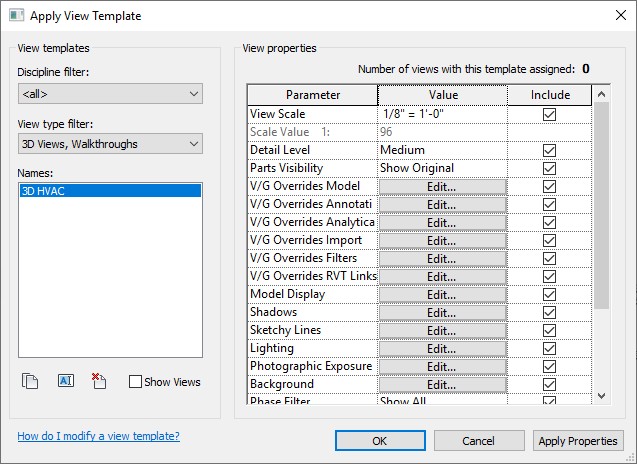
- Right-click on the renamed view and select Apply Template Properties.
- In the Apply View Template dialog box, select 3D HVAC and click OK.
- The view updates using the information stored in the view template. Use the controls to expand the top of the section box so the mechanical equipment displays, as shown below.
- Save the project.
Task 2: Update and reapply the view template
- Zoom in closer and notice that the plumbing piping is still displaying in this view.
- Instead of changing this one view, update the view template.
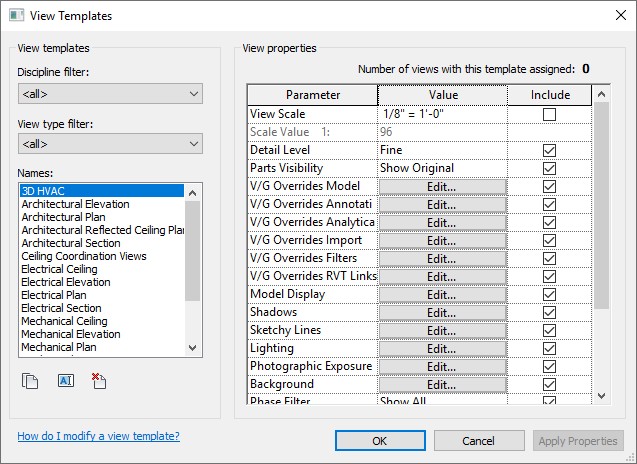
- In the View tab>Graphics panel, expand View Templates and select Manage View Templates.
- Review the parameters that can be specified in a view template.
- Beside the View scale, clear the check from the Include column and change the Detail Level to Fine, as shown below.
- Beside V/G Overrides Filters, click the Edit… button.
- In the Visibility/Graphic Overrides dialog box, on the Filters tab click Add.
- In the Add Filters dialog box, select Domestic Cold Water, Domestic Hot Water, and Sanitary. Click OK.
- In the Filters tab, clear the check from the Visibility column for all three filters, as shown below, and click OK.

- In the View Templates dialog box, click OK. The changes are not automatically applied to the view.
- In the Project Browser, right-click on the new 3D Lower Level HVAC view and select Apply Template Properties.
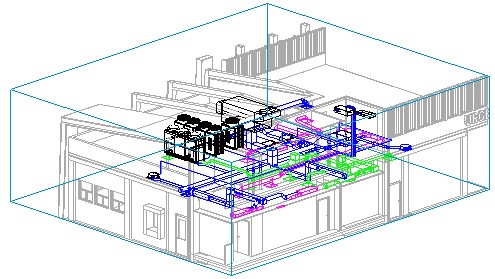
- In the Apply View Template dialog box, select 3D HVAC and click OK. The changes to the view are now applied, as shown below.
- Save the project.
Task 3: Apply the view template to a view in properties
- Open the 3D HVAC view. The view has not updated and still shows the plumbing piping.
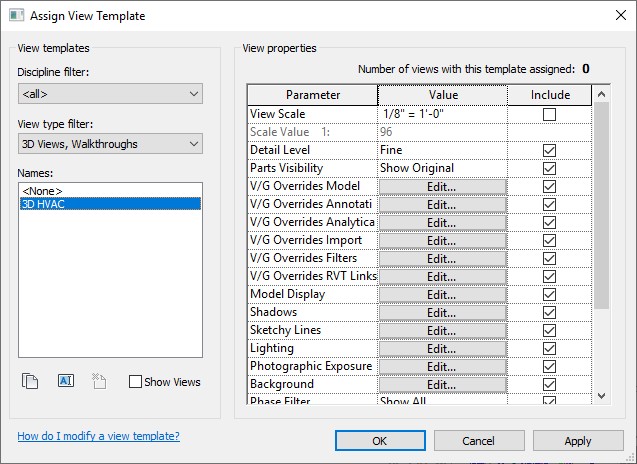
- In Properties, in the Identity Data group, click the button beside View Template.
- In the Assign View Template dialog box, select 3D HVAC, as shown below, and click OK.
- The template is applied to the view. Notice that while you can override the scale, you cannot override the Detail Level, as shown below. This view is now controlled by the view template.
- Save the Project.
Task 4: Setup a view type with the view template
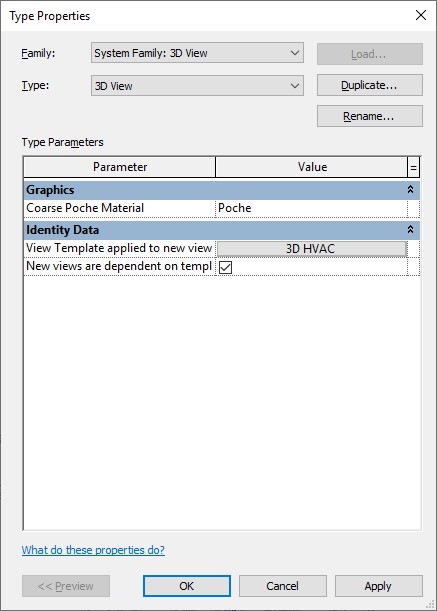
- In the Type Selector, verify that you are in the 3D View view-type and click Edit Type.
- In the Type Properties dialog box, select the button beside View Template applied to new views.
- In the Assign View Template dialog box, select 3D HVAC and click OK. The view template is assigned to this view type when new views are created, as shown below.
- Use the Default 3D View command to create another 3D view.
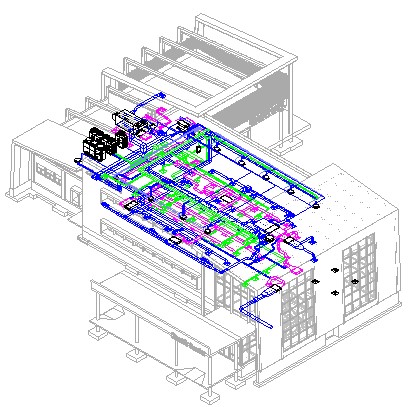
- Notice that it comes in using the information stored in the view template, as shown below.
- Save the project.


