00:03
cat data is extremely useful when developing your surface drainage design
00:07
as it includes detailed infrastructure and mapping data that exists on the site.
00:13
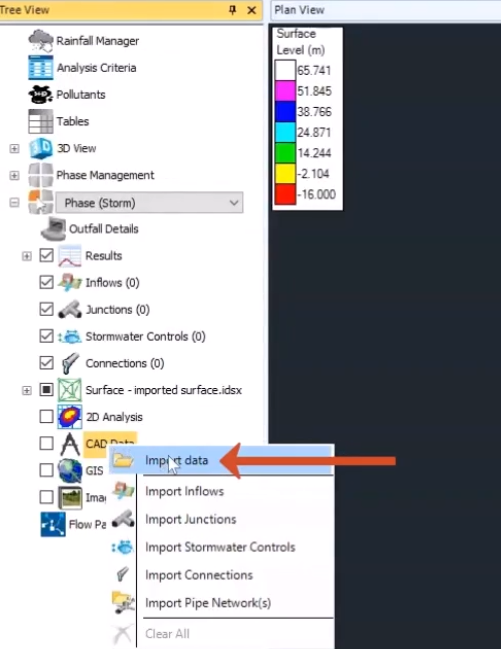
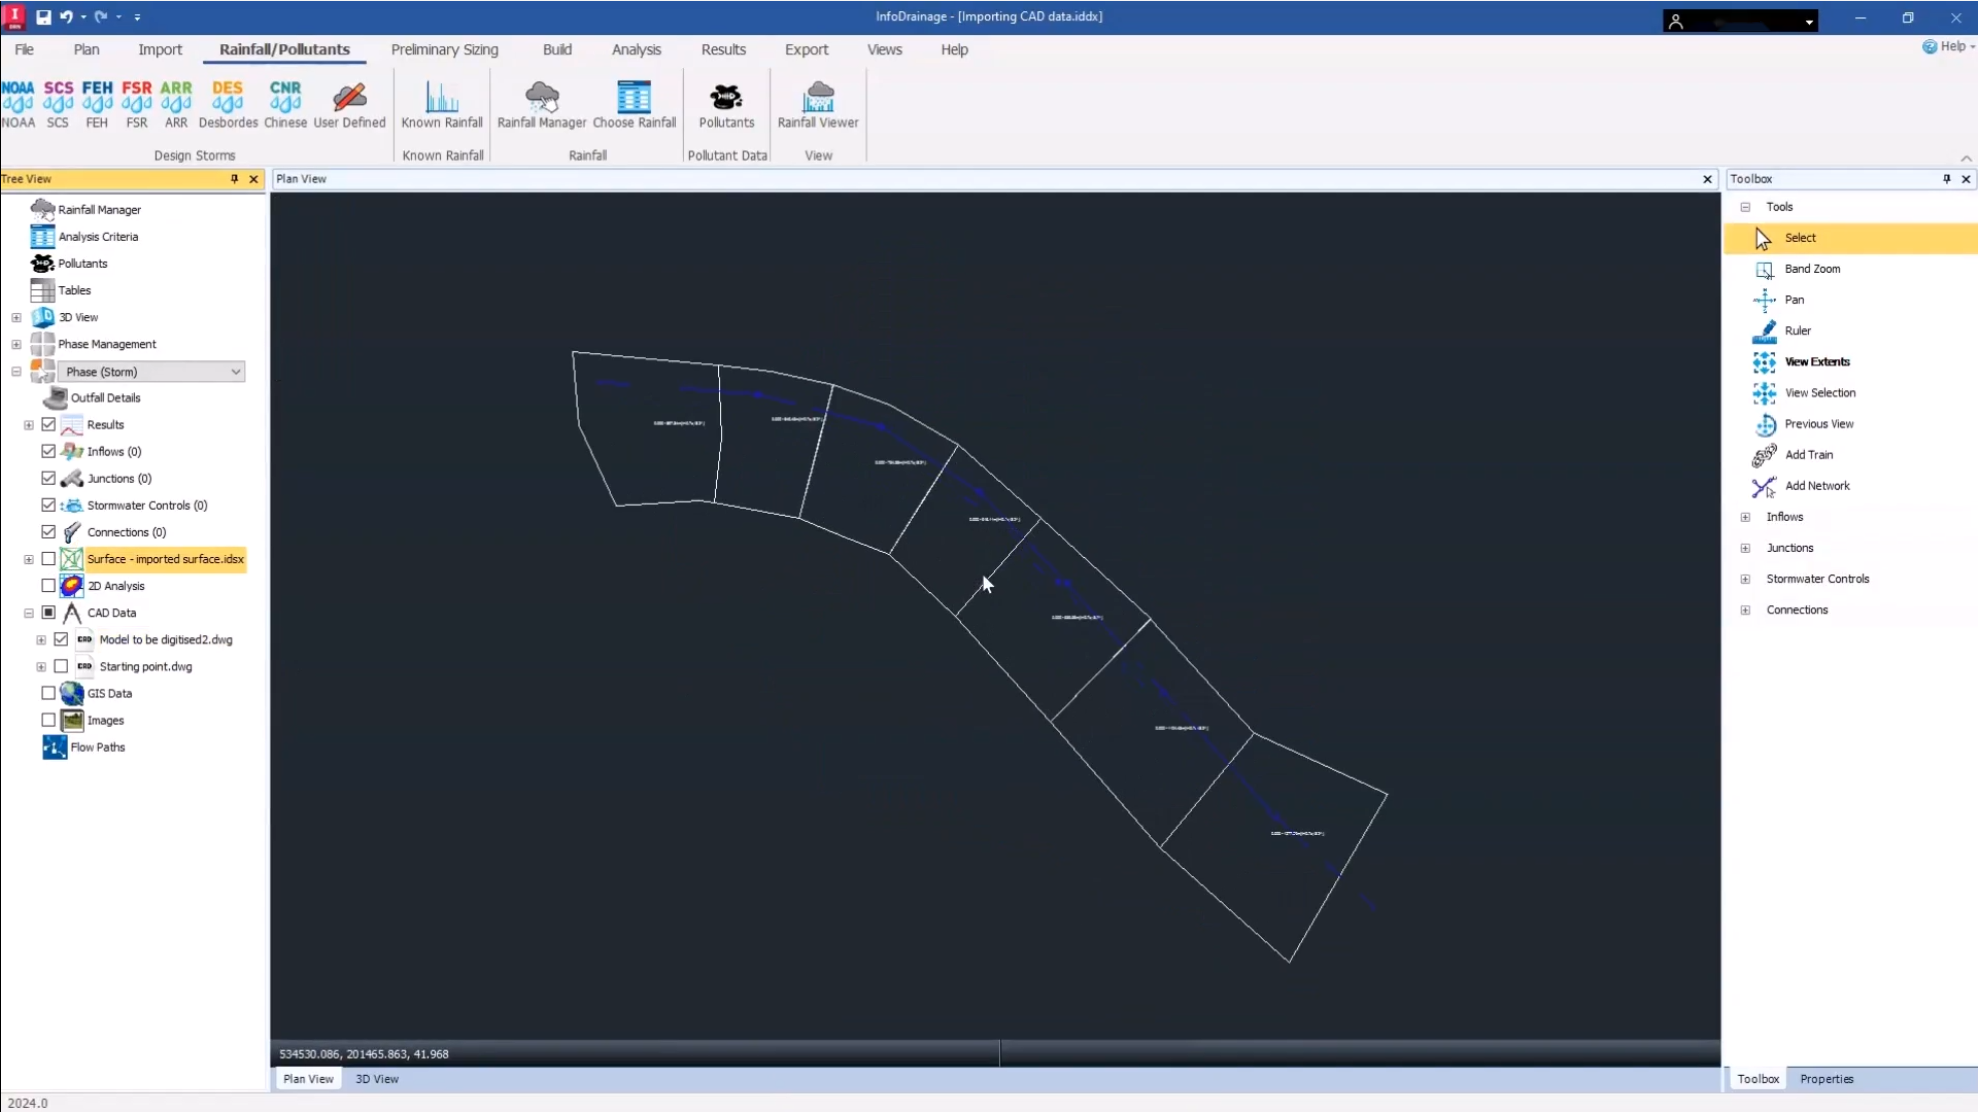
To import cad data in the tree view,
00:15
right click the cad data node and select import data
00:20
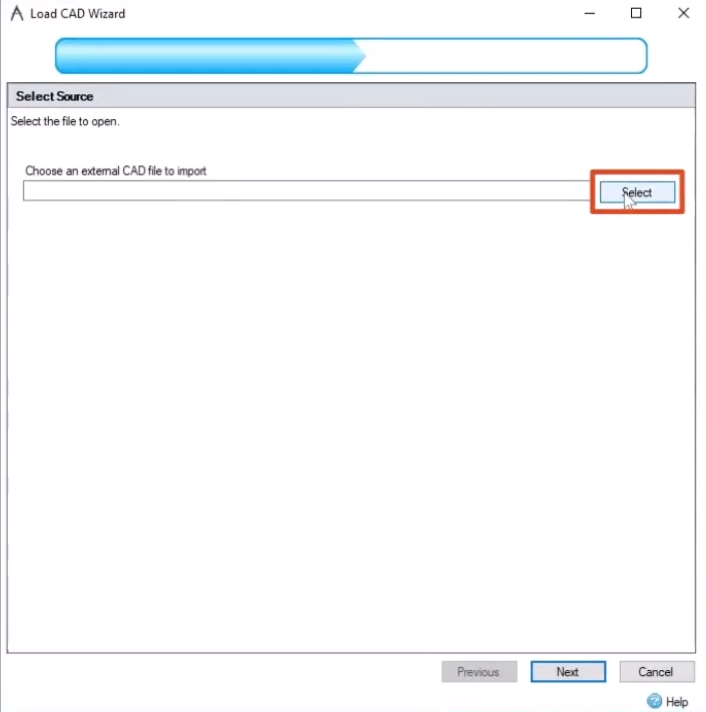
in the load cad wizard.
00:21
You can choose an external cad file to import,
00:25
click select and then in the open dialog browse
00:28
to and select the cat file you want to import
00:33
Select info, drainage, introduction data, starting point,
00:43
confirm that the file path is correct.
00:45
And then click next.
00:48
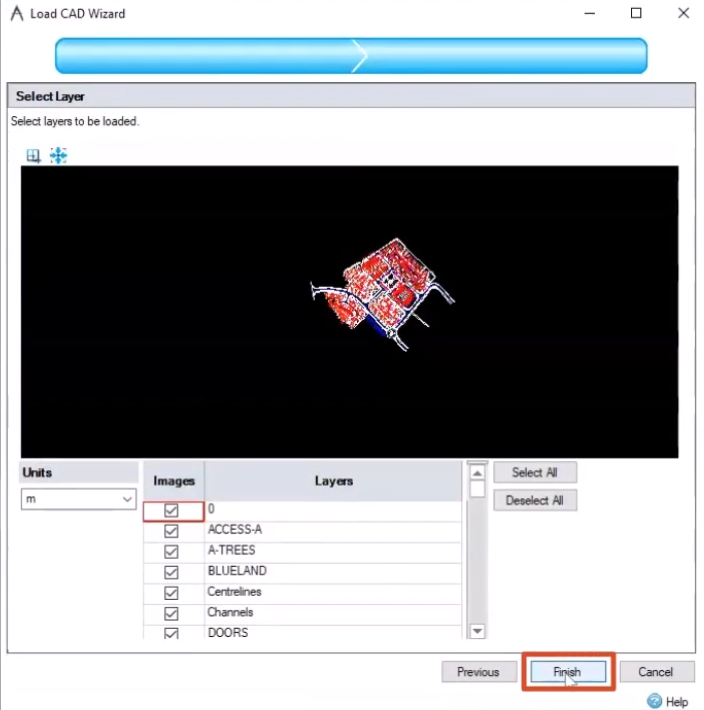
Now you are prompted to select the layers you want to import
00:52
first check the units to make sure they match the rest of your project.
00:57
you can expand the drop down to change them
01:04
You can choose which layers in the cat file
01:06
you want to include in the import by default.
01:09
All layers are enabled.
01:10
But if you wanted to exclude some of these layers,
01:13
you would just click the checkbox to turn them off for this exercise.
01:18
Keep all the layers on and click finish.
01:22
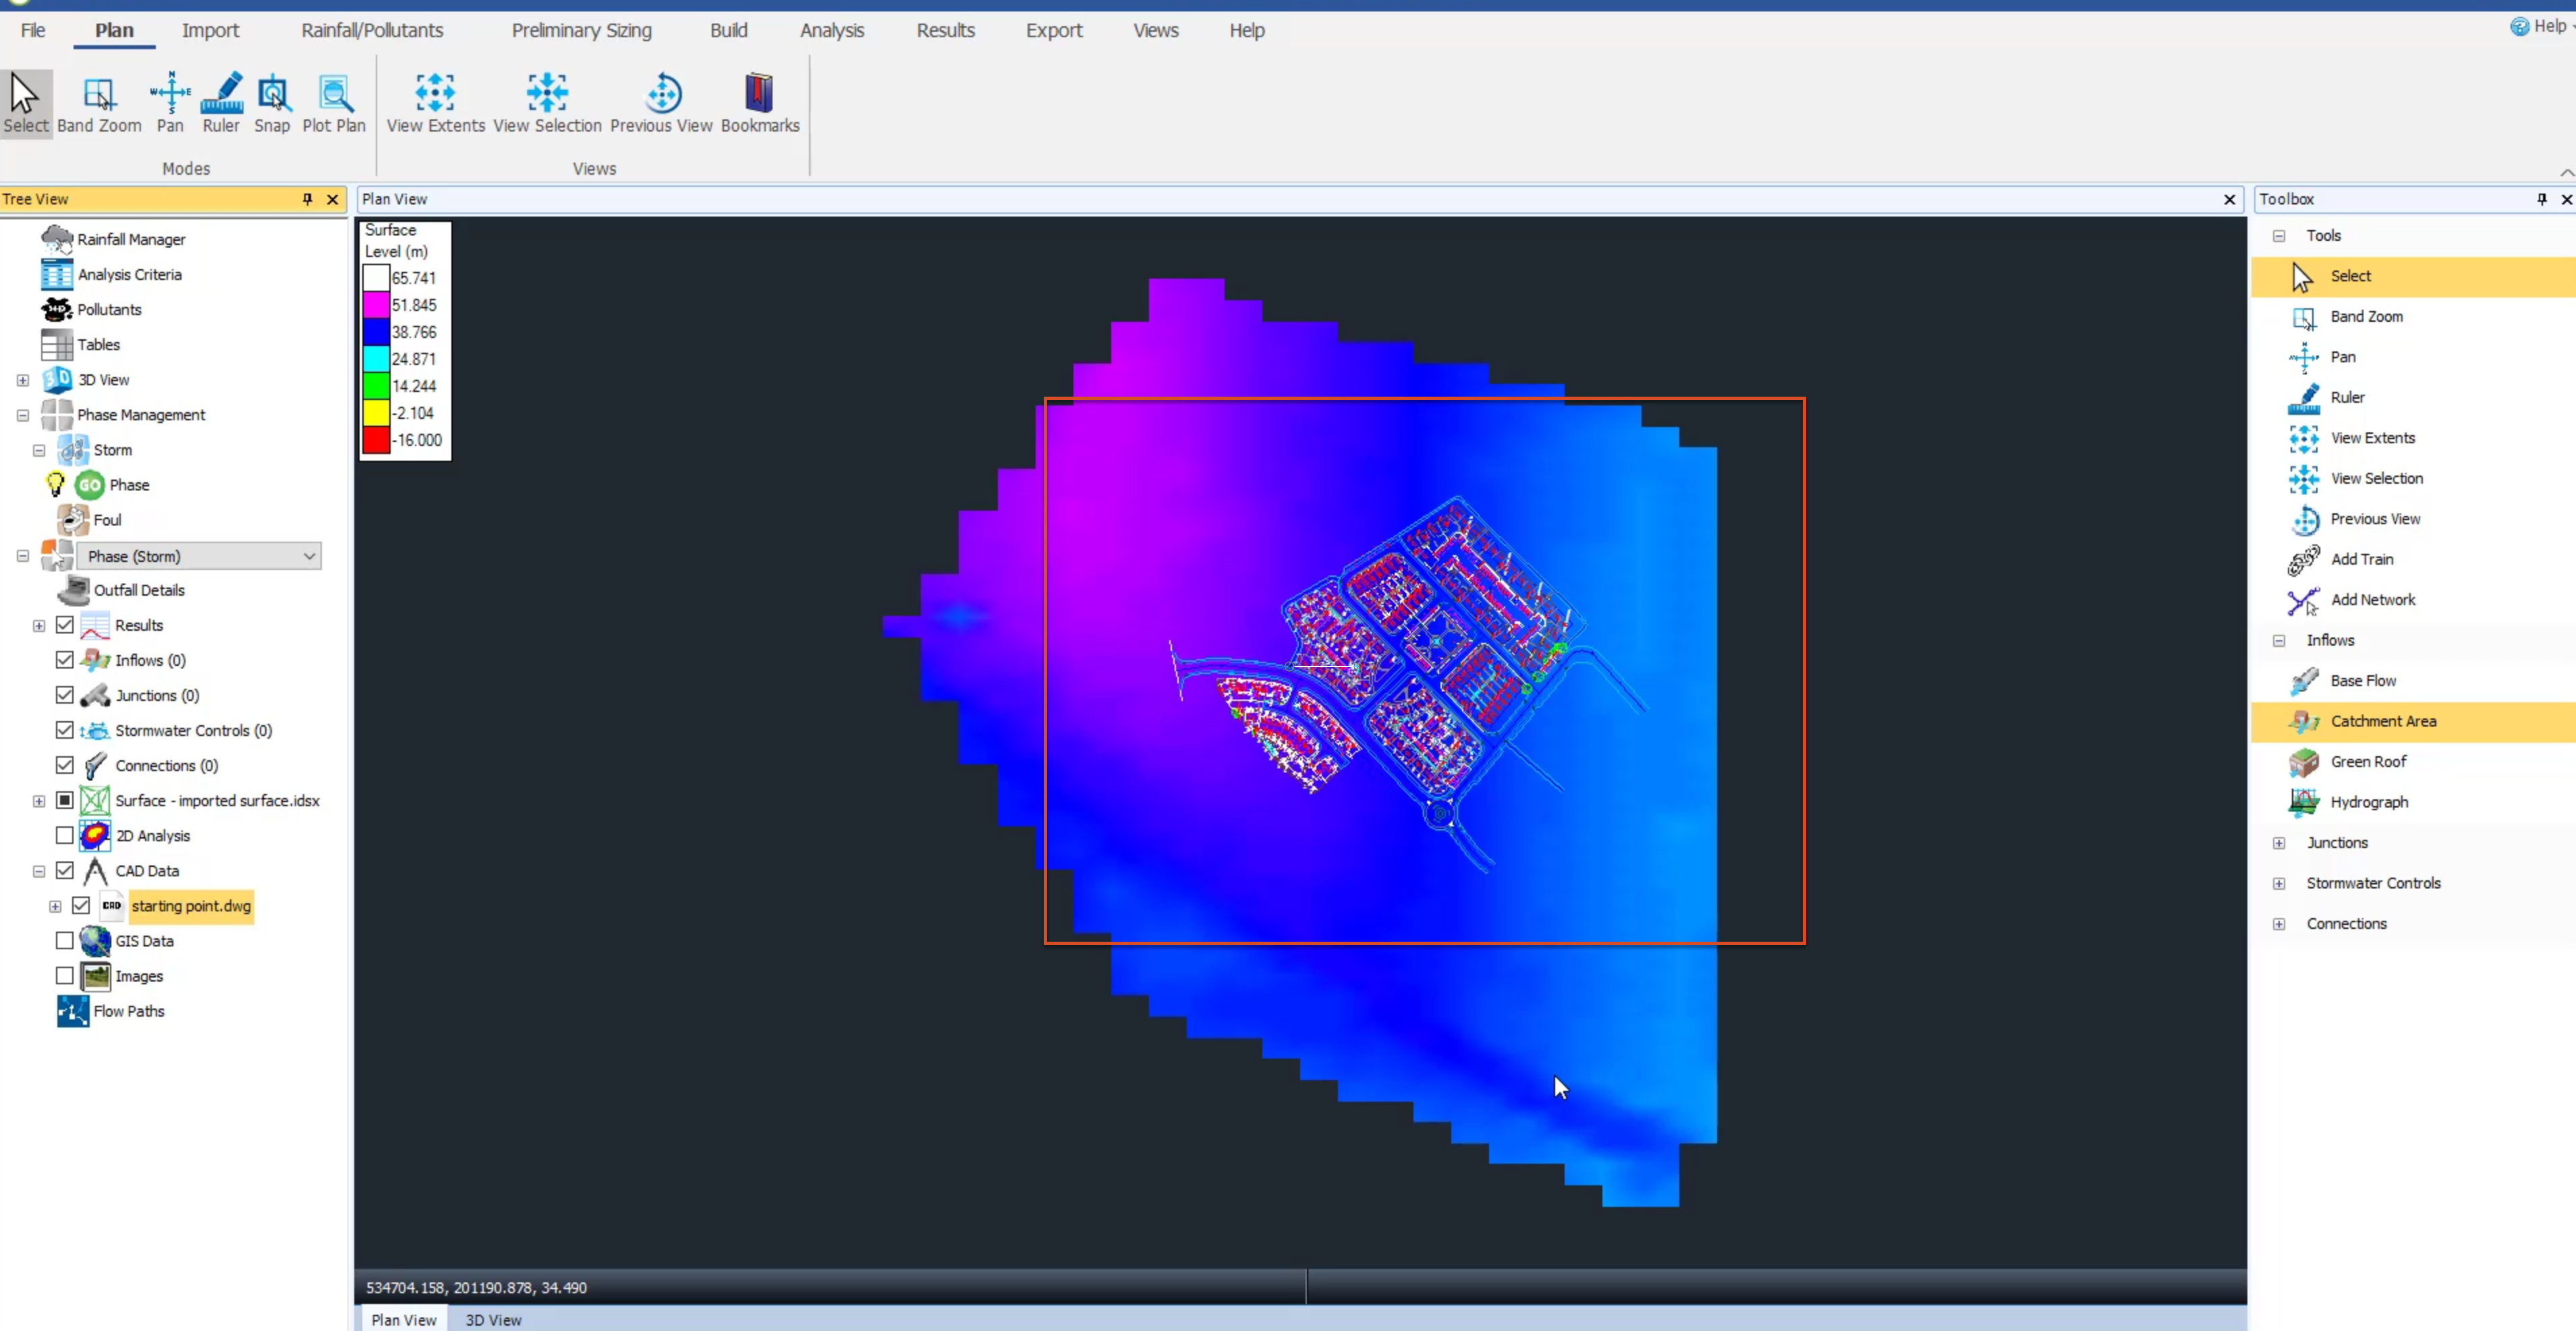
The cat data appears on top of the surface data. Be aware that you could also import G.
01:28
I. S. Data using a similar method.
01:31
If you need to you can import more than one cad file
01:34
for example. Right click the cad data note again and select import data
01:41
browse to and select the exercise file model to be digitized and then click open
01:47
in the wizard, click next,
01:49
confirm the units are correct and all the layers are enabled and then click finish.
01:55
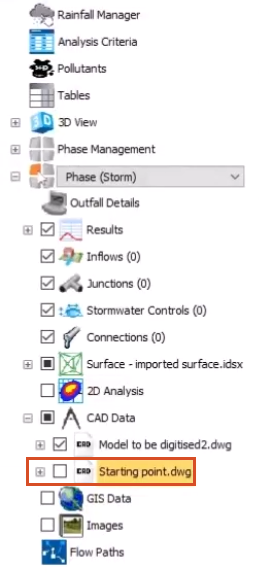
At first, it appears as if nothing has changed
01:59
turn off the visibility of the starting point caD file,
02:03
and now you can see the second caD file you imported,
02:06
turn off the visibility of the surface and then zoom
02:09
in on the area you want to work with.