Step-by-step guide
In InfoWorks Pro, a GMR configuration has been created to test whether each hydrant in a network can provide the required fire flow when it is at the lowest pressure. The next step is to simulate the hydrant testing exercise.
- In the Model Group, right-click the Run Group.
- Select New > Run.
- In the Schedule Hydraulic Run dialog box, name this run “GMR Hydrant Testing”.
- Select Experimental.
- From the Model Group, drag the Network into the Schedule Hydraulic Run dialog box and drop it into the Network group box.
- Expand the Run Type drop-down and select Fire Flow.
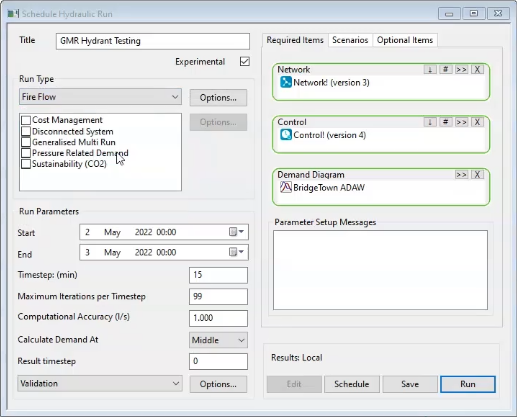
- In the Fire Flow Options dialog box, under Type of simulation, select Hydrant Testing.
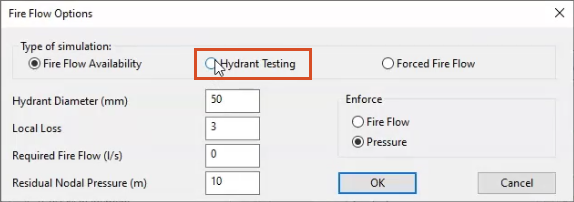
The dialog box expands with more options.
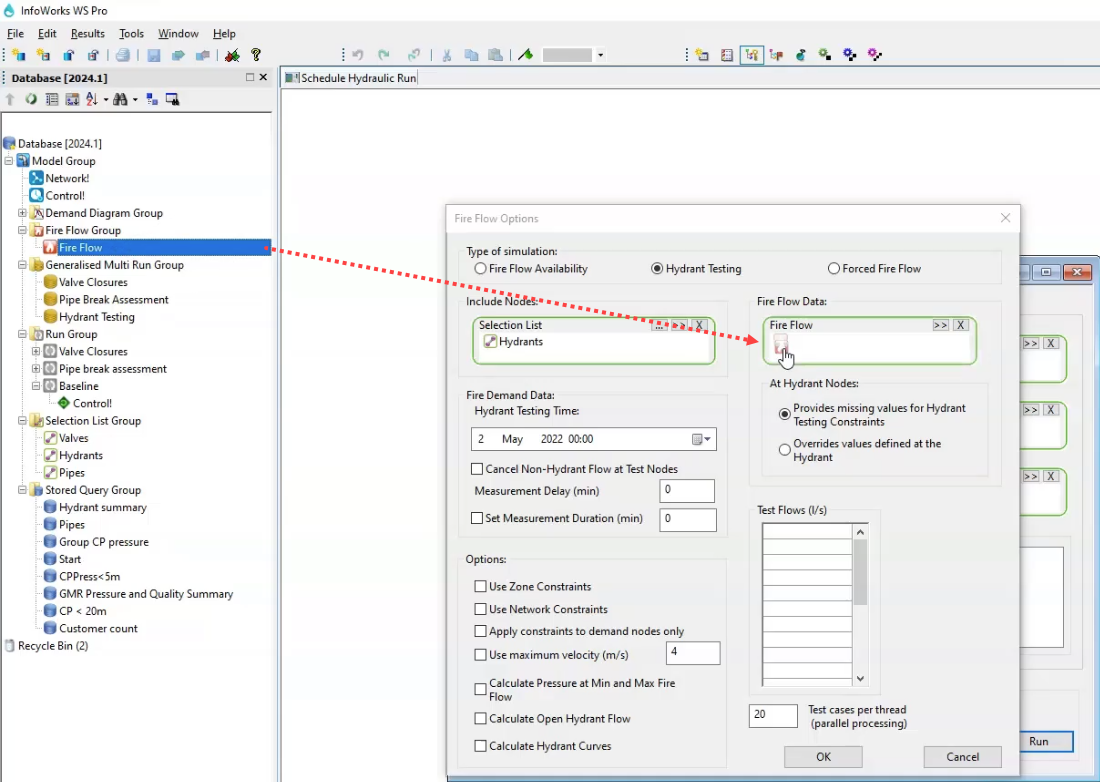
- From the Model Group, drag the Hydrants selection list into the Fire Flow Options dialog box and drop it into the Selection List box.
- In the Model Group, expand Fire Flow Group.
- Drag Fire Flow and drop it into the Fire Flow box.
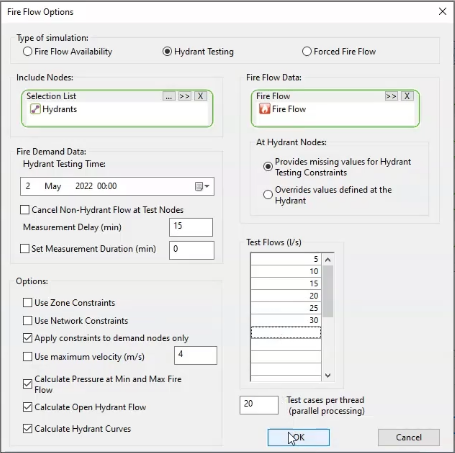
- In the Fire Demand Data group, set the Measurement Delay to 15 minutes.
- In the Options section, enable Apply constraints to demand nodes only.
- Enable Calculate Pressure at Min and Max Fire Flow.
- Enable Calculate Open Hydrant Flow.
- Enable Calculate Hydrant Curves.
- In the Test Flows list, in the first row, enter a value of 5 l/s.
- In the next five rows, enter the following test flows: 10, 15, 20, 25, and 30 l/s.
- Click OK.
- Back in the Schedule Hydraulic Run dialog box, under Run Type, enable Generalised Multi Run.
A Generalised Multi Run Options popup appears.
- From the Model Group, drag the Hydrant Testing GMR into the popup and drop it into the Generalised Multi Run Config box.
- Click OK.
- In the Schedule Hydraulic Run dialog box, click Save.
To run the simulation and view the results:
- Click Run.
- In the Model Group, expand GMR Hydrant Testing.
- Right-click Control and select Open as.
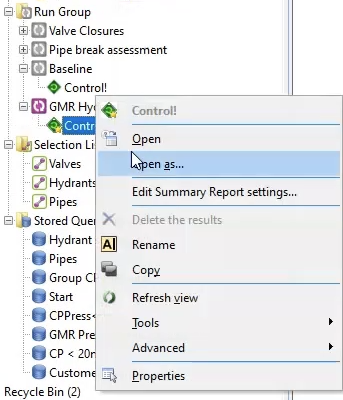
- In the Select Results popup, with Summary report selected by default, click OK.
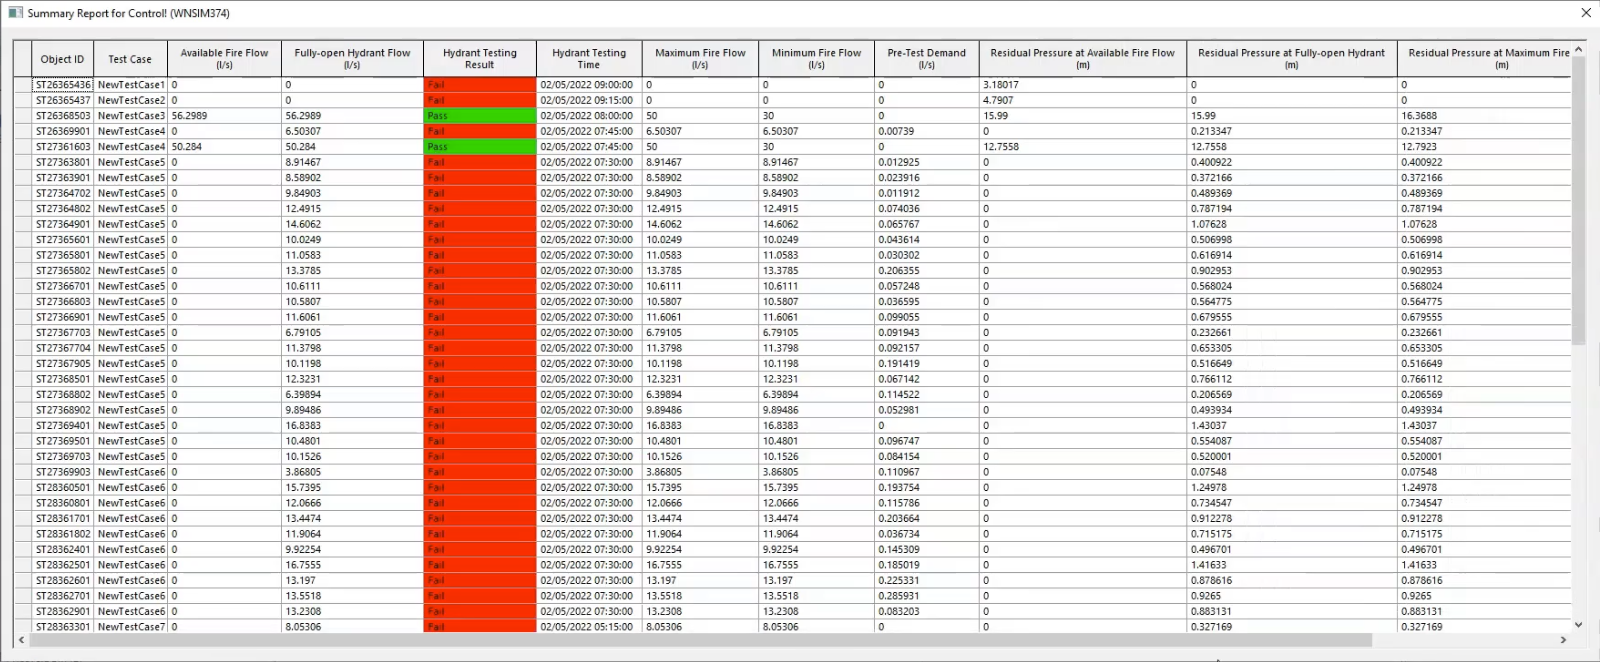
The GMR produces a summary report with test results for all the options selected in the Fire Flow Options dialog box. It indicates the fire flow at which the test failed, and it stipulates the time at which the test was run, which is the time of the lowest pressure at each hydrant.


