Exercise: Review Project Data and Add Mark-ups
Task 1: Review Revit Model on Autodesk Construction Cloud (ACC)
- Go to https://acc.autodesk.com/projects and log into your project.
- From the project list, select your project.
- Click on Product Picker on the top left and then click Docs, if you are not already in the Docs environment.
- From the Files tool, go to the folder where the Revit file is saved, as shown below.
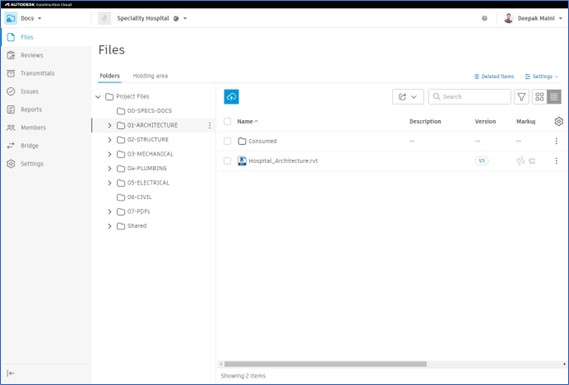
- Click on the Revit file to open it.
- Press and hold down the left mouse button and orbit the model.
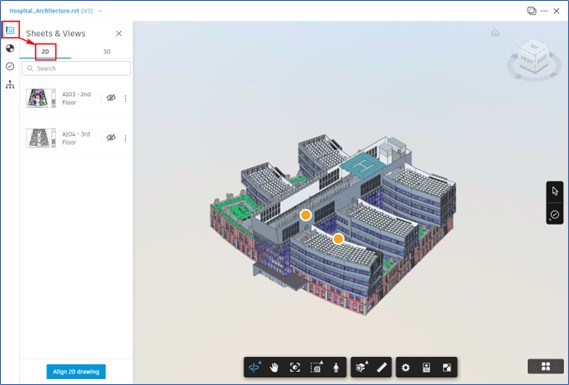
- From the Navigation Bar on the left, click Sheets & Views > 2D, as shown below.
- Click on the eye icon on the right of one of the sheets to section the model at that level at overlay the sheet on top of the 3D model, as shown below.
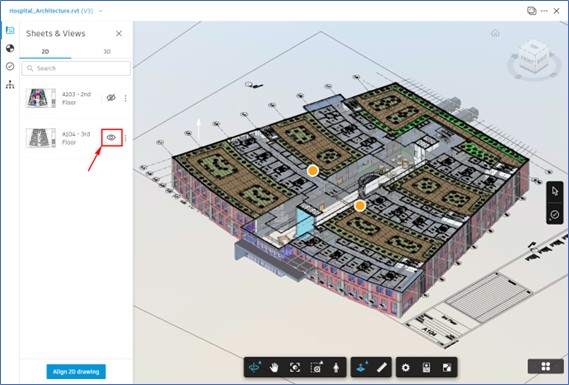
- Similarly, turn off this sheet and turn on the other sheet to section the model at that level and overlay the sheet on top of the 3D model.
- Once you have reviewed the model, turn off the visibility of the sheet from the Sheets & Views
- Close the Sheets & Views
- From the toolbar available at the bottom of the window, click the Add Z Plane button to turn off the sectioning.
Task 2: Perform Measurements in the Revit Model
- From the toolbar at the bottom of the window, click Measure.
- On the same toolbar, click Measure Settings to configure the measurement units and precision.
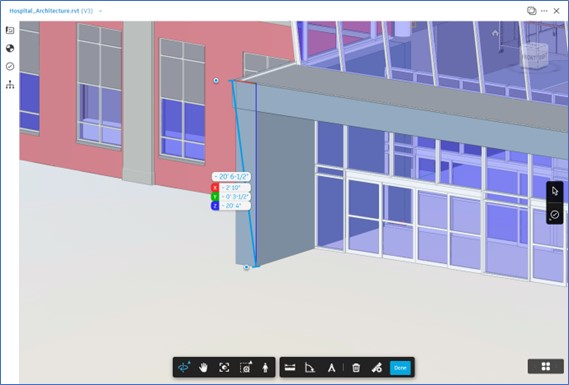
- Pick two points on the model to show the distance between those two points, as shown below.
- Similarly, measure other distances and angles.
- Click Done from the toolbar at the bottom to exit the measurement tool.
- Close the Revit model.
Task 3: Add Mark-ups in a PDF File
- From the PDFs folder, open one of the PDF files.
- From the Mark-ups toolbar on the right, click the Cloud button to invoke this tool.
- Add a cloud mark-up on the PDF file.
- With the cloud mark-up still selected, click the Edit button from the toolbar above the mark-up.
- Using the Edit panel on the right, style the mark-up and change its border thickness and fill color, as shown below.
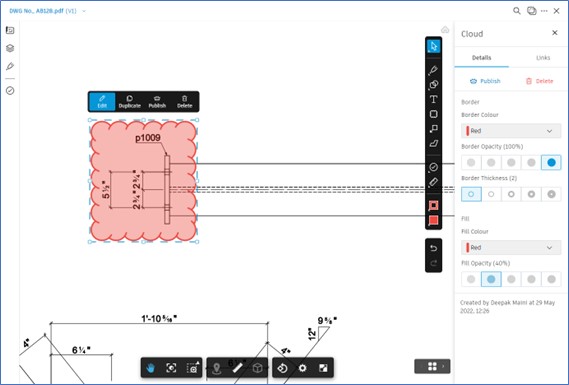
- Click outside the mark-up to exit the editing environment.
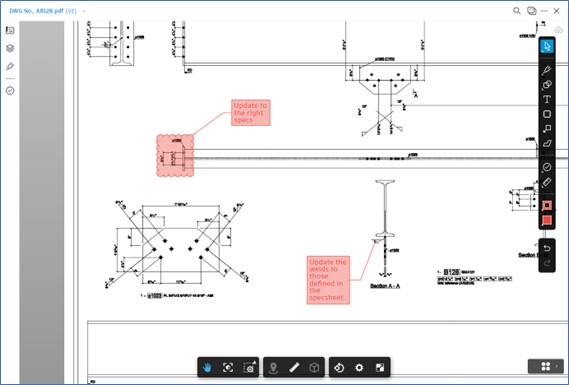
- Similarly, add other mark-ups, such as a Callout, as shown below.
Task 4: Calibrating and Measuring in a PDF File
- From the PDFs folder, open the GA PDF file.
- From the toolbar at the bottom, click Measure; most of the measurement tools are greyed out. This is because you need to calibrate the sheet first.
- From the toolbar at the bottom, click Calibrate.
- From the Calibration panel on the right, click 2 points calibration at the top.
- From the Units drop-down list, select the preferred units.
- Click the two endpoints of a known distance.
- In the Calibration panel > Set Size fields, enter the distance between the two selected points, as shown below.
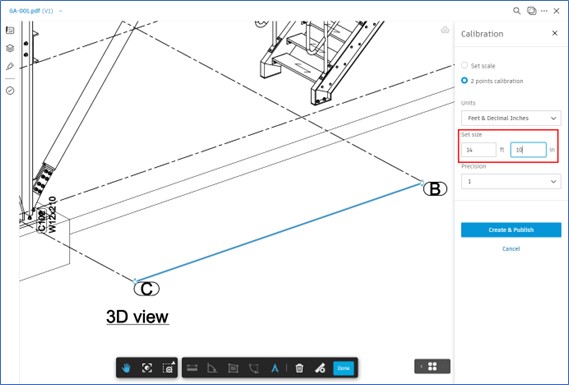
- Click Create & Publish; the sheet is calibrated.
- Perform various measurements on this sheet.
Note: You can use the Delete Measurement tool from the toolbar at the bottom to delete the measurements from the screen.
Task 5: Measuring a 2D DWG File
- From the Civil folder, open the DWG file.
- From the Sheets & Views panel, open a 2D view.
- Perform various measurements and notice that the calibration is not needed.
- From the Sheets & Views panel, open a 3D view.
- Perform various measurements.


