Exercise: Resolve and Close Issues
Prerequisite
In this exercise, it is assumed that some of the issues you created in the previous exercise were resolved in the native files, their issue statuses changed, and the revised files were uploaded to the project.
Task 1: Reviewing Issue Statuses
- Log on to your ACC project.
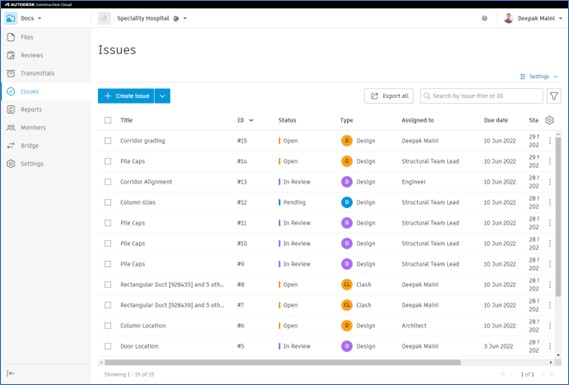
- From the Navigation Bar on the left, click the Issues tool; all the issues are displayed.
- Notice the change in various issues, as shown in the figure below.
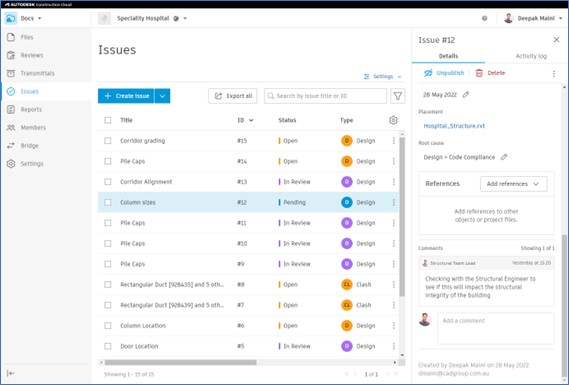
- Click on one of the issues that has the status set to Pending; the flyout panel is displayed with all the issue information.
- Review the information in this issue to see why the team could not resolve it, as shown below.
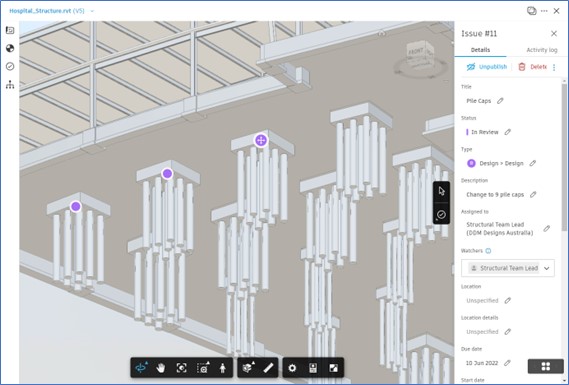
- Click on one of the pile caps issues that has the status set to In Review.
- From the flyout panel, click on the Revit model in the Placement section to open the model and navigate to the issue in the context of the model, as shown below.
Task 2: Comparing Versions of the Models
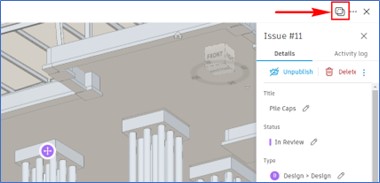
- With the issue still opened in the context of the model, click the Compare button from the top right, as shown below.
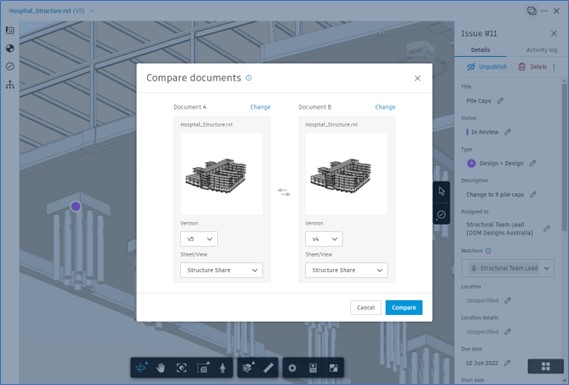
- Under Document A, select the current version and its 3D view.
- Under Document B, select the previous version and its 3D view, as shown below.
- Click Compare; the changes between the models are compared and the Changes window shows all the elements that were added, removed, or modified, as shown below.
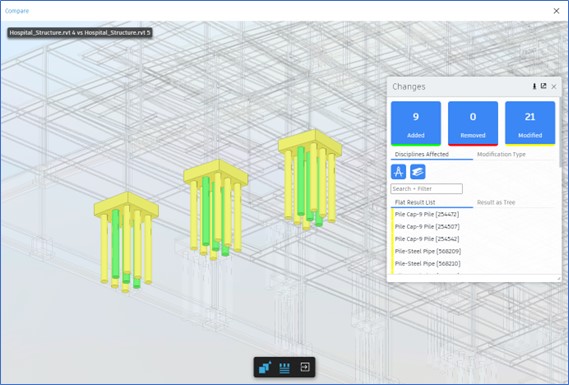
- Review the changes between different versions.
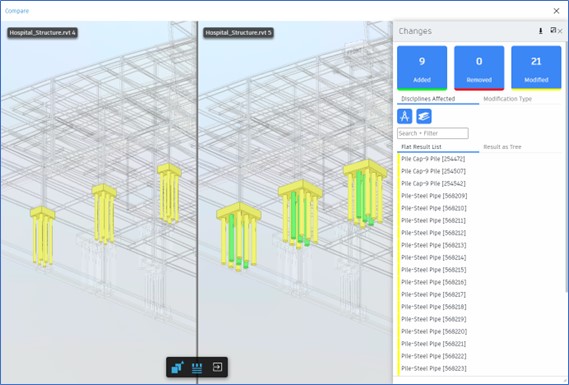
- From the toolbar at the bottom of the window, click the Overlay flyout and click Side By Side to display the changes side by side, as shown below.
- Once you are satisfied with the changes, click the Exit Comparing button on the toolbar at the bottom of the window.
- Similarly, compare other models on which the issues were created to check whether the required changes were made or not.
Task 3: Closing the Issues
- Using the method discussed in the previous task, compare different versions of the models on which the issues were created.
- Once satisfied, return to the Issues
- Click the issue that you want to close.
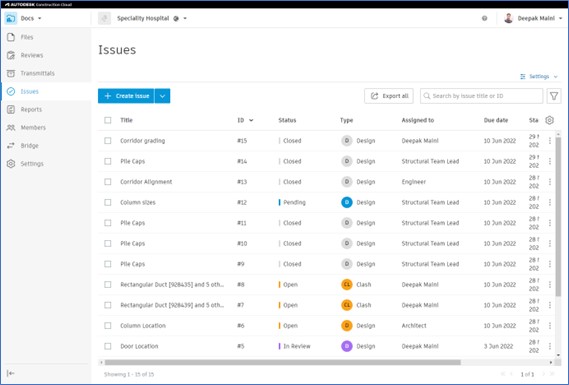
- From the flyout panel on the right, click on the Status drop-down list and select Closed as the status, as shown below.
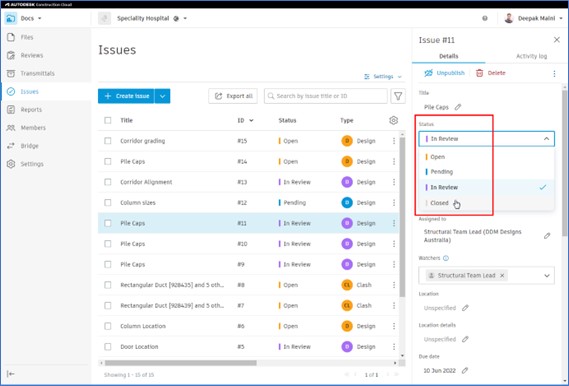
- Repeat the process to close the status of the remaining issues that you are satisfied with. The figure below shows the Issues tool showing various closed issues.
