Step-by-step guide
In Rhino, tagging model elements categorizes and labels geometries to enable easier identification. In addition, when sending geometries from Rhino to Forma, tags help Forma to determine how to read and display the Rhino data.
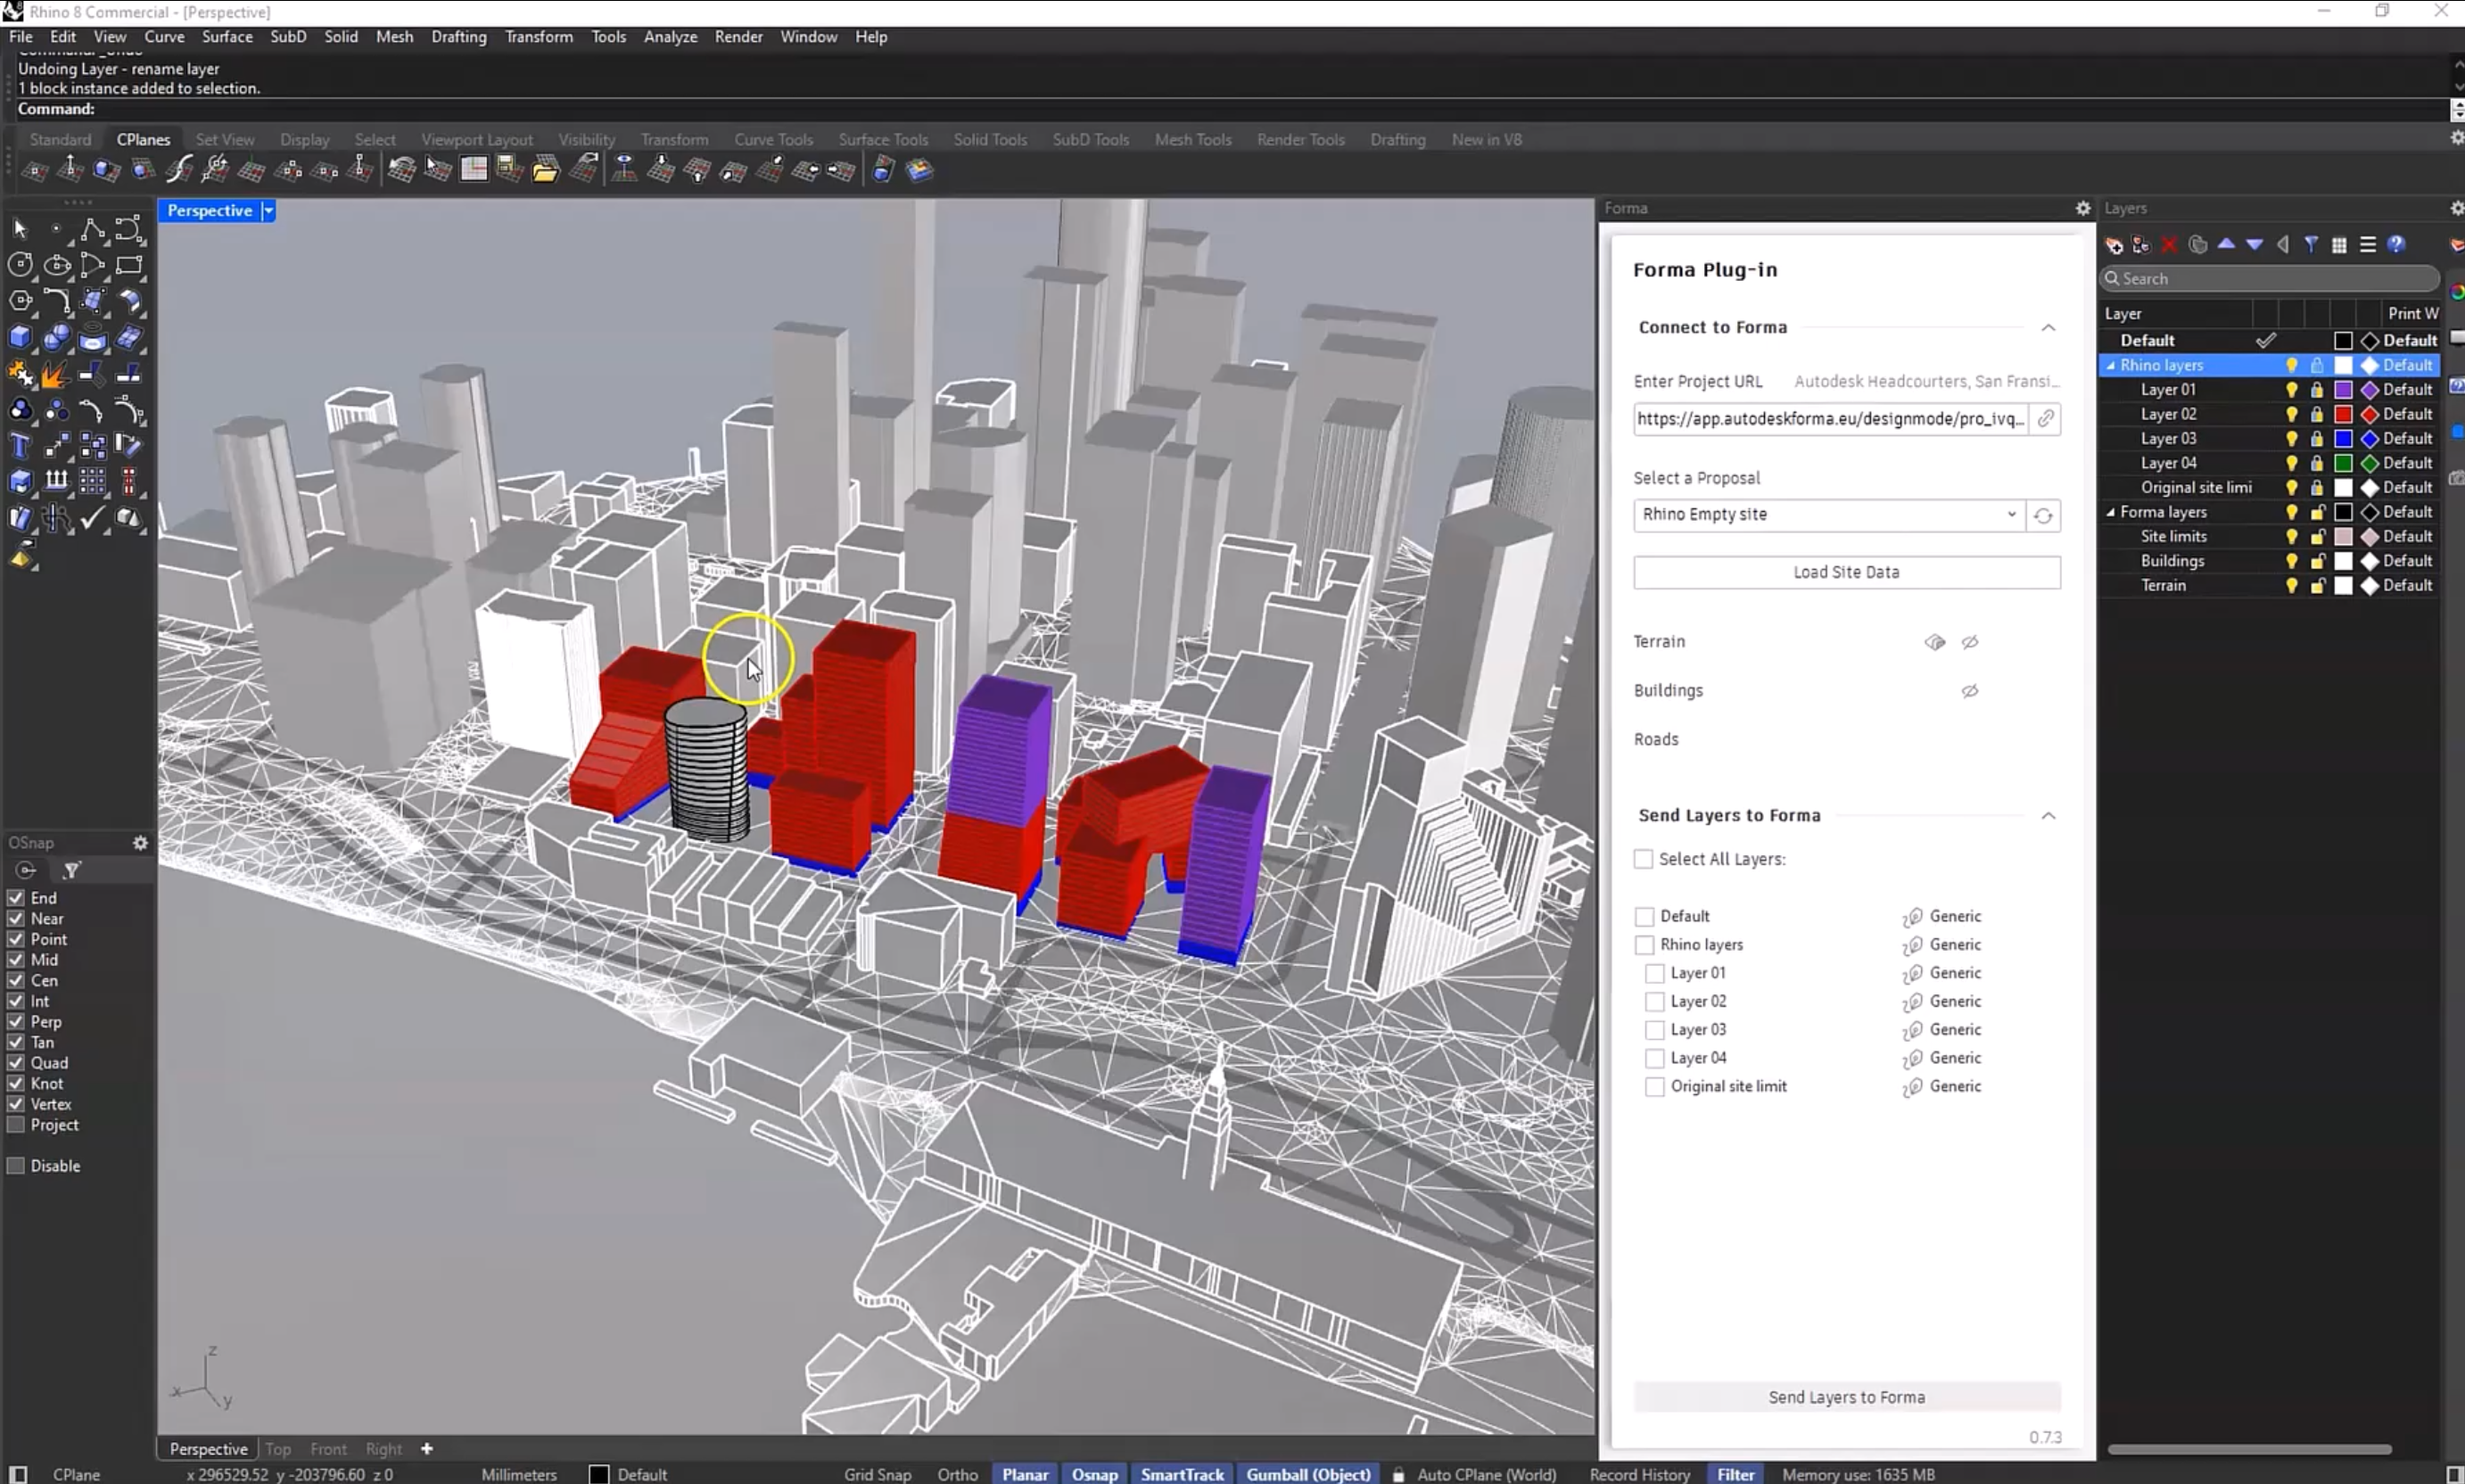
Begin in Rhino, with the project open in the Perspective view, and with the Forma and Layers panels docked:
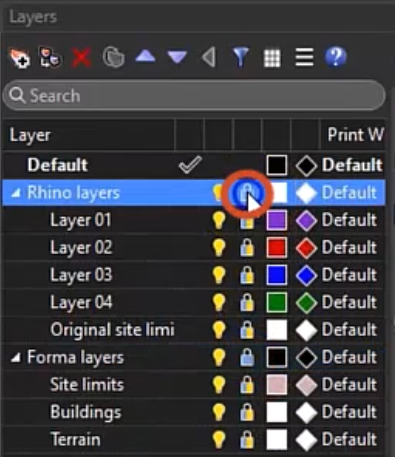
To lock the Forma layers and unlock the Rhino layers to be used for tagging:
- In the Layers panel, next to each Forma layer, click Lock.
- Unlock the layer with the Rhino geometries. In this example, they are on the Default layer.
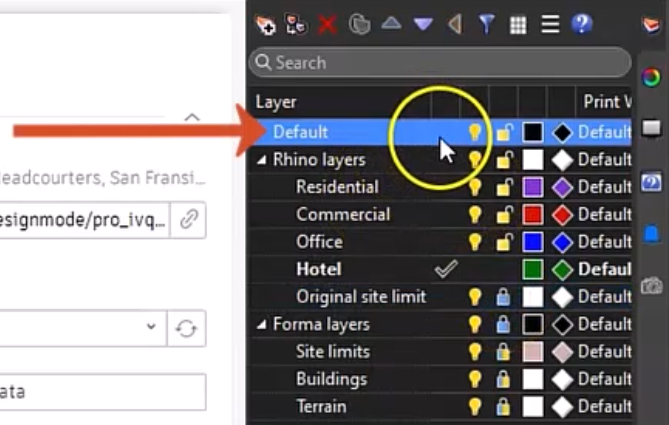
Still in the Layer panel, rename each layer to be used for tagging:
- Right-click a layer and select Rename, or click the layer twice slowly.
- Enter a new name. Here, Layer 01 is renamed to “Residential”, Layer 02 to “Commercial”, Layer 03 to “Office”, and Layer 04 to “Hotel”.
- Ensure that the Original site limit layer is locked.
- Activate the Default layer.
- On the canvas, select a geometry to tag, such as the round tower building.
- Expand the quick action Layers menu and select the appropriate layer—in this case, Hotel.

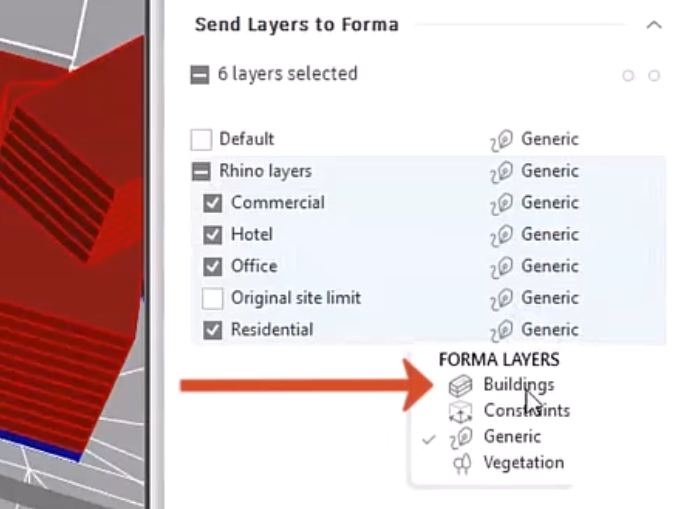
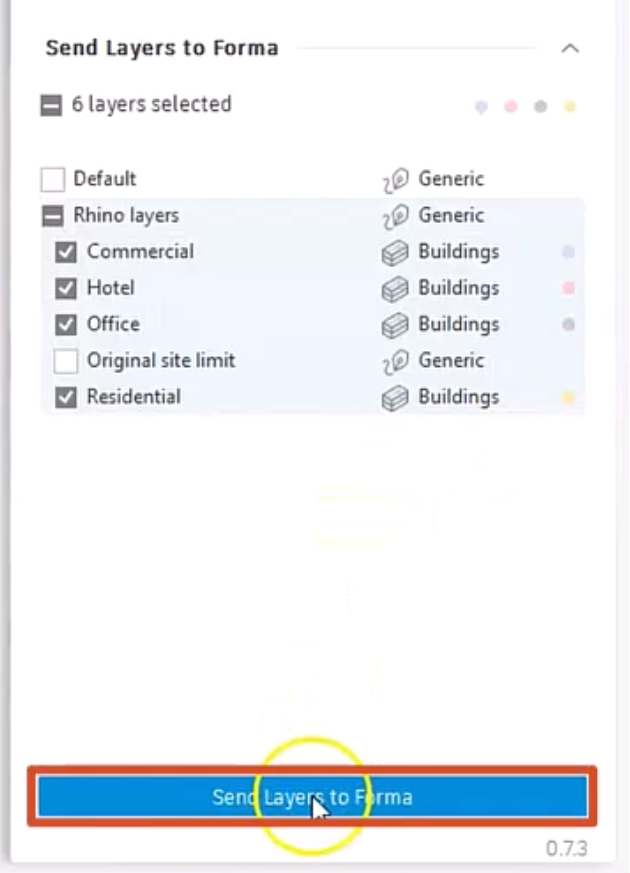
- In the Forma panel, select the Rhino layers to be sent to Forma. In this example, the Commercial, Hotel, Office, and Residential layers are all selected, but Original site limit is deselected.
For each Rhino layer, both the Forma layer and Forma function must be specified to determine how Forma reads and displays the data.
- In the Forma Layer column, click the layer name.
- In the drop-down, select Buildings, Constraints, Generic, or Vegetation. Here, set each of the selected Rhino layers to Buildings.
To verify the Forma functions, represented by colored dots to the right of the layers:
- Click in this column for any layer to display the Forma Functions menu and current selection. Here, all the layers are set to Unspecified.
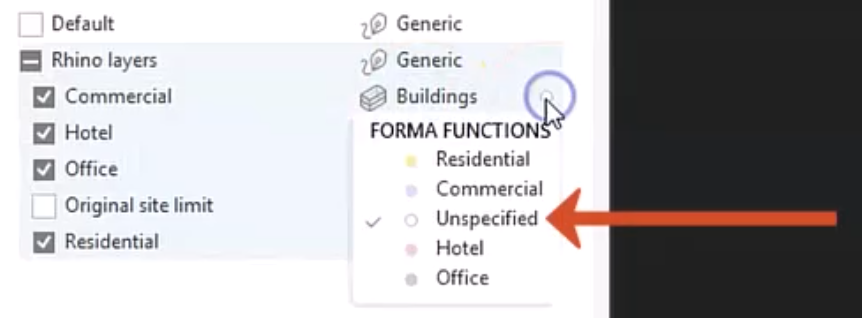
- For each layer, select the corresponding Forma function.
IMPORTANT: If the desired function name is not available, then open Forma and create the functions there first. Then return to Rhino and update the connection by clicking the update symbol after the proposal name.
With all the Rhino geometries tagged and the layer information verified, the model is ready to be sent to Forma.
- Click Send layers to Forma.
Now, the model can be opened in Forma to leverage its capabilities to enhance and analyze the design.


