• InfoDrainage

Importing CAD data

Import a CAD file and merge the CAD data with the existing surface model.


Tutorial resources

These downloadable resources will be used to complete this tutorial:

ifdr2023_M01_data.zip

Step-by-step:

CAD data is extremely useful when developing your surface drainage design, as it includes detailed infrastructure and mapping data that exists on the site.

To import CAD data:
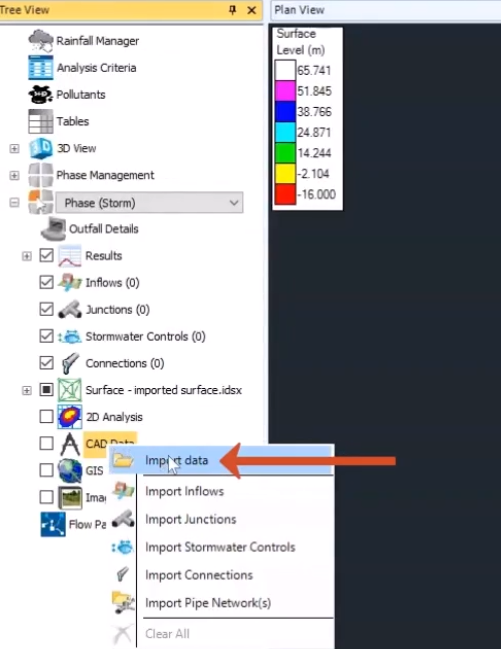
  1. In the Tree View, right-click the CAD Data node and select Import Data.

The Tree View with Import Data selected and the submenu showing the import options.

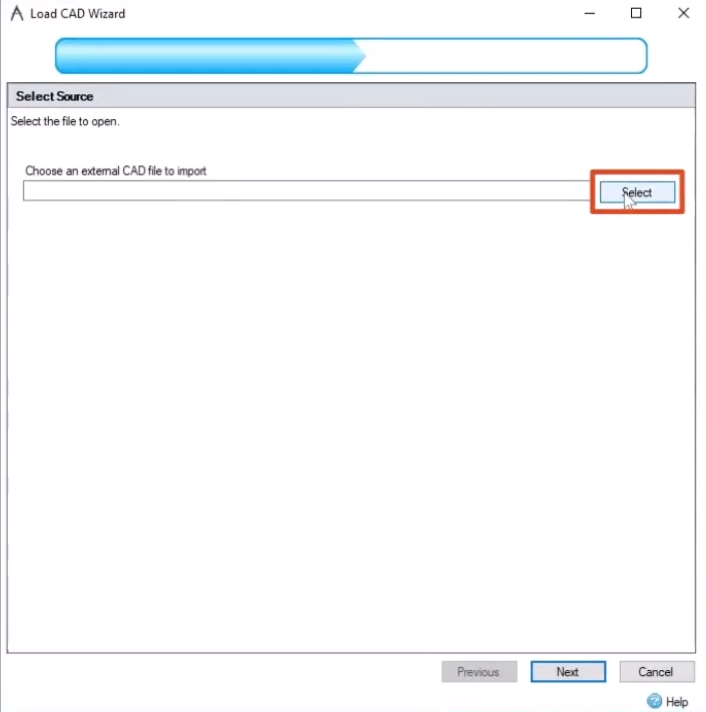
  1. In the Load CAD Wizard, to choose an external CAD file to import, click Select.

The Load CAD Wizard, with Select called out to browse for the file to import.

  1. In the Open dialog box, browse to and select the CAD file you want to import. For this exercise, select InfoDrainage Introduction > data > Starting point (DWG file).
  2. Click Open.
  3. Back in the Load CAD Wizard, confirm that the file path is correct.
  4. Click Next.
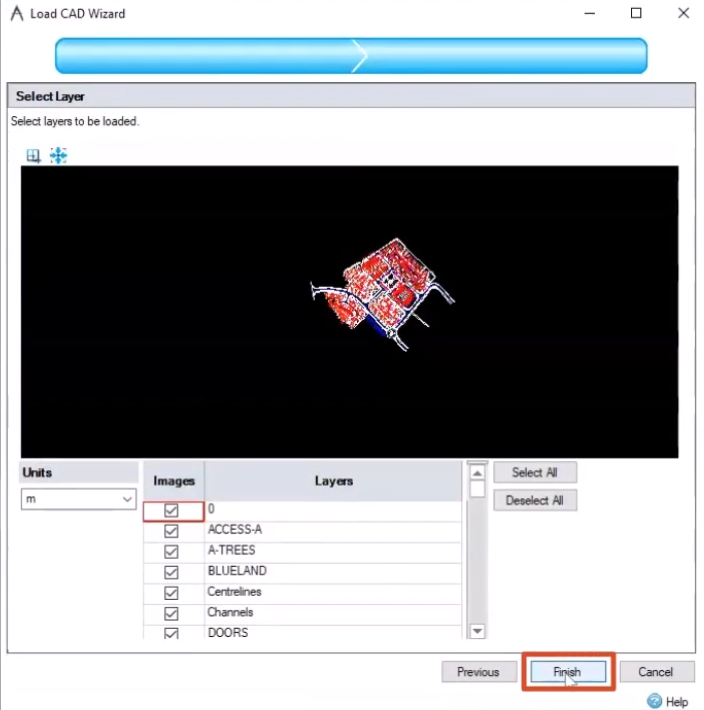
  5. On the Select Layer page, check the Units to make sure they match the project. If not, expand the drop-down to change them. For this exercise, meters is selected.
  6. Choose which layers in the CAD file you want to include in the import. By default, all layers are enabled.
  7. If you want to exclude layers, click the checkbox to turn them OFF.
  8. For this exercise, keep all the layers ON.
  9. Click Finish.

The Load CAD Wizard with the units confirmed, layers configured, and Finish being selected.

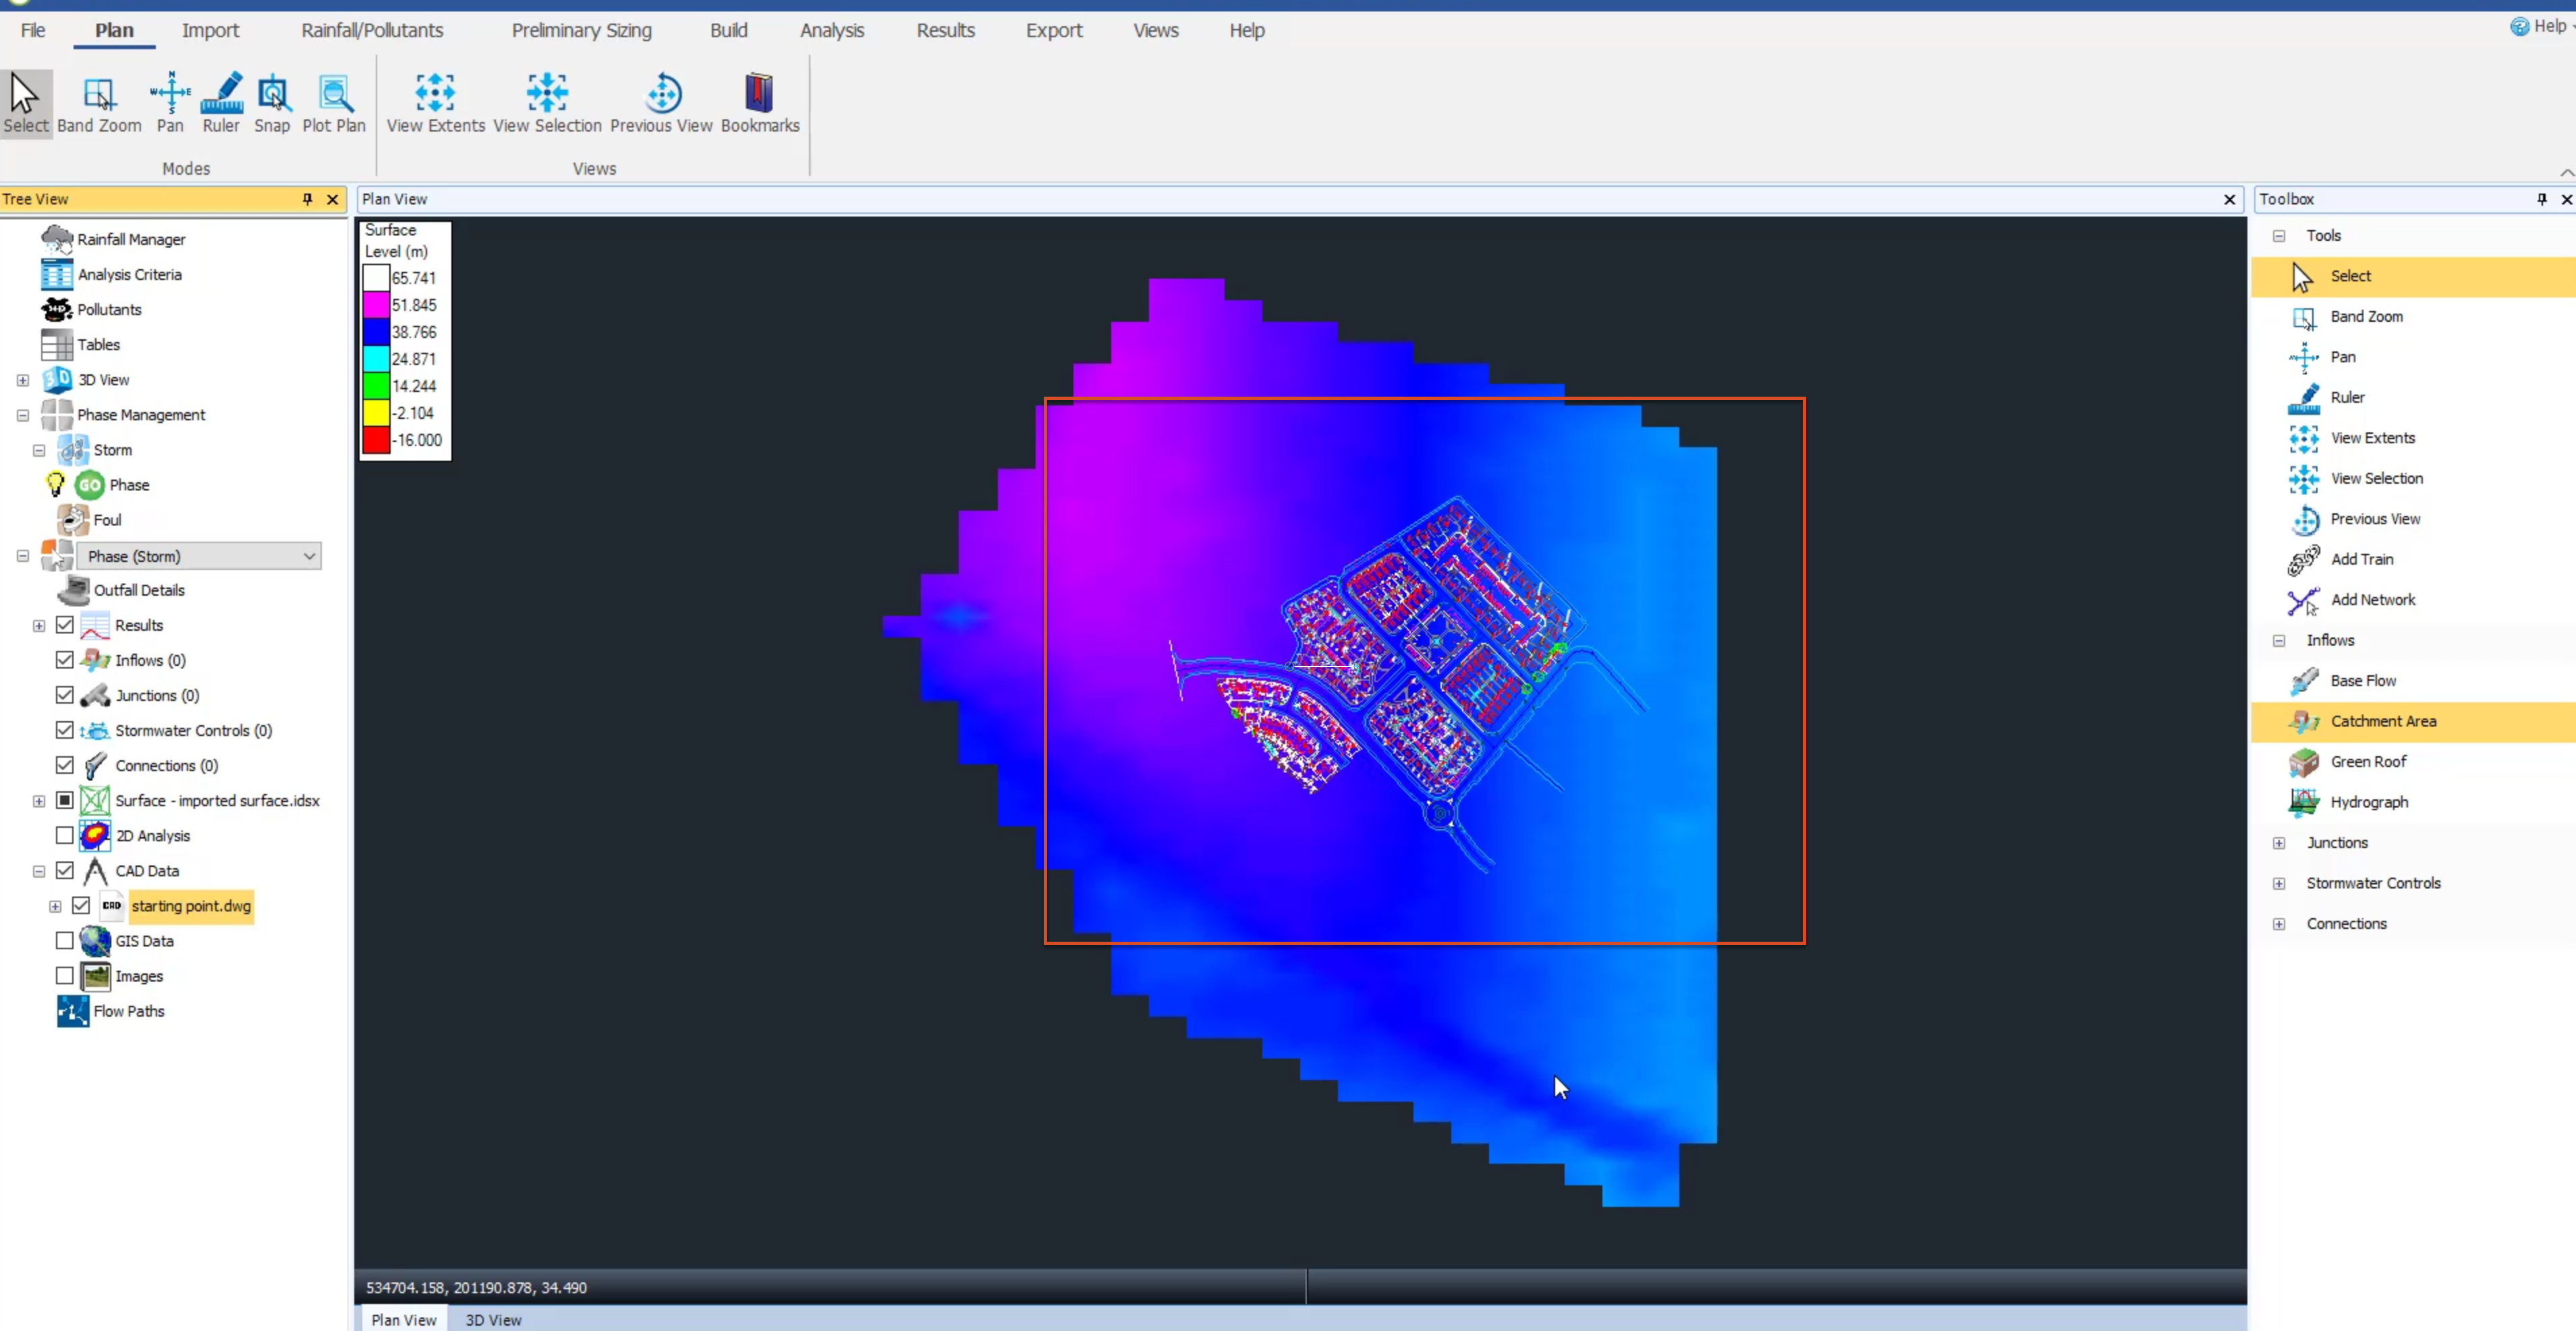
  1. The CAD data appears on top of the surface data.

The Plan view with CAD data displayed on the surface data.

  1. Import another CAD file. Right-click the CAD Data node again and select Import Data.
  2. Browse to and select the exercise file Model to be digitized2.dwg.
  3. Click Open.
  4. In the wizard, click Next.
  5. Confirm the Units are correct.
  6. Confirm all layers are enabled.
  7. Click Finish.
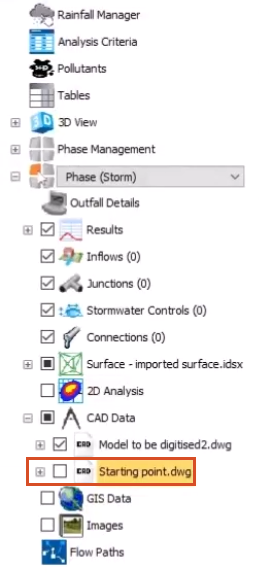
  8. To see the second CAD file you imported, in the Tree View, turn OFF the visibility of the starting point.dwg CAD file.

The Tree View with the visibility of the file starting point.dwg toggled OFF.

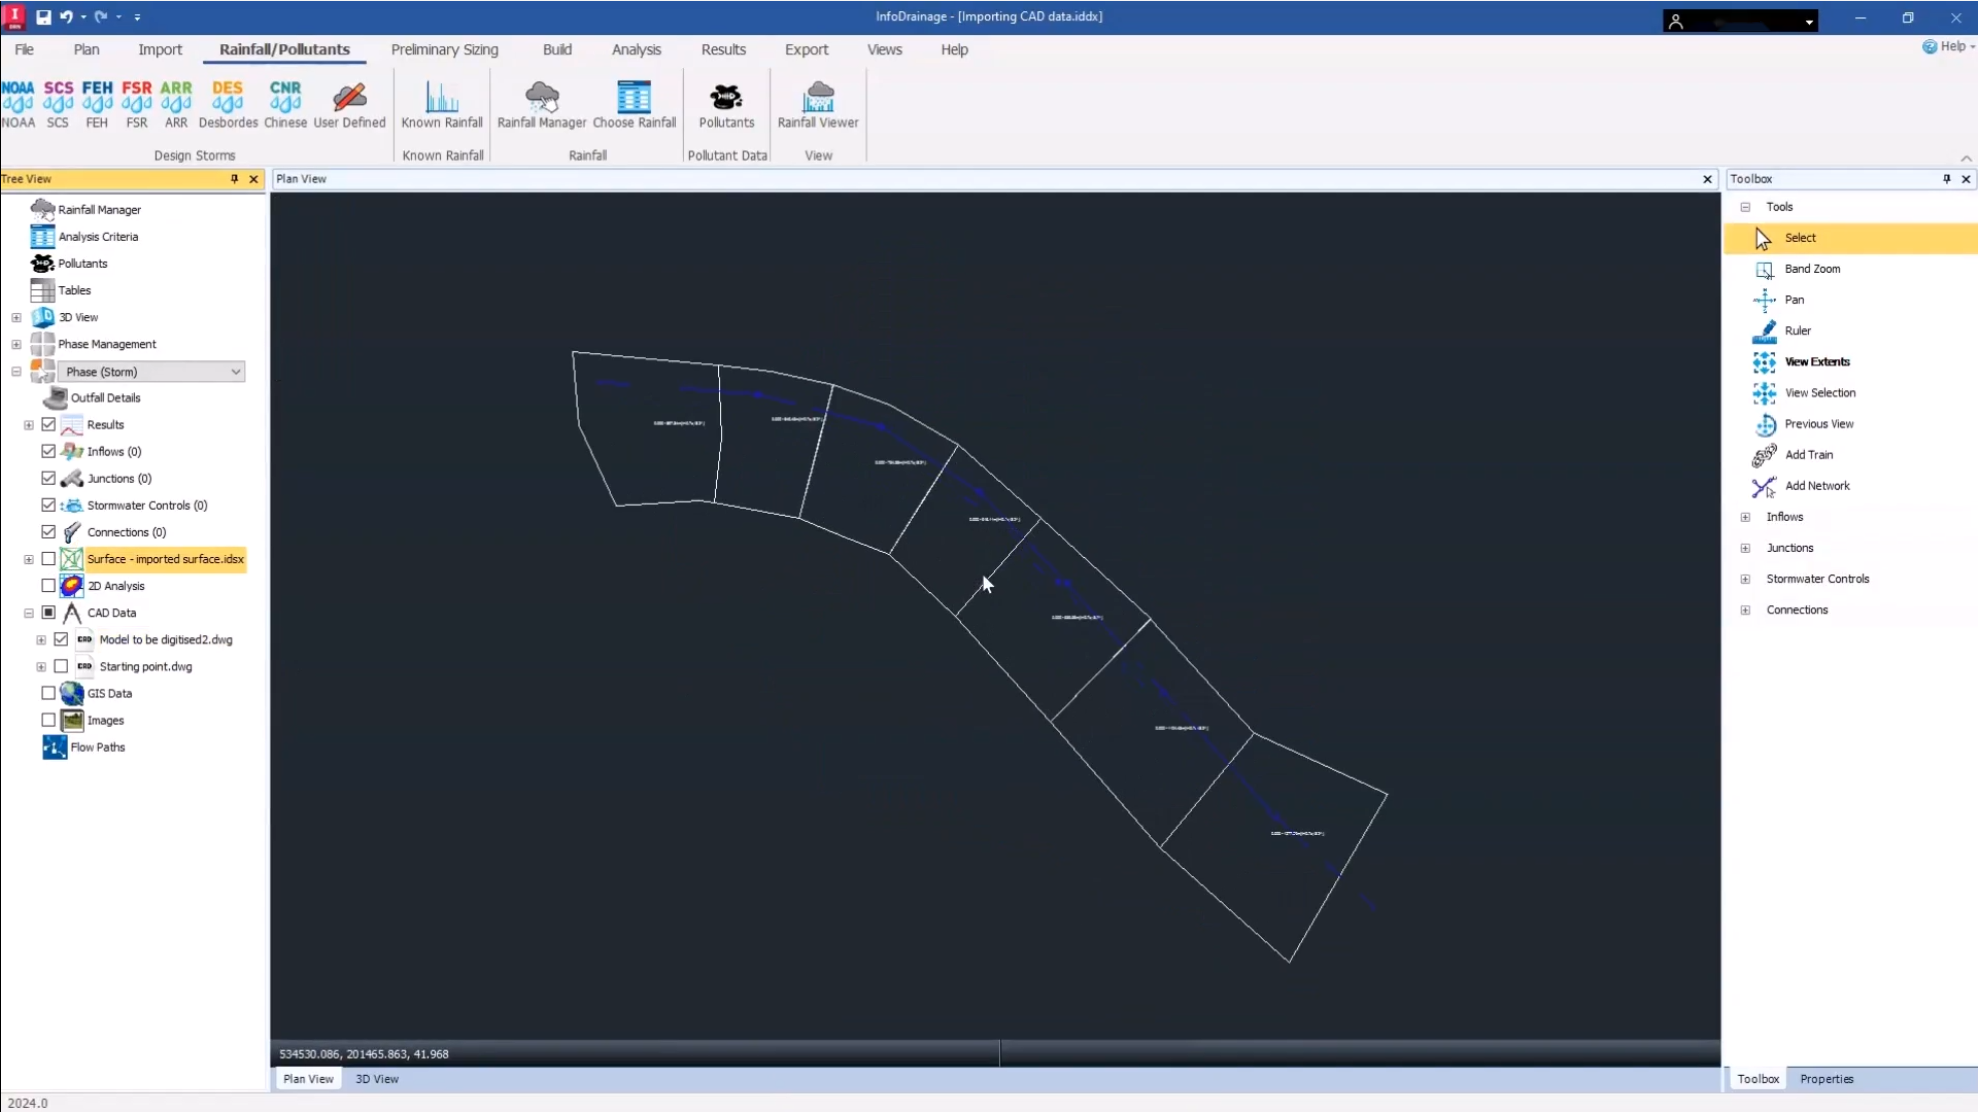
  1. Turn OFF the visibility of the surface.
  2. Zoom in on the area you want to work with.

The InfoDrainage interface, with the model imported and the Plan View zoomed in to show only the area of interest.