Perform a 3D takeoff of windows, walls, and structural system elements. Use the 3D model view to provide answers to the questions below. Use the Model Browser and Form Clusters tools to ensure you have included every listed model item in your count. Be sure to provide screenshots and export the inventory to a spreadsheet to document your answers.
Open Autodesk Takeoff module: From the product picker menu, click Takeoff.
Open takeoff package: Click the takeoff package you created in your name to open it. If you do not have a takeoff package, go to Part 1: 2D Takeoff for instructions.
Open model view: Open Sheets and Models from the left navigation menu and search for model Revit 2025_Small Bldg_All disciplines.rvt. Click the model name to open model view.
Open takeoff types view: Open Takeoff types from the left navigation menu.
Note: Refer to Online Help for further details on creating a Package.
Create takeoff types for windows and walls
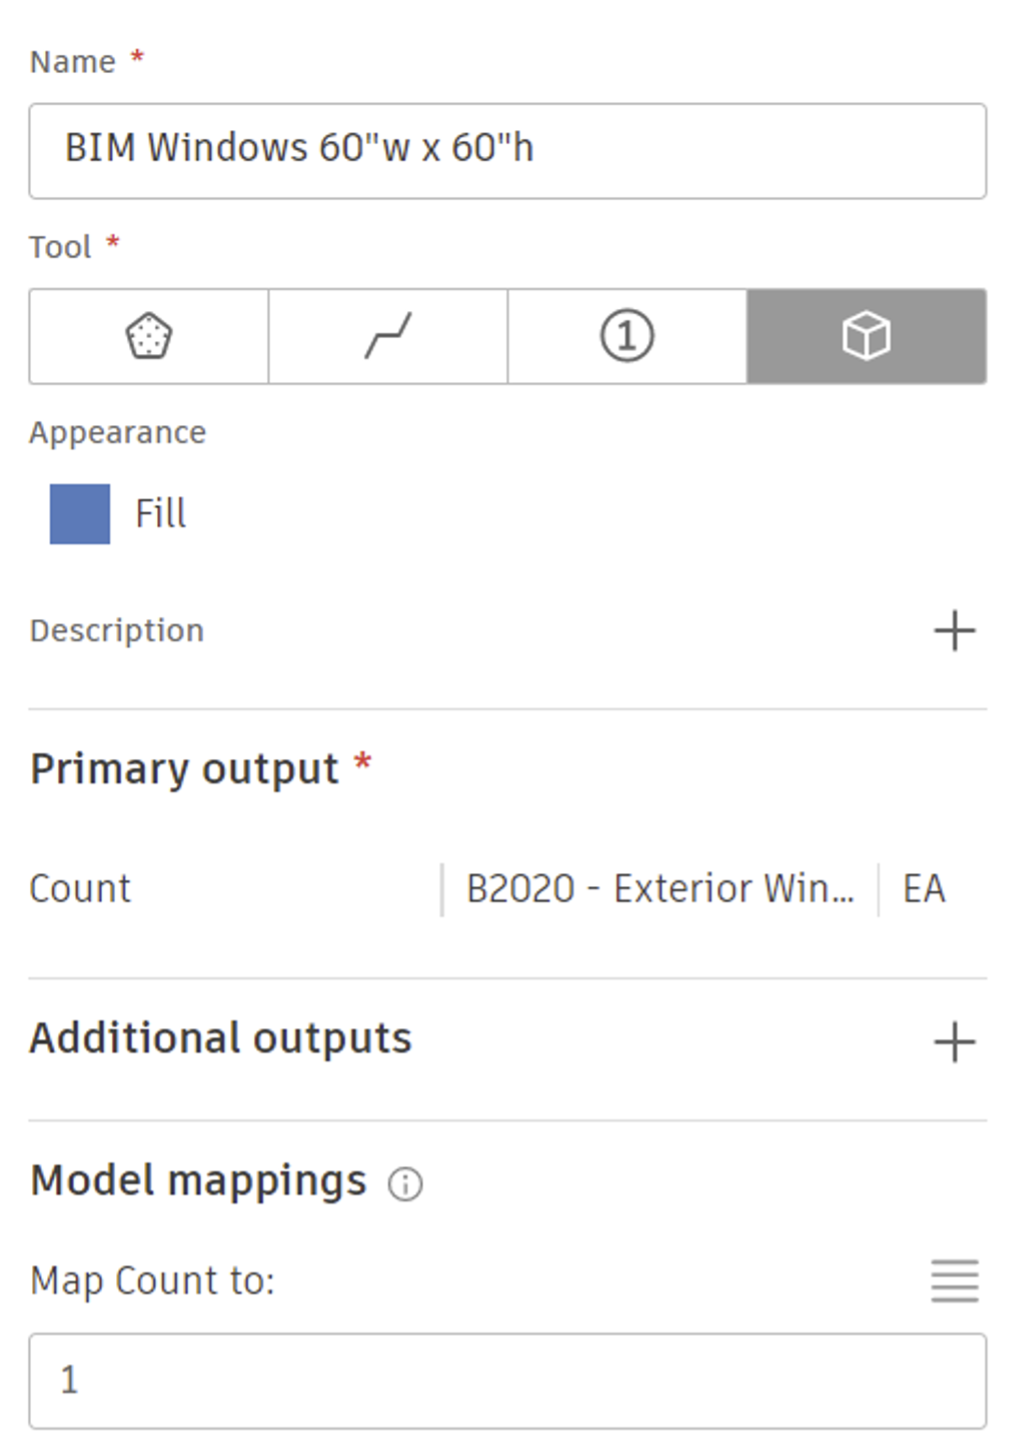
Create BIM Windows 60”w x 60”h takeoff type: takeoff by count.
Classification 2: select 08 51 00 – Metal Windows.
Unit of measure: select Count.
Click X to close the Primary Output Details dialog. Finished result is shown in Figure 20.
In model view, select a square window, right-click in the model view, and confirm the style name at bottom of shortcut menu is correct.
Click Select all 60”w x 60”h.
Click the blue plus (+) button in the Takeoff Types view.
Name takeoff type: BIM Windows 60”w x 60”h.
Accept default Tool and Appearance settings.
Primary output: Click Add Details and add the following details:
Click Start Takeoff to complete the creation of the takeoff type.
Click the blue checkmark to add elements to the takeoff type.
Figure 20
Note: Refer to Online Help for further details on creating takeoff types.
Create BIM Windows 72”w x 60”h and BIM Windows 60”w x 48”h takeoff types Use the same process above to takeoff the additional windows.
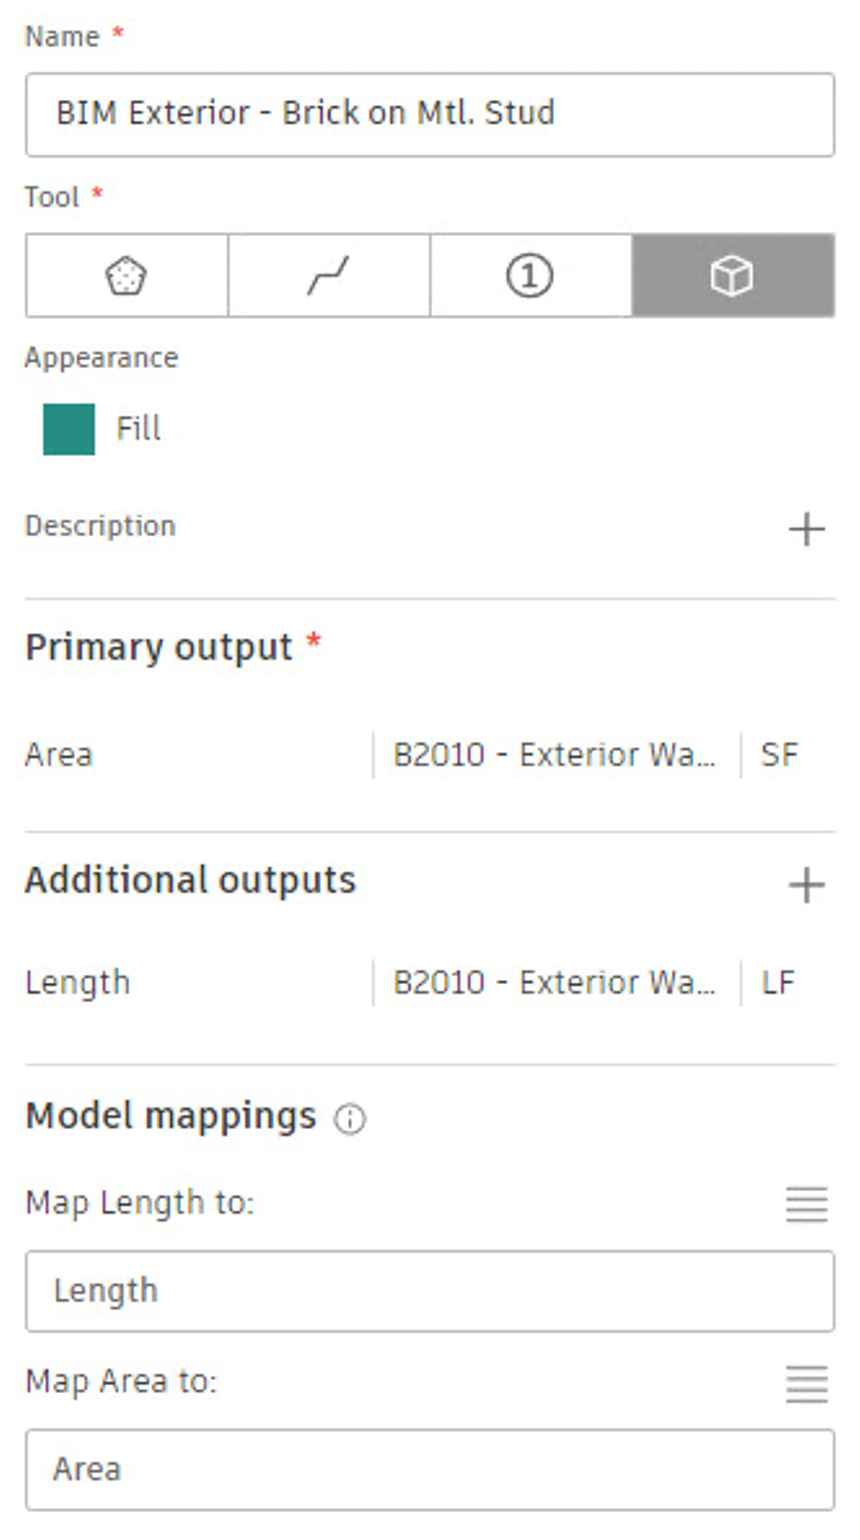
Create BIM Exterior — Brick on Mtl. Stud takeoff type: takeoff by area and length.
In model view, select the lower-level exterior brick veneer wall type, right-click in the model view, and confirm the style name at the bottom of shortcut menu is correct.
Click Select all Exterior – Brick on Mtl.Stud_...
Click the blue plus (+) button in the Takeoff Types view.
Name takeoff type: BIM Exterior – Brick on Mtl. Stud.
Accept default Tool and Appearance settings.
Primary output: Click Add Details and add the following details:
Output name: type Area.
Classification 1: select B2010 – Exterior Walls.
Classification 2: select 04 21 00 – Clay Unit Masonry.
Unit of measure: select Square Feet or Square Meters.
Click X to close the Primary Output Details dialog.
Additional outputs: Click the grey plus (+) button
Output name: type Length
Classification 1: select B2010 – Exterior Walls.
Classification 2: select 04 21 00 – Clay Unit Masonry.
Unit of measure: select Linear Feet or Meters.
The finished result is shown in Figure 21. Click X to close Additional Output Details dialog.
Click Start Takeoff to complete creation of the takeoff type.
Click the blue checkmark to add elements to the takeoff type.
In model view, select the upper-level exterior brick veneer wall type, right-click in the model view, and confirm the style name at the bottom of the shortcut menu is correct.
Click Select all Exterior – Brick on Mtl.Stud_...
Click takeoff Type BIM Exterior – brick on Mtl. Stud if it is not already selected.
Click the blue checkmark to add elements to the takeoff type.
Figure 21
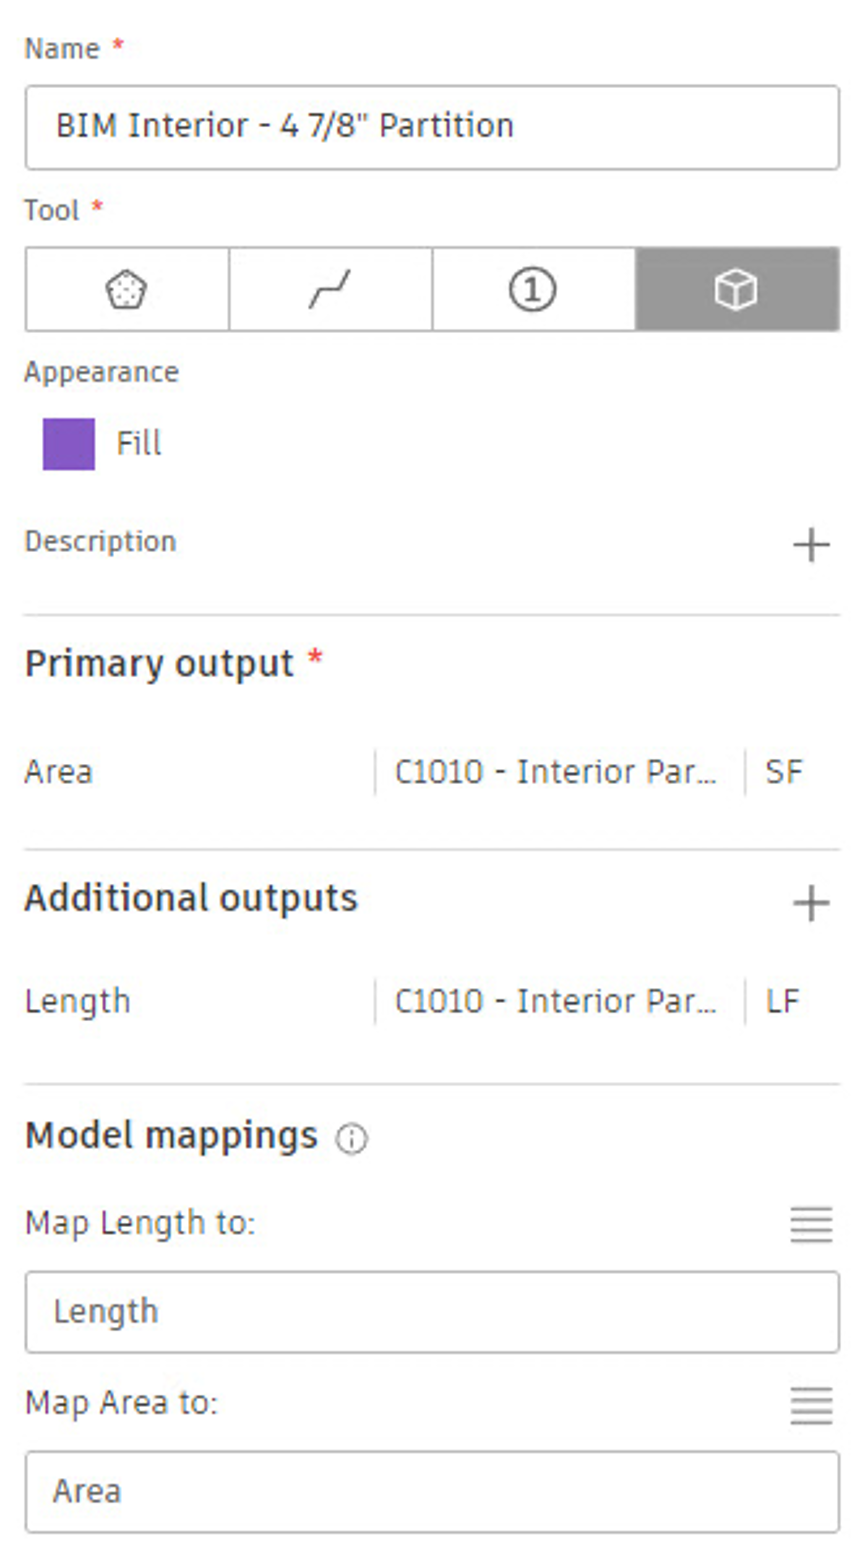
Create BIM Interior — 4 7/8” Partition takeoff type: takeoff by area and length.
Use the same process above to create the additional wall takeoff type. The finished result should look like Figure 22.
Use the following Classifications:
Classification 1: C1010 – Interior Partitions
Classification 2: 09 29 00 – Gypsum Board
Include all model elements that contain “Interior – 4 7/8” Partition” in their Type Name.
Figure 22
Hint: Use the Section Box or Form Clusters tool to see inside the 3D model.
Answer questions about windows and walls
Revit 2025_Small Bldg_All disciplines.rvt-Windows: Take off the total quantity of all the following items.
Questions:
Windows 60” w x 60” h
Count _______________each
Windows 72” w x 60” h
Count _______________each
Windows 60” w x 48” h
Count _______________each
Revit 2025_Small Bldg_All disciplines.rvt-Wall types: Take off and calculate area and length of all the following wall types.
Questions:
Exterior—Brick on Mtl. Stud
Area _______________squared feet or squared meters
Length _______________linear feet or meters
Interior—4 7/8” Partition
Area _______________squared feet or squared meters
Length _______________linear feet or meters
Note: Refer to Online Help for further details on creating takeoff types.
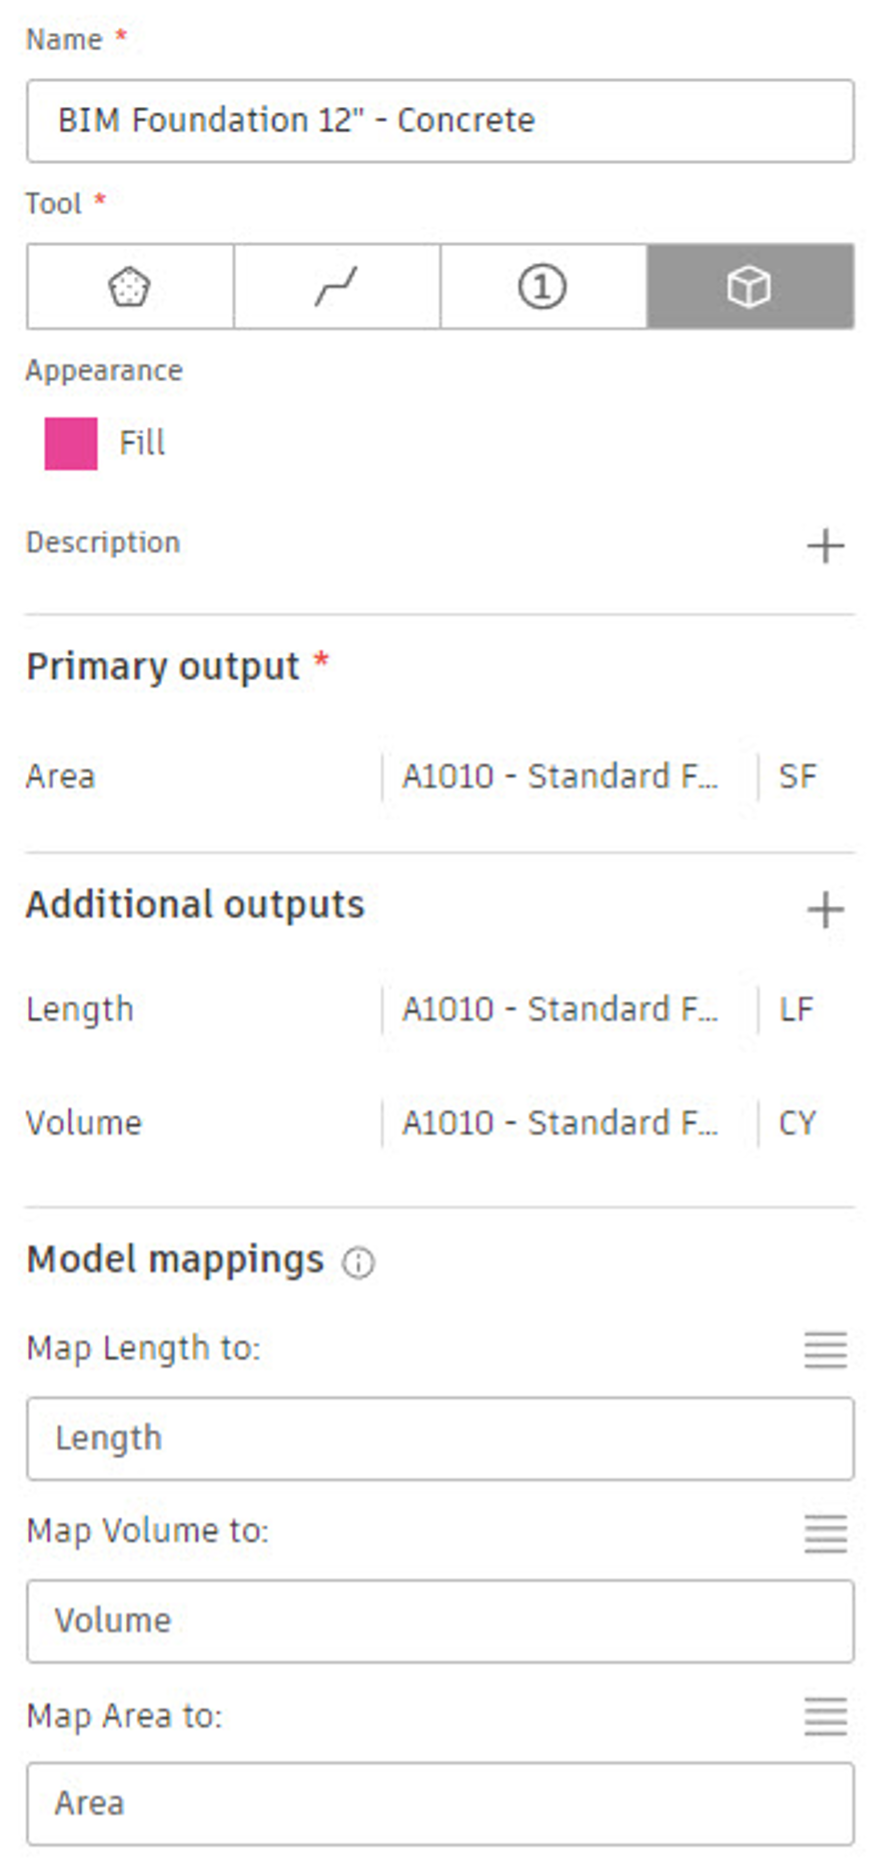
Create takeoff types for foundation walls and floor
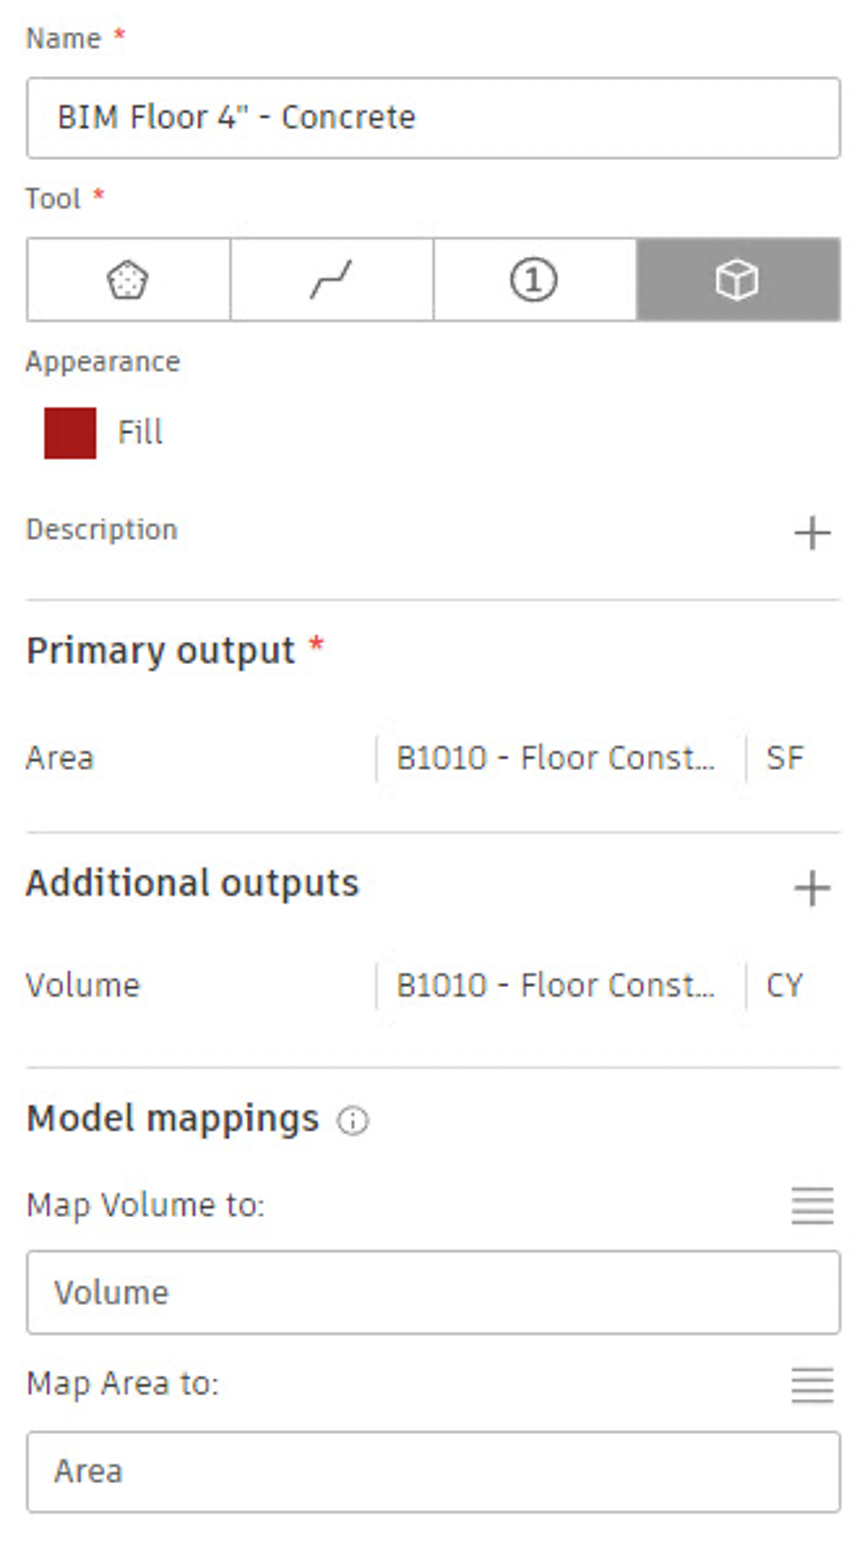
Create BIM Floor 4” — Concrete takeoff type: takeoff by area and volume.
In model view, select the 4” Concrete Slab, right-click in the model view, and confirm the style name at the bottom of the shortcut menu is correct.
Click Select all 4” Concrete Slab.
Click the blue plus (+) button in the Takeoff Types view.
Unit of measure: select Cubic Yards or Cubic Meters.
The finished result is shown in Figure 24. Click X to close the Additional Output Details dialog.
Click Start Takeoff to complete the creation of takeoff type.
Click blue checkmark to add elements to the takeoff type.
Figure 24
Create BIM Footing 20” — Concrete takeoff type: Use the same process above to create the additional foundation takeoff type. Or, to simply the steps, you can find Footing 20” in the model, select all instances, and then duplicate the previous takeoff type while all (new) instances are selected.
Answer questions about foundation walls and floor
Revit 2025_Small Bldg_All disciplines.rvt-Floor, foundation, and footing: Take off and calculate area, length, and volume of all the following concrete items.
Questions:
Floor 4” – Concrete
Area _______________ squared feet or squared meters
Volume _______________ cubic yards or cubic meters
Foundation 12” – Concrete
Area _______________ squared feet or squared meters
Length _______________ linear feet or meters
Volume _______________ cubic yards or cubic meters
Footing 20” – Concrete
Area _______________ squared feet or squared meters
Length _______________ linear feet or meters
Volume _______________ cubic yards or cubic meters