Step-by-step Guide
When using InfoWorks WS Pro, SQL is a flexible tool for importing and exporting data. In this example is a CSV containing a list of customers who have reported low water pressure. This example creates a selection list of these customers.
- In a file browser window, navigate to the folder containing the exercise data.
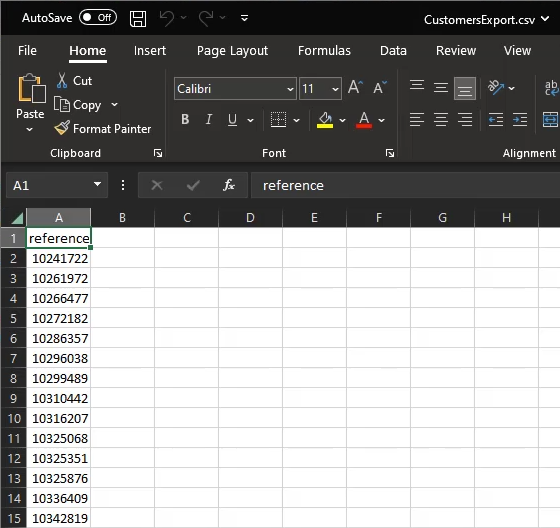
- In Notepad or a spreadsheet program like Microsoft Excel, open the Customers.csv file to check the structure.
The first value must be the name of the variable to be used; in this case, it is $customers. All values, or for this example, customer IDs, are separated by commas.

- Close the file.
To locate the full file path, which is necessary to load it in an SQL query:
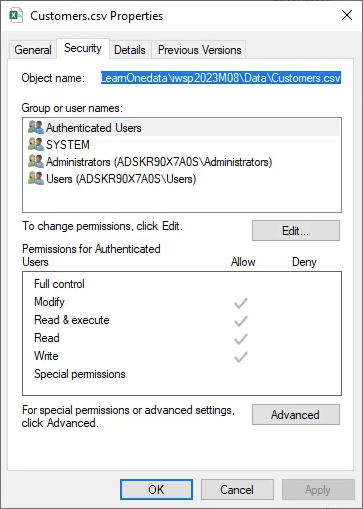
- In the file browser window, right-click Customers.csv and select Properties.
- On the Security tab, in the Object name field, select all the text.
- On your keyboard, press CTRL+C
- Click OK.
- From the Model Group window, drag-and-drop the BridgeNet network into the workspace to open the GeoPlan.
- In the Selection menu, pick SQL Select.

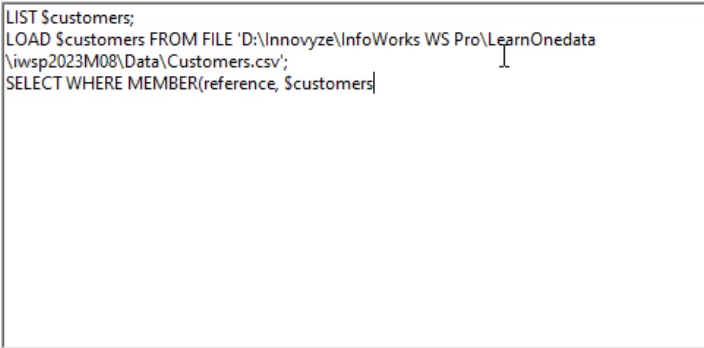
Your SQL query needs to load the list of customers, and then select any customers in that list.
- In the SQL dialog box, expand the Object Type drop-down and select Customer Point.
- In the text box, type: LIST $customers;
This defines the list variable you will load your CSV into. Remember that this must match the first value in your CSV.
- On your keyboard, press ENTER.
- Type: LOAD $customers FROM FILE ‘
- On your keyboard, press CTRL+V to paste the complete file path.
- Type another apostrophe (‘).
- Type a semicolon (;).
This loads your CSV into the list variable.
- Type: SELECT WHERE MEMBER(reference, $customers)
This will select any customer whose reference field is in your $customers list. Your syntax should match the image below:
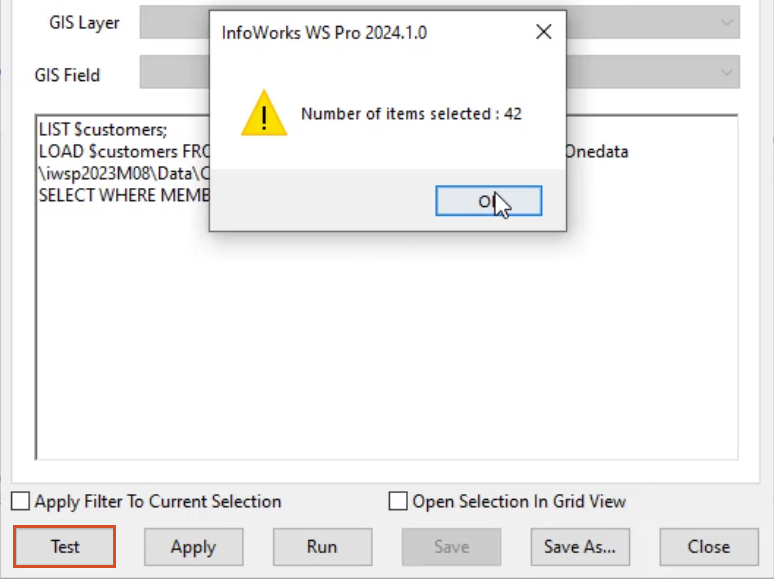
- Click Test to ensure the query syntax is correct.
- In the notification, click OK.
- Click Apply.
There should now be customers selected in the network. If the customers are not visible:
- Move the SQL dialog box to one side.
- Right click in the GeoPlan and select Find selection.
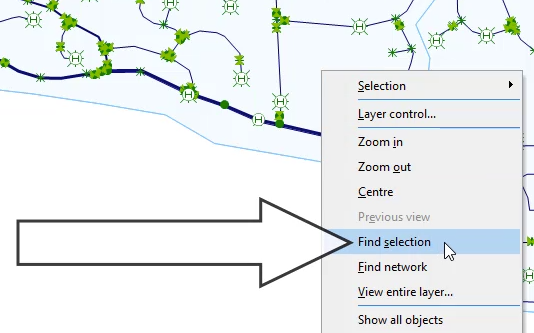
- Close the SQL dialog box.
- In the Model Group window, open the existing Selection Lists group.
OR, to create a new one:
- Right-click the Selection Lists group.
- Select New > Selection List.
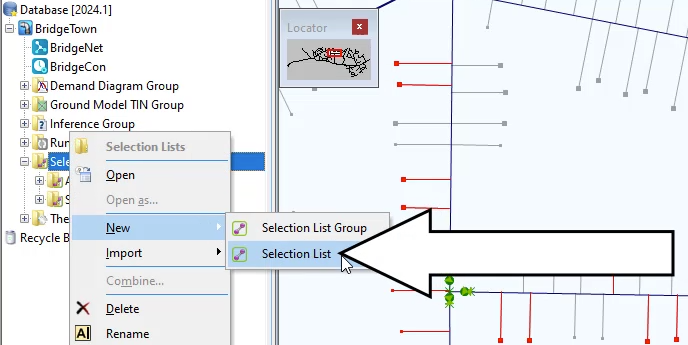
- Name the selection list “Customers”.
- Click OK.
To clear the current selection:
- On the Operations toolbar, click Clear Selection.
- From the Model Group window, drag-and-drop the Customers selection list into the GeoPlan to re-select the customers.

Now, repeat the process in reverse, and then export the affected customers:
- With the Customers still selected, in the Selection menu, pick SQL Select.
- In the SQL dialog box, expand the Object Type dropdown and select Customer Point.
- Enable Apply Filter to Current Selection.
- Type the following query: SELECT reference INTO FILE ‘
- On your keyboard, press CTRL+V to paste the file path to the CSV again.
Note: If needed, repeat Steps 4-7 to copy the full file path.
- Change the filename to CustomersExport.csv.
- At the end of the filename, type an apostrophe (‘).

- Click Test to make sure that the query syntax is correct.
- Click OK.
- Click Apply.
- Navigate to the data folder, where you will find a list of exported customer IDs.