Dimensioning, annotating, and exporting to a PDF
Task 1: Create dimensions and annotations
With our sheets created, and our views placed, we really don’t have to worry about organization anymore. We can now start getting into annotating and dimensioning our details.
To start adding annotations to your details, follow along with these steps:
- Open the practice file called 2023R2_Arch_03.rvt.
- In the Project Browser, scroll down to Sheets(All) and open the sheet A301 DETAILS.
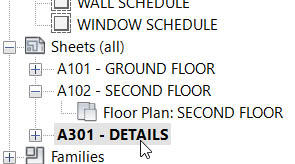
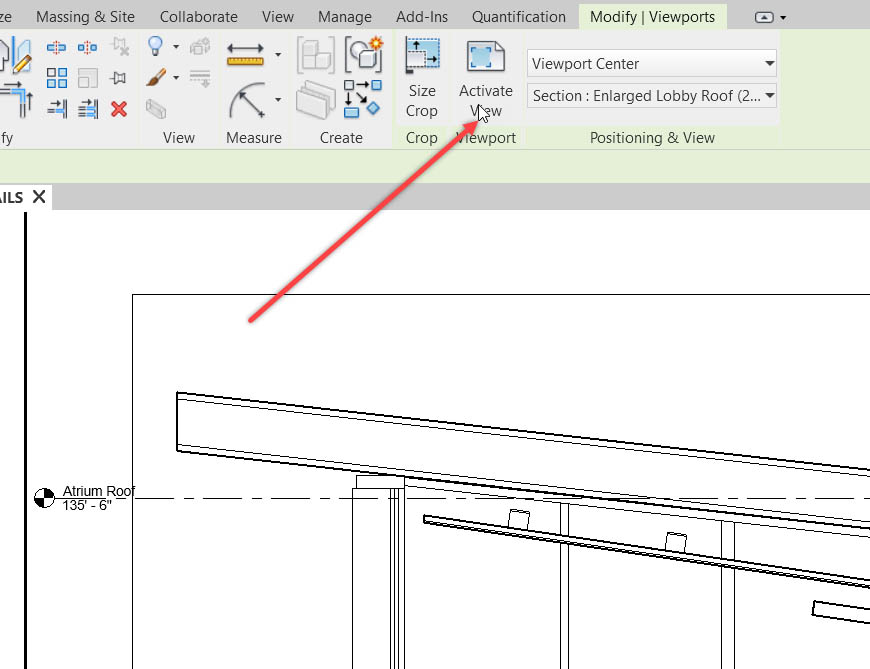
- Zoom into the Enlarged Lobby viewport and select it.
- Click on Activate Viewport. (See next page)
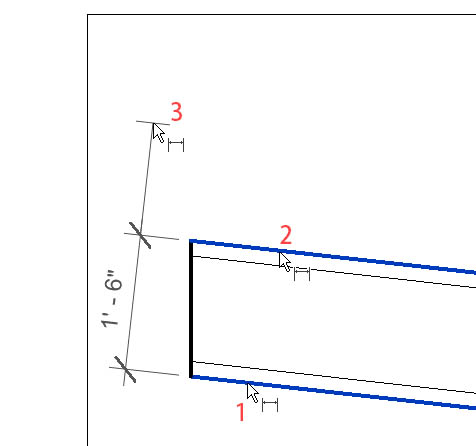
- On the Annotate tab, click the Aligned Dimension button.

- Select the three (3) points shown in the figure below.
- Hit esc.
- Select the new dimension.
- Double-click on the 1’-6” dimension.
- For the Text Fields, add ROOF for the Below input.
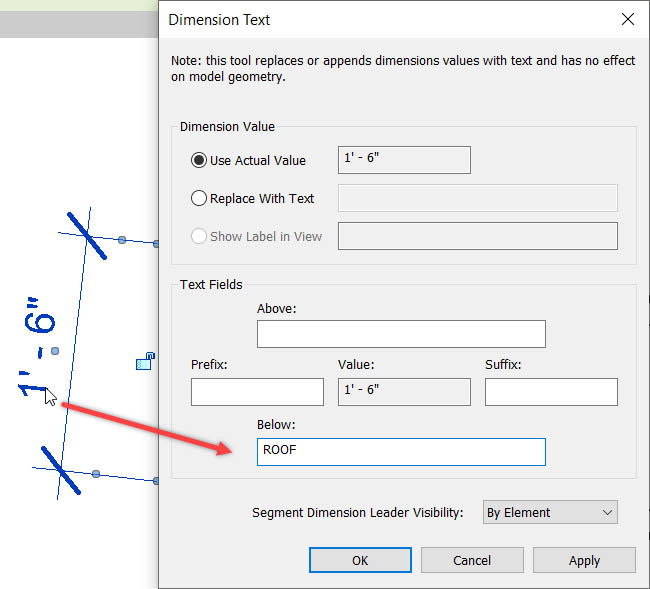
- Click OK.
- Pan to the other side of the roof where it angles down.
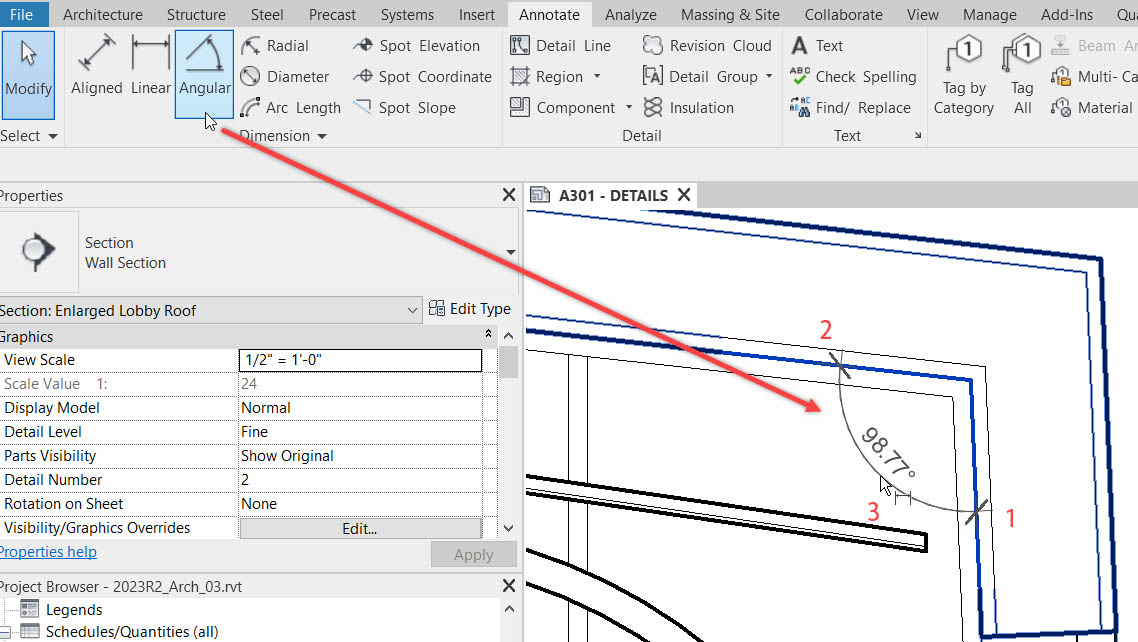
- Click the Angular Dimension button.
- Click the three (3) points shown in the figure on the next page.
Task 2: Export Sheets to PDF
It used to be we needed to print our sheets to a PDF. The problem was there were too many different drivers and applications in order to do so. This resulted in inconsistencies with the output. The new method of creating PDF’s is to physically export the selected sheets.
To export sheets to PDF, follow along with the steps listed below:
- On the Quick Access toolbar, click the PDF button.

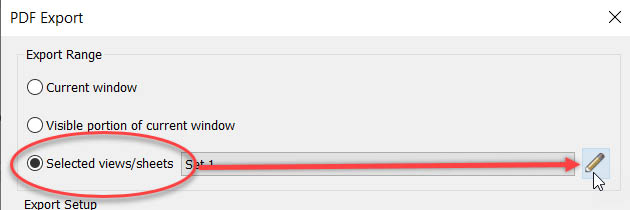
- Click the Select views/sheets radio button.
- Click the pencil icon to the right of the dialog (See next page).
- Scroll down to the sheets and select the sheets in the figure below.
- Click the Edit Print Order at the bottom of the dialog.
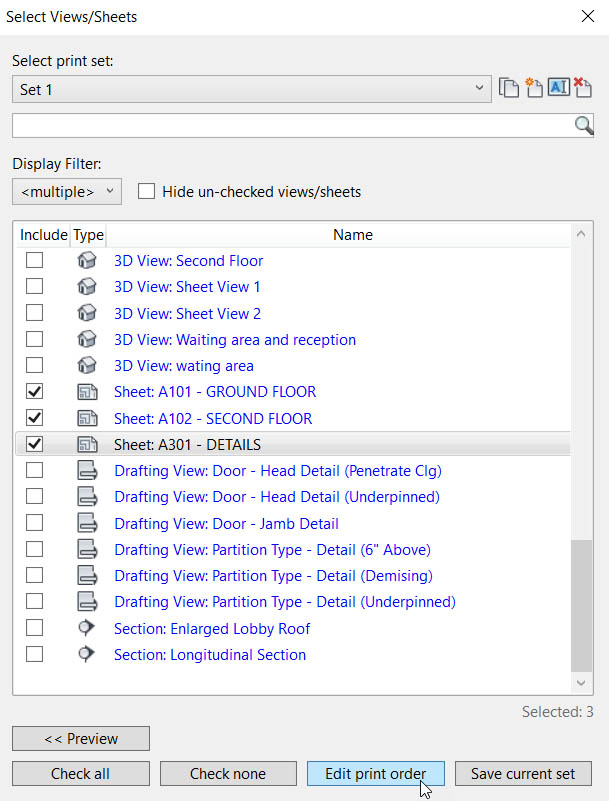
- Click and Drag the sheets to read the opposite order.

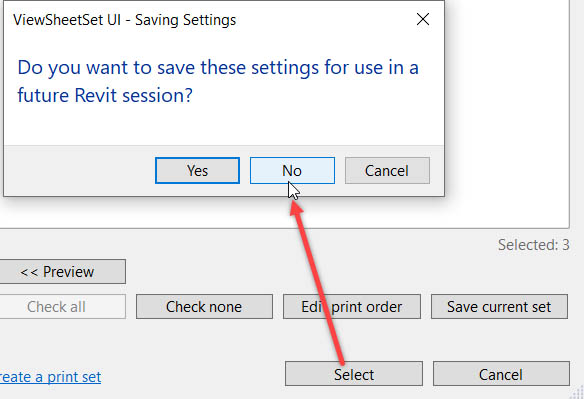
- At the bottom of the dialog, click the Select button.
- Click No to the next dialog.
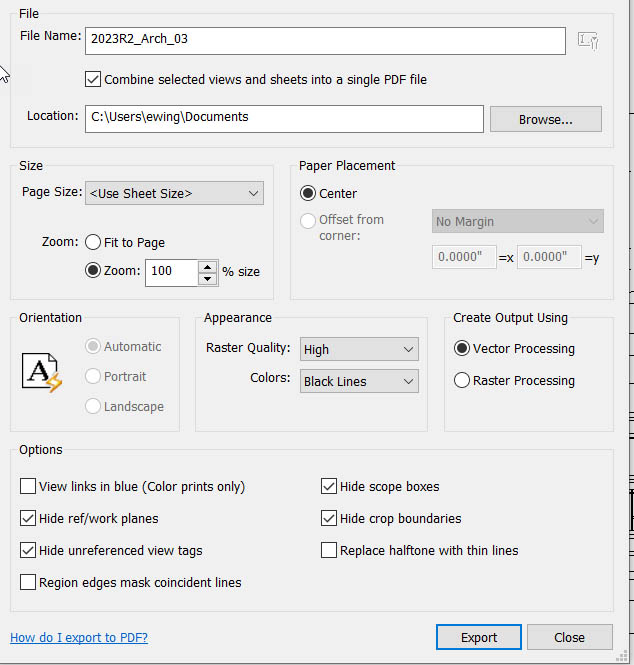
- Duplicate the settings shown in the figure below, and click Export. (See next page)
- Click No to save the settings.
- Browse to the directory you sent the file to and verify it looks correct.


