Populating the Material Editor - Exercise
In this tutorial we will be looking at:
- Different Material Editor modes
- Changing the number of sample windows
- Picking materials using the Eye Dropper
If you want to modify the materials on the FrontLoader, you will need to do this in the Material Editor.
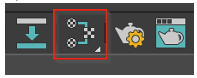
From the Main Toolbar, click on the Material Editor icon or use the hot key M on the keyboard to open the material editor.
This will open the Slate Material Editor which is the default editor, and this is a node-based editor.
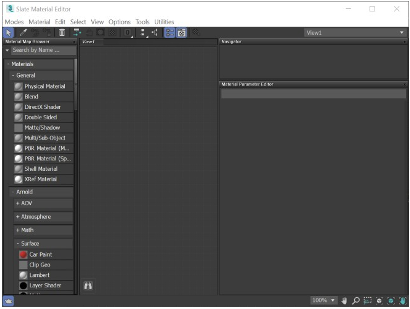
This is a nicer visual representation of our material, and it is great to use when you have complex materials. For this exercise we will use compact material editor.
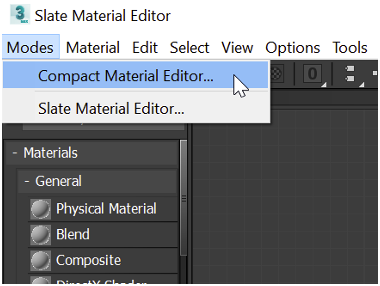
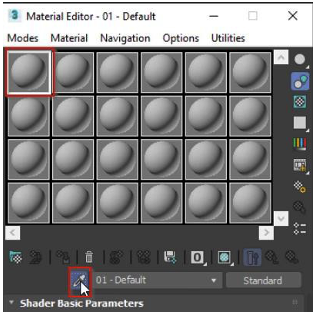
From the Slate Material editor, click on Modes and switch to Compact Material Editor.
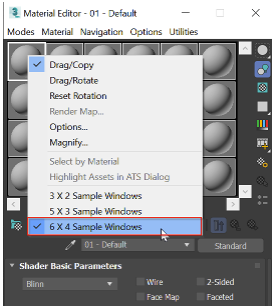
The compact material editor works in this way: we have slots which allow us to modify existing materials or work on new ones. There is a maximum of 24 slots but by default you see 6.
To switch to see all the material slots, Right-click on one of the materials slots and choose 6 x 4 Sample Windows.
Just because there are only 24 materials doesn’t mean that we can only have a maximum of 24 materials at a time – we can have unlimited materials in the scene. This just means that we can only work with 24 different materials at a given time.
To start populating materials from the Front_Loader:
From the Compact Material Editor, select an Empty slot. The selected material slot will be highlighted by a white outline, then pick the Eye dropper and click on any object in the scene. In this case, we click on the Tire.
You will see that it has now populated the slot with its current material of the tire. Next, we name this material.
With the Tire material slot still selected, rename the material to Tire. This way it is easier to know the materials in the scene.
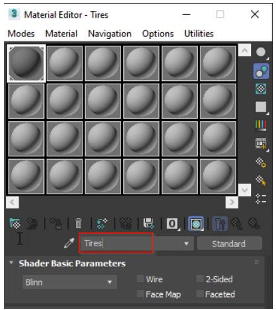
Do the same for the rest of the slots by picking up the materials and rename them to your liking. One way to tell a slot is used by the material: it will show triangles at the corner, which means that this slot’s material is linked to objects in the scene, whereas the empty slot will show nothing, as seen in the above screenshot.
Multiple objects can share the same material. If you change the material of the Tire, you see that all the four tires changed at the same time.
Once done, save your scene with File > Save or CTRL+S.