• InfoWater Pro

Setting boundary conditions for a steady state analysis

Set boundary conditions in preparation for a steady state analysis.


Tutorial resources

These downloadable resources will be used to complete this tutorial:


00:03

To run a steady state analysis.

00:05

You must first set boundary conditions such as pump status or tank levels.

00:11

In this exercise, you define pump operations and assign an initial level to the tank

00:17

to begin.

00:18

Double click the desired project dot APR X file to open

00:22

Agis Pro.

00:24

Once the project starts,

00:26

click the info water pro tab to open the info water Pro ribbon

00:30

in the project panel, click initialize

00:35

to start zoom to the north tank with an ID of T 5004

00:41

from the info water pro ribbon

00:43

edit panel, click the select tool, then select tank T 5004.

00:51

If you are having trouble finding this tank in the model,

00:54

you can use the model explorer to help locate it

00:58

in the attribute tab. Enter T 5004 in the name field,

01:03

press enter

01:04

and then click zoom to an active element

01:08

with tank T 5004 selected

01:10

from the model explorer

01:12

attribute tab

01:13

enter an initial level of 120.

01:17

This means that this tank will have a hydraulic grade line

01:20

or H G L of 120 ft above the ground.

01:23

Surface. During this static analysis,

01:30

locate in zoom to the south tank with an id of T 5000 and select it

01:36

again

01:37

in the attribute tab of the model explorer enter an initial level of 90.

01:44

This tank will have an HGL of 90 ft above the ground surface.

01:47

During this static analysis,

01:51

locate in zoom to the treatment plant with an ID of W T P 100

01:56

select it

01:58

in the attribute tab of the model explorer. Enter ahead of 5880.

02:03

This treatment plant operates at a constant HGL of 5880 ft.

02:09

During this static analysis

02:12

now add pumps, P 100

02:14

P 120 to the domain which are the pumps located downstream of the reservoir.

02:21

On the info water pro ribbon in the domain panel, click the enlarged domain icon,

02:26

then select both pumps near the reservoir to add them to the domain.

02:31

The pumps and adjacent pipes will be selected,

02:35

click the reduced domain icon and then select the

02:38

adjacent pipes to remove them from the domain.

02:42

Only the pumps should remain

02:44

on the info water pro ribbon in the edit panel,

02:47

click group editing to open the group editor,

02:51

select pump slash valve status. Make sure that the initial status is set to close

02:56

and click. Apply

02:59

when you are prompted to confirm click. OK. And then close. The group editor

03:05

on the info water pro ribbon

03:07

in the domain panel. Click the clear domain icon.

03:11

Now, the pumps and tank are ready for a steady state analysis.

Video transcript

00:03

To run a steady state analysis.

00:05

You must first set boundary conditions such as pump status or tank levels.

00:11

In this exercise, you define pump operations and assign an initial level to the tank

00:17

to begin.

00:18

Double click the desired project dot APR X file to open

00:22

Agis Pro.

00:24

Once the project starts,

00:26

click the info water pro tab to open the info water Pro ribbon

00:30

in the project panel, click initialize

00:35

to start zoom to the north tank with an ID of T 5004

00:41

from the info water pro ribbon

00:43

edit panel, click the select tool, then select tank T 5004.

00:51

If you are having trouble finding this tank in the model,

00:54

you can use the model explorer to help locate it

00:58

in the attribute tab. Enter T 5004 in the name field,

01:03

press enter

01:04

and then click zoom to an active element

01:08

with tank T 5004 selected

01:10

from the model explorer

01:12

attribute tab

01:13

enter an initial level of 120.

01:17

This means that this tank will have a hydraulic grade line

01:20

or H G L of 120 ft above the ground.

01:23

Surface. During this static analysis,

01:30

locate in zoom to the south tank with an id of T 5000 and select it

01:36

again

01:37

in the attribute tab of the model explorer enter an initial level of 90.

01:44

This tank will have an HGL of 90 ft above the ground surface.

01:47

During this static analysis,

01:51

locate in zoom to the treatment plant with an ID of W T P 100

01:56

select it

01:58

in the attribute tab of the model explorer. Enter ahead of 5880.

02:03

This treatment plant operates at a constant HGL of 5880 ft.

02:09

During this static analysis

02:12

now add pumps, P 100

02:14

P 120 to the domain which are the pumps located downstream of the reservoir.

02:21

On the info water pro ribbon in the domain panel, click the enlarged domain icon,

02:26

then select both pumps near the reservoir to add them to the domain.

02:31

The pumps and adjacent pipes will be selected,

02:35

click the reduced domain icon and then select the

02:38

adjacent pipes to remove them from the domain.

02:42

Only the pumps should remain

02:44

on the info water pro ribbon in the edit panel,

02:47

click group editing to open the group editor,

02:51

select pump slash valve status. Make sure that the initial status is set to close

02:56

and click. Apply

02:59

when you are prompted to confirm click. OK. And then close. The group editor

03:05

on the info water pro ribbon

03:07

in the domain panel. Click the clear domain icon.

03:11

Now, the pumps and tank are ready for a steady state analysis.

Step-by-step:

To run a steady state analysis, you must first set boundary conditions, such as pump status or tank levels. In this exercise, you define pump operations and assign an initial level to the tank. Note that a steady state analysis has already been created.
  1. Open the appropriate .aprx file in ArcGIS Pro.
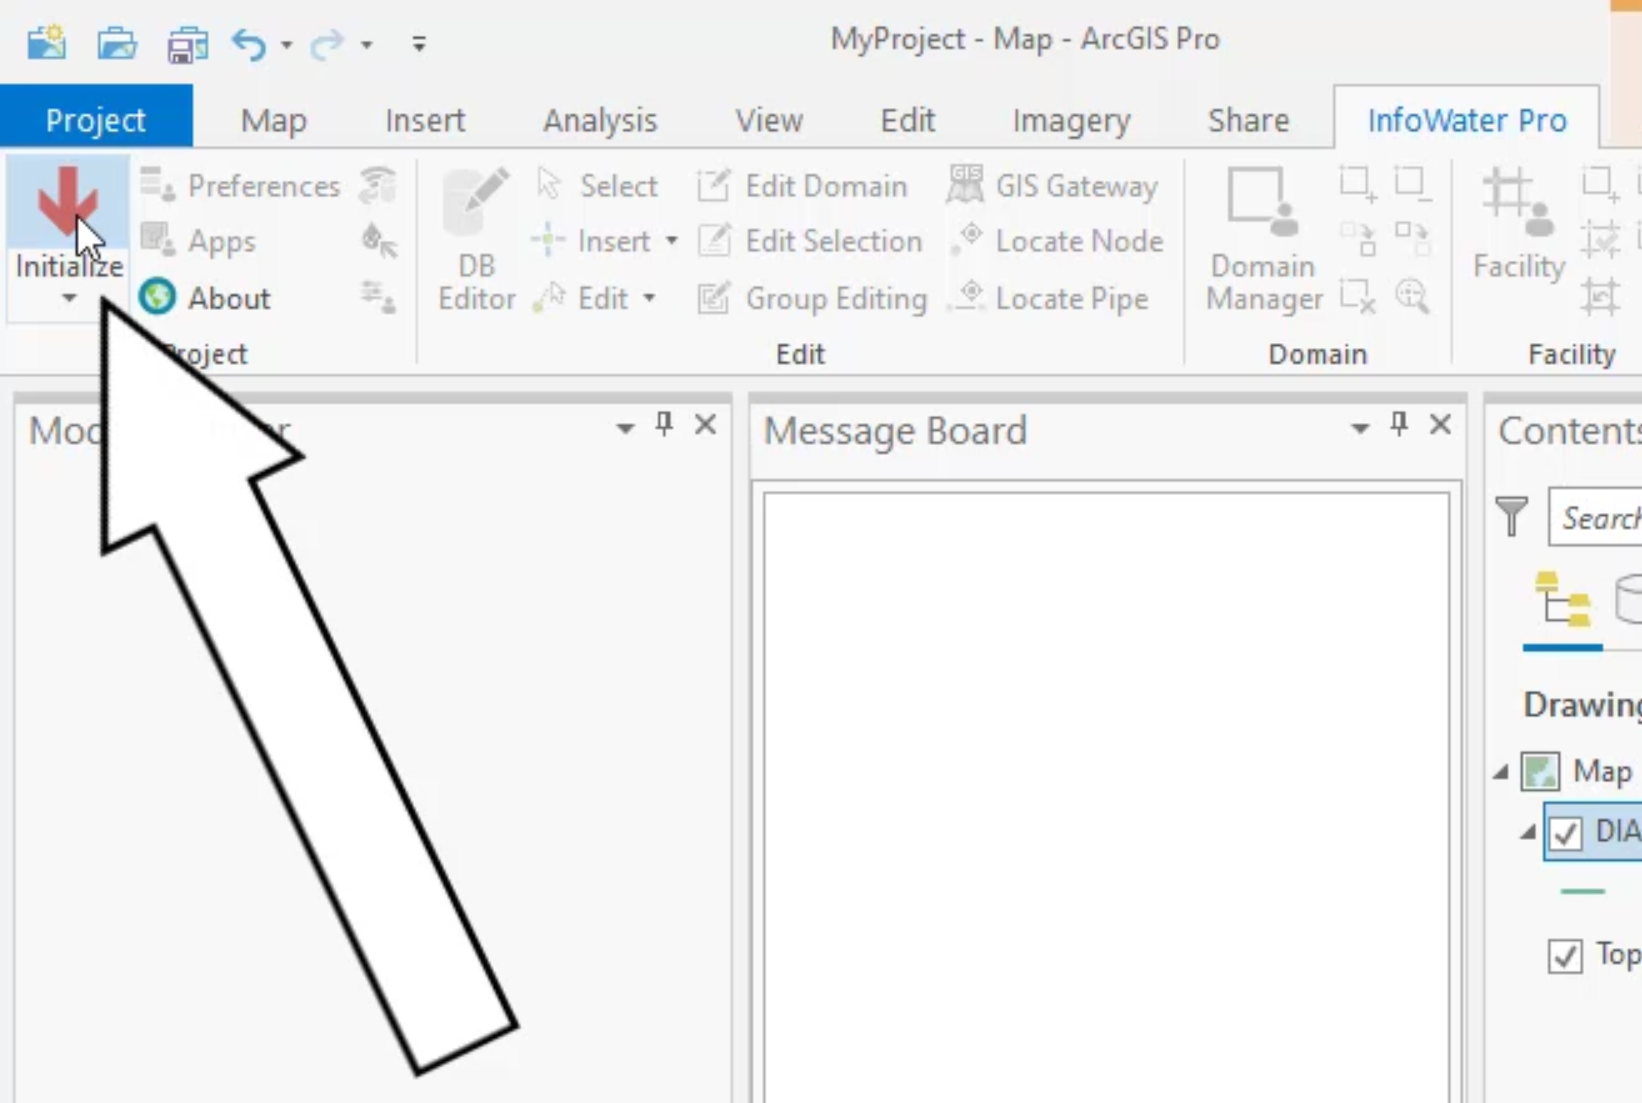
  2. From the ribbon, InfoWater Pro tab, click Initialize.
    The InfoWater Pro tab of the ribbon with Initialize called out as being selected
  3. In the model, locate tank TD5004.
  4. From the InfoWater Pro ribbon, Edit panel, click Select.
    The Edit panel in the InfoWater Pro tab of the ribbon with the Select tool active
  5. In the model, draw a selection window around tank T5004.
    The model view zoomed in to tank T5004, with a selection window being drawn around it and a callout arrow highlighting the location

TIP: If you are having trouble finding this tank in the model, use the Model Explorer to locate it. In the Attribute tab, enter T5004 in the name field, press ENTER, and then click Zoom to an Active Element.

  1. In the Model Explorer, Attribute tab, set Initial Level to 120.
    The Model Explorer, Attribute tab, with the new Initial Level for tank T5004 entered and highlighted

Tank T5004 will now have a hydraulic grade line, or HGL, of 120 feet above the ground surface during the steady state analysis.

  1. In the model, locate tank T5000 and select it.
  2. In the Model Explorer, Attribute tab, set Initial Level to 90.

Tank T5000 will now have an HGL of 90 feet above the ground surface during the steady state analysis.

  1. In the model, locate treatment plant WTP100 and select it.
  2. In the Model Explorer, Attribute tab, set Head to 5880.

Treatment plant WTP100 will now operate at a constant HGL of 5880 feet during the steady state analysis.

  1. On the InfoWater Pro ribbon, Domain panel, select Enlarge Domain.
    The Domain panel in the InfoWater Pro tab of the ribbon with Enlarge Domain being selected
  2. In the model, select pumps P-100 and P-120.
    Pumps P-100 and P-120 and the adjacent pipes selected
  3. On the InfoWater Pro ribbon, Domain panel, click Reduce Domain.
    The Domain panel in the InfoWater Pro tab of the ribbon with Reduce Domain being selected
  4. In the model, select the pipes adjacent to pumps P-100 and P-120.
    Pipes adjacent to pumps selected.

Note that only the pumps should be selected.

  1. On the InfoWater Pro ribbon, Edit panel, select Group Editing.
    The Edit panel of the InfoWater Pro ribbon, with the Group Editing tool highlighted for selection
  2. In the Group Editing dialog box, select Pump/Valve Status.
  3. Set Initial Status to Closed.
  4. Click Apply.
  5. Click OK.
    The Group Editing dialog box, with the applicable options selected and the user clicking Close
  6. Close the Group Editing dialog box.
  7. On the InfoWater Pro ribbon, Domain panel, click Clear Domain.
    The Domain panel in the InfoWater Pro tab of the ribbon with Clear Domain being selected

The pumps and tank are now configured and ready for the steady state analysis.

Was this information helpful?