 AutoCAD
 AutoCAD LT
 Fusion
 AutoCAD Revit LT Suite
 Architecture, Engineering & Construction Collection
 Revit
Revit Civil 3D
 BIM Collaborate Pro
 Product Design & Manufacturing Collection
 Maya
Maya Inventor
 Navisworks
 3DS Max
 Fusion Extensions
Transcript
00:01
So that last rendering took some time. And that was only at a medium resolution.
00:06
You can imagine how time intensive full renderings can be, especially if you have multiple renderings.
00:12
But there's a solution for that.
00:14
Rather than a rendering on your own computer, send it up to the cloud and let Autodesk servers render it for you.
00:22
It must be noted that Flex tokens are required for most renderings in the cloud, you can create a simple rendering without any tokens.
00:30
However, the more advanced the rendering is the higher the resolution is, the more it will cost you in terms of Flex tokens.
00:39
Here in Revit 2024, we will open up our small medical center model once again.
00:46
As before, if you did not complete the previous lesson, you can open up the small medical center cloud model.
00:55
If the model does not open up to the SECOND FLOOR - BREAKROOM 3D view,
00:60
you can make this current by going to your 3D views in your project browser and double clicking on that view.
01:11
So, the process is pretty simple.
01:14
Let's go back to the rendering dialog box and let's just double check our settings.
01:20
We can look at the exposure adjustments.
01:23
But since the last rendering was good, we really don't need to make any changes.
01:28
So, I can cancel out of this.
01:31
On my view tab, I can go to my render gallery from the cloud rendering.
01:37
Let's start by going to the render gallery.
01:43
It opens up in the Autodesk website.
01:49
I am logged in as myself and it shows me how many projects I have and how many Flex tokens I have,
01:55
and a selection of all the renderings that I've done previously.
01:60
If yours does not open up, that means you need to either log into your Autodesk account,
02:05
or perhaps you have to set up an Autodesk account and you may even need to purchase some Flex tokens.
02:12
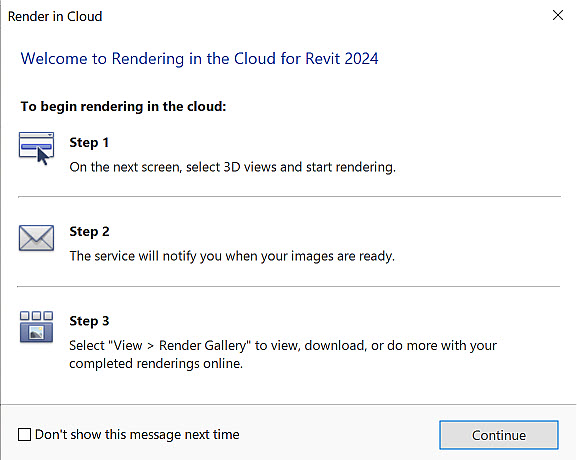
Back in Revit, I go to the Cloud Rendering, Render in Cloud.
02:20
It is a very simple process. Step 1, I select the 3D view and start rendering.
02:27
In step 2, I will be notified when my image is ready.
02:31
And step 3, I go to my render gallery to view the results and download.
02:39
So, I click "Continue".
02:42
And here are the three steps.
02:44
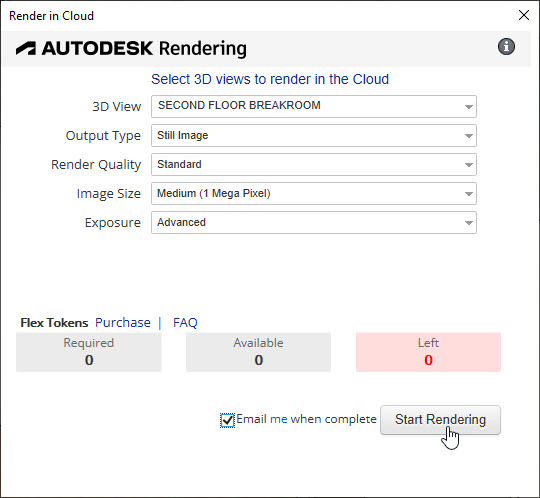
I select my 3D view, which is my SECOND FLOOR - BREAKROOM.
02:49
My output type will either be a still image or a panorama, a stereo panorama or a luminance.
02:57
I click "Still Image".
02:59
Notice that currently in my standard quality, no flex tokens are required.
03:06
For my image size, let's go to 16 megapixels and notice that tokens are required.
03:17
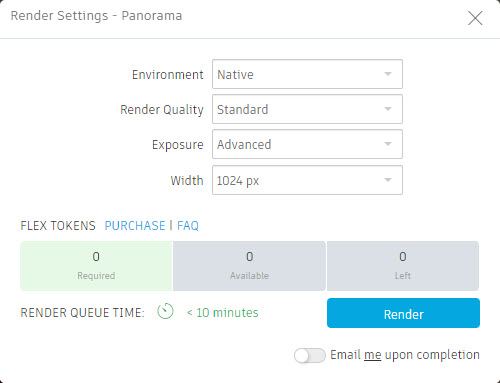
For my exposure, it can either be native or advanced.
03:22
The advanced will read the settings that I did earlier in my render dialog box.
03:27
And I do want to receive an email when it is complete, and I can start rendering.
03:32
So, it's starting to gather the data.
03:35
And once again, some materials are missing because of graphics files that are lacking.
03:41
I click "OK".
03:43
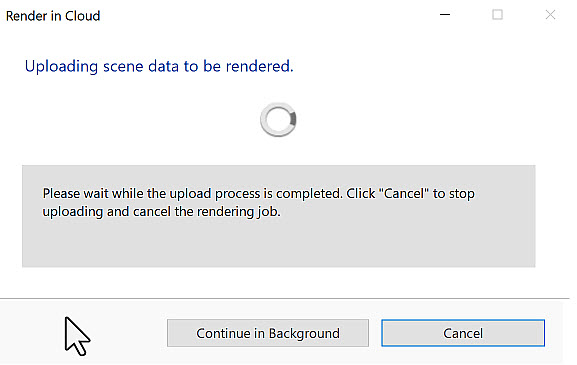
Now it's uploading the entire scene.
03:46
I can click on "Continue in Background" and that way I can continue to work.
03:51
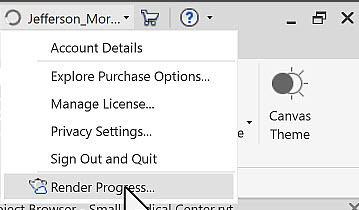
In the meantime, I can see up in the top right corner that it's still rendering.
03:57
And at any point I can click on the render progress and we jump into the gallery and this is where the image will appear when it's done.
04:07
Oh, it just finished rendering. It didn't take that long.
04:10
So, in the render gallery, I can re render if I want to or I can render it as a panorama,
04:18
a stereo panorama, a solar study, a luminance or a turntable.
04:25
For example, let's check out panorama.
04:28
Again, there will be some flex tokens that are required.
04:34
Let's see what that looks like.
04:36
Yes, I do want to receive an email when it's complete and we go to render.
04:43
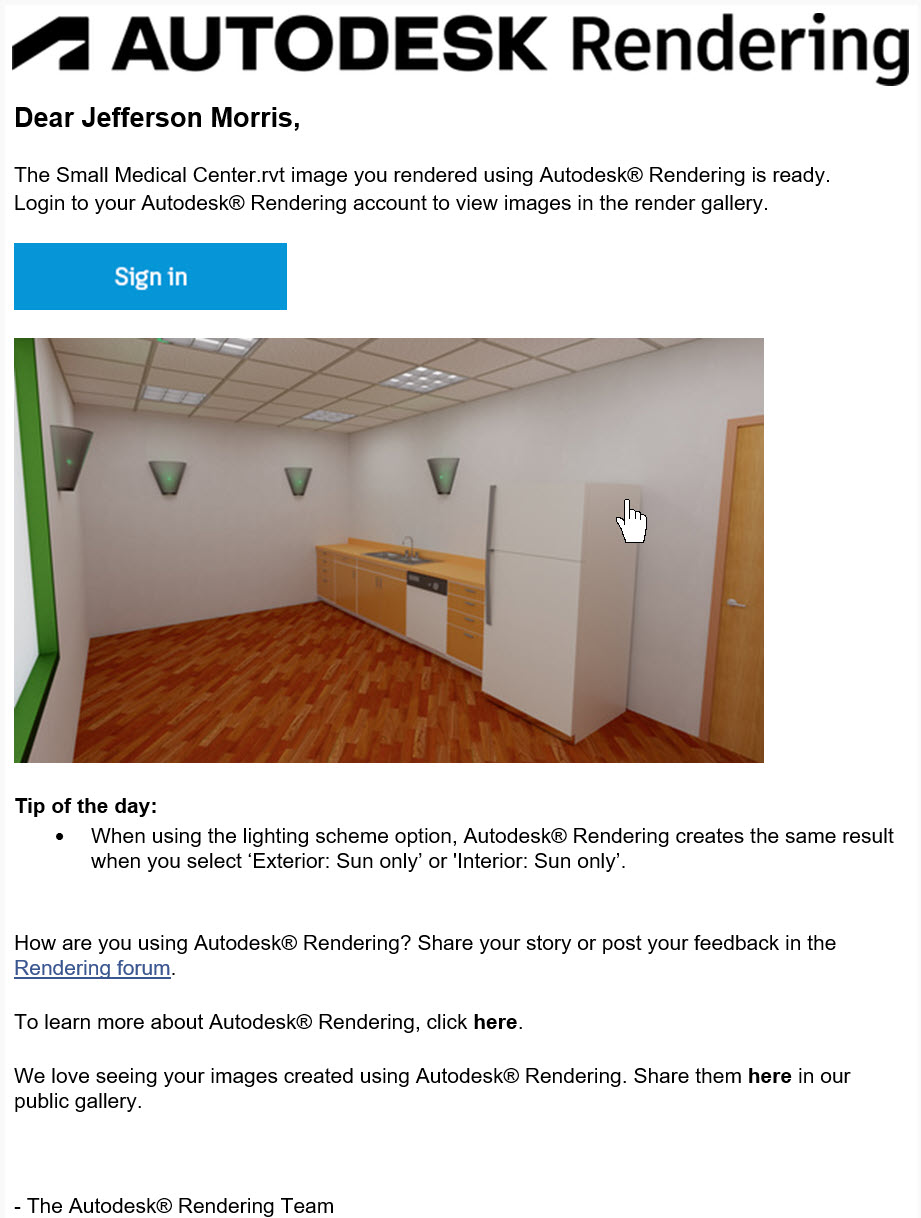
This is the email I received from Autodesk render stating that the rendering is complete and it gives me a few tips.
04:53
When the Panorama is complete in my gallery, I can hold the mouse down and inspect the entire room.
05:00
Talk about a great presentation tool.
05:03
And I can look at the other two images.
05:06
This is the still image that I can download as a JPEG file.
05:14
And the panorama, I can download as an html file.
05:19
And then I can save these in my rendering folder.
Rendering can be quite time-consuming and can take up a lot of resources from your computer. Luckily, Autodesk allows you to render images to their server, allowing you to get on with your day! You will be notified when the rendering in the cloud is complete. Please note that Flex tokens are required for cloud renderings at higher quality/larger image size settings.
To render a scene to the cloud, follow these steps:
