00:00
As they say in the movie industry, lights, camera, action.
00:04
In Revit, shall I say views, materials, lights, action?
00:10
We're ready to render, but I'm still not going to click the easy button for a render,
00:14
because we need to look at the various settings within Revit that will make the rendering more effective.
00:22
So, let's jump back into Revit.
00:26
Here we are in Revit 2024.
00:29
And as before, let's open up the small medical center.
00:32
As before, if you didn't finish the previous lessons, you can click on small medical center rendering,
00:40
and it opens up to our reflected seating plan where we finished off last time.
00:45
If it doesn't open to that, in your project browser, go to your ceiling plan, second floor.
00:52
I remember the sconce that I placed.
00:55
It's actually right on a window. So, that's not going to work very well.
00:59
So, simply select it and delete it.
01:02
In our project browser. Let's go to our 3D views
01:05
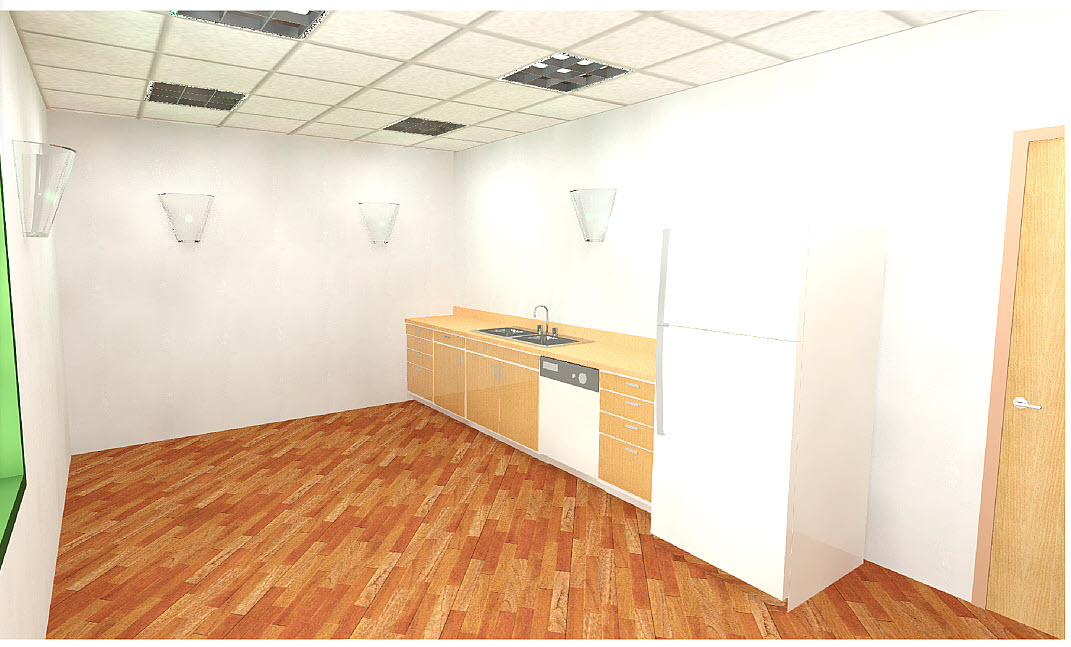
and double click on the SECOND FLOOR - BREAKROOM.
01:09
Oh, Look at this. Some of our sconce up lights are actually pointing downward.
01:14
Easy enough to change. So, I simply select it.
01:18
And each time I hit the space bar, it rotates 90 degrees.
01:22
Do that for all the sconces that are upside down.
01:27
And now indeed there are sconce up lights.
01:31
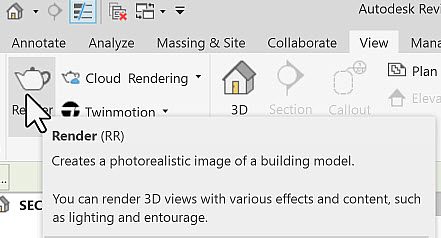
Okay. It's time to render.
01:33
Notice down here. I have a little teapot with a light bulb so I can show my rendering dialog box.
01:41
Or on my view tab I have my render here.
01:45
Notice RR is the keyboard shortcut for displaying the rendering dialog box.
01:52
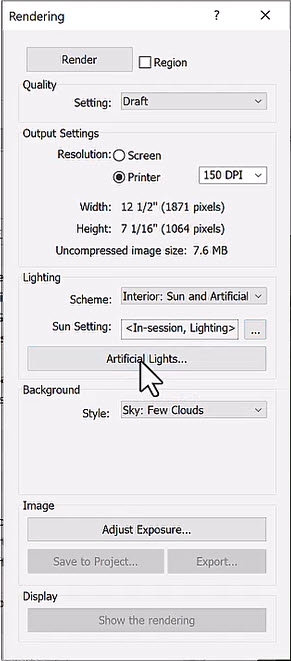
For this initial run, I like to have my settings set to draft.
01:58
And once I have the kinks worked out, I can increase the quality.
02:04
For my resolution, let's set it to a printer resolution.
02:14
For my lighting scheme, notice we do have a window and some lights.
02:20
So, I go to my interior and artificial.
02:25
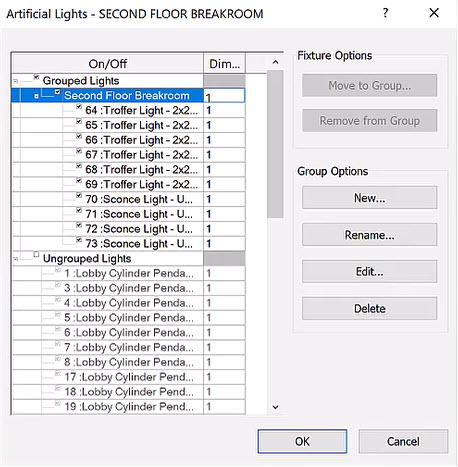
And for my artificial lights,
02:28
let's select that group for my SECOND FLOOR - BREAKROOM and uncheck the ungrounded lights.
02:37
Notice when I select SECOND FLOOR - BREAKROOM, all the lights get highlighted in my view.
02:43
So, I know I have the proper one set and click "OK".
02:48
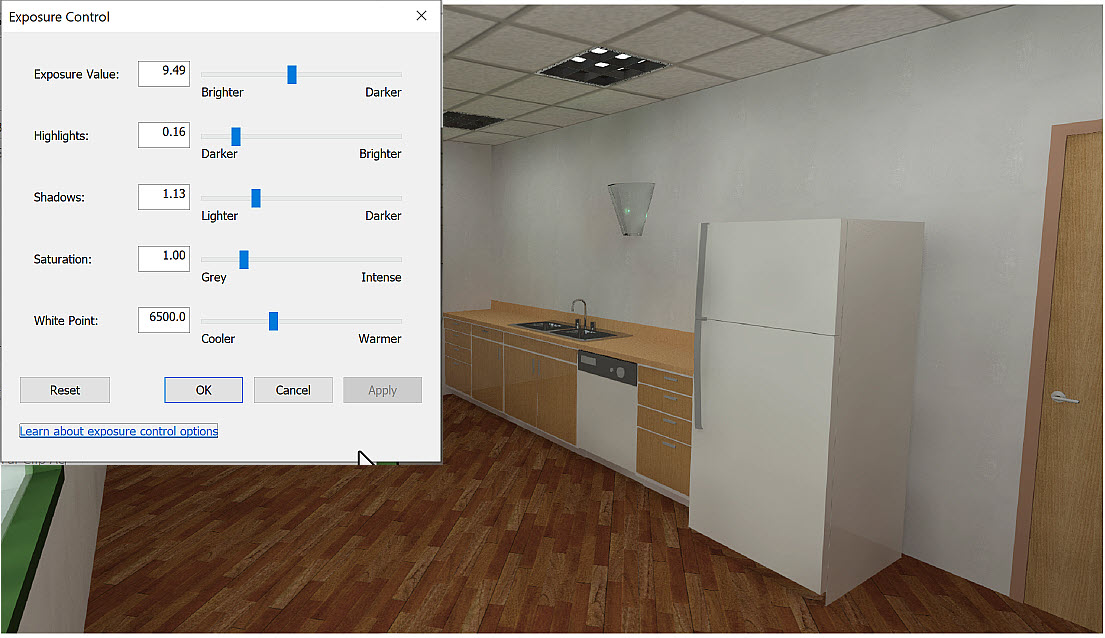
Let's do some small tweaking right now. Let's adjust the exposure a bit.
02:55
Let's decrease that by, let's go to about 7.5.
03:01
The rest we can adjust later.
03:06
And let's click the "Render" button.
03:10
So, the rendering process it can take some time. It gives me a progress.
03:16
If it's all in black, don't hit the stop button,
03:20
be patient and let it keep going and eventually you will get a result that you can work with.
03:26
Now, this isn't too bad.
03:28
But for the image, let's adjust the exposure, make it a little bit darker, apply.
03:38
My highlights, let's make them a little bit darker as well.
03:44
Let's start from the shadows to about 1.1.
03:49
And for the saturation and white point,
03:52
I generally leave them the way they are because I want the electrical settings to dictate the saturation white point.
04:01
If it's a halogen light versus if it's a fluorescent light.
04:07
Okay. That's not bad for my draft. So, I click "OK".
04:12
And now I can come to a high resolution.
04:16
Increase my DPI to maybe 300 dots per inch and re-render this.
04:24
Now this is going to take some more time.
04:26
So, I'll see you in a few minutes.
04:31
Oh, I forgot to mention last time, notice that there's some materials missed.
04:37
So, I received this file from a consultant.
04:40
They created some new materials and they forgot to send me the materials and the corresponding graphics.
04:49
So, I should really go back to that consultant and request those.
04:53
Okay. This is finally done.
04:55
I can save this to a project, give it the proper name.
04:59
I'll accept the default.
05:01
This basically creates a drafting view and puts the image on that drafting view.
05:06
So, as you can see, it creates under renderings, basically, a drafting view with the names that we think.
05:15
I can also export this.
05:17
So, I go to my project folder, I'll create a rendering folder,
05:27
and I can save it as a variety of images.
05:31
I'll leave the default as JPEG which is a more compressed file format.
05:37
Okay. This took quite some time to render.
05:40
The next lesson will look at an alternative to rendering on your own computer where we can render to the cloud.