00:01
If you walk into a room and there's no windows and no lights, it is dark.
00:06
In Revit, if you render a room with no windows and no lights, it's dark too.
00:11
It's as simple as that. Lighting affects the rendering. To make an effective presentation,
00:17
the lights must be controlled and that's what we'll be looking at in this video.
00:21
So, let's jump into Revit to see how that's done.
00:25
Once again here in Revit 2024, let's open up the small medical center model that we've been working on.
00:33
If you didn't have a chance to complete the previous lesson, click on small medical center lighting.
00:41
Make sure that you're in the 3D view for the SECOND FLOOR - BREAKROOM.
00:47
And if not in your project browser expand the 3D views category and double click on SECOND FLOOR - BREAKROOM.
00:56
You'll notice that there's no lights in this break room.
00:59
So, let's add some troffer lights in the ceiling and also, some sconces along the walls.
01:07
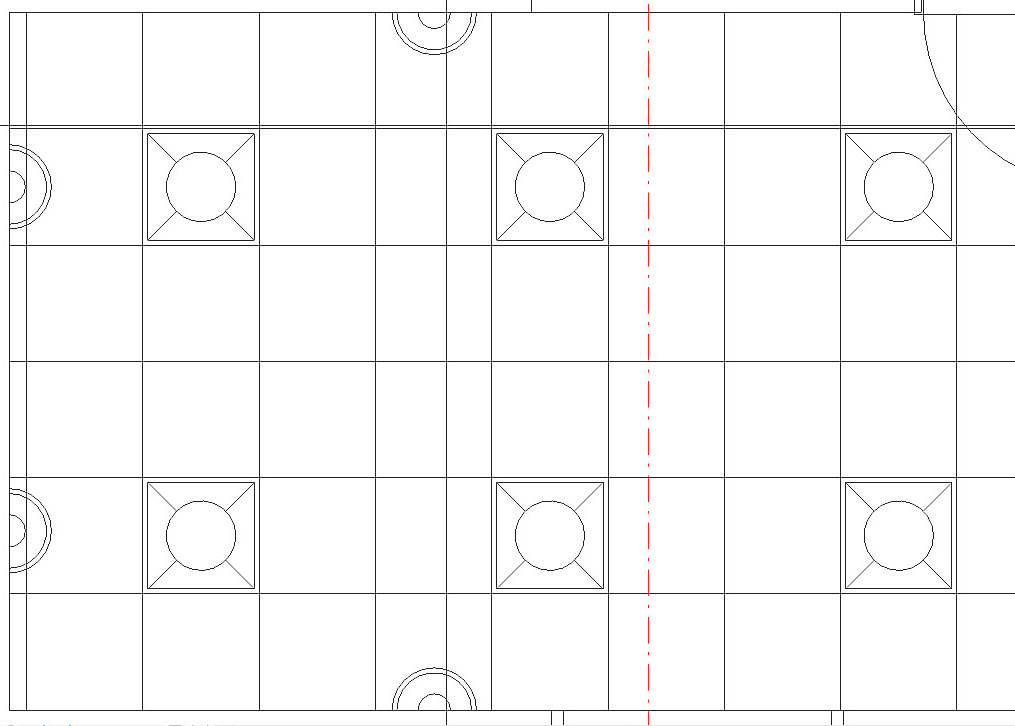
If we add some lights, let's go to the reflected ceiling plan.
01:12
So, my project browser, ceiling plans, double click on "SECOND FLOOR".
01:18
Here in the lower left corner is a break room.
01:22
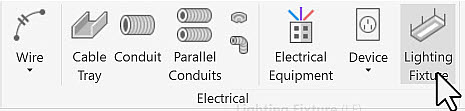
Let's go to the systems tab and under electrical lighting fixtures,
01:30
let's see what lighting fixtures we have in our model,
01:34
nothing really suitable.
01:36
So, we need to load the family.
01:38
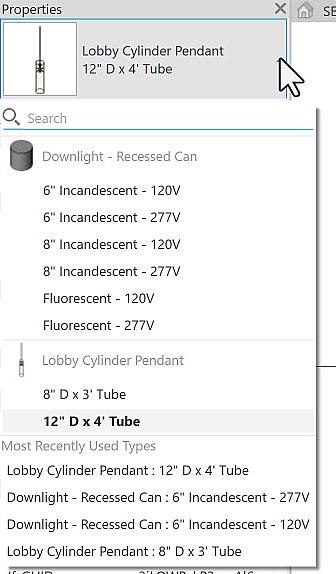
We go to the lighting folder, we want to pick MEP lights and these are for internal purposes.
01:50
And here's our Troffer Light 2X2 Parabolic because we have a 2X2 ceiling grid.
01:57
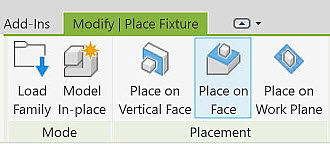
Let's open that. You notice that I can't place it on the ceiling because it wants to place it on a vertical face.
02:05
So, I click on "Place on face" and now I see a preview of it.
02:11
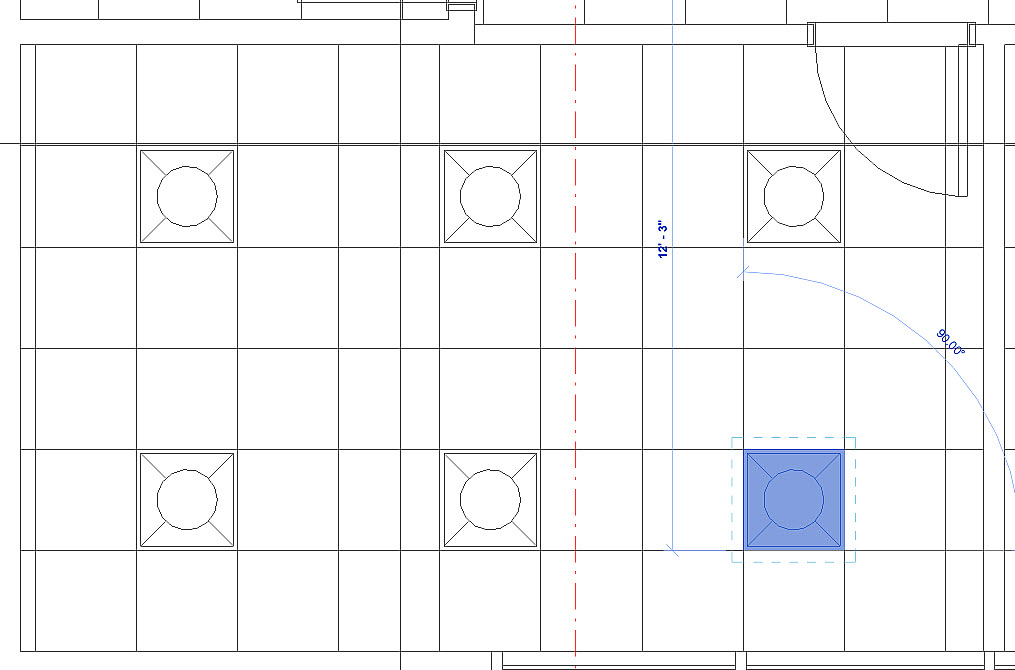
I'm going to do is I'm just going to make sure that I select one of the grid lines.
02:17
Then I'll use the align tool to align it properly.
02:22
So, click "Modify" to deselect it.
02:25
I can type in AL for align,
02:28
select my destination line and the line from the ceiling fixture and it lines it in place.
02:37
Hit "Modify" to finish my align command.
02:41
Now I want to place more lighting fixtures.
02:44
So, I select the original lighting fixture and copy it.
02:50
I want to make multiple copies and constrain the set. So, I can only copy it in either the X or the Y direction.
02:59
Select my base point, copy one to this location.
03:06
Constrain is still set and I can move down and copy them across,
03:16
hit the "Modify" button or hit "Escape" to deselect it.
03:20
I finished with my troffer lights.
03:23
Now I want to insert some sconces.
03:26
So back on my systems tab, I go back to my lighting fixtures and I need to load a family.
03:34
For my sconces, scroll down.
03:37
Here's my sconce light up light.
03:42
I want to place this one on my vertical face.
03:46
I think this is where my sync is.
03:49
Select another face lining up with this row.
03:54
Now it's on the wrong side so I can simply flip it.
04:01
Select the next one down and flip that as well.
04:07
For my fourth one, go opposite the sync, flip it again.
04:14
Now, I want to show you something.
04:18
So, I'll get modified to deselect that.
04:20
And what I want to do is I simply want to copy this lighting fixture across.
04:26
So, I select the lighting fixture.
04:30
I go to copy it from this base point, let's say over to here, just at the door.
04:40
Now it's telling me that the instant origin does not lie in a host face.
04:46
What this means is, I simply copied it but it's not set to the host at the wall.
04:53
So, I select the lighting fixture and in my rib and I can pick a new host and I select the wall.
05:02
And now it's hosted.
05:04
Hosting means that if I move the wall, the lighting fixture will move as well.
05:09
So, we selected these lighting fixtures straight from the library.
05:14
Let's check their properties to make sure that they're set according to our design intent.
05:21
So, I select the troffer light and I go to the properties of it.
05:27
Notice in the properties, they have a variety of electrical properties in this.
05:34
One thing I want to make sure of is for rendering purposes that I have the appropriate IES file.
05:42
The IES file will dictate how the light behaves during rendering.
05:48
So, you want to make sure that you do have an IES file.
05:51
For my light loss factor let's make that about 1.5 and click "OK".
05:59
The initial intensity, 40 watts is a bit low.
06:04
Let's make that 60 watts.
06:08
And you notice as I enter 60, the other values increase automatically. So, we'll keep it at 60 watts.
06:15
That's all will change.
06:18
The last one is the light color.
06:20
I have a drop down here for the presets.
06:23
I want to make this one fluorescent daylight, it'll be a bit warmer.
06:28
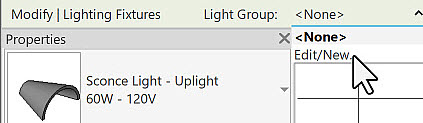
Let's do the same for the sconce.
06:32
Just make sure that everything is properly set.
06:35
Notice the default elevation is 6 ft 4, which is fine.
06:40
I do have an IES file.
06:42
For the light loss factor, let's again crank that up to 1.5 and let's make this bit stronger as well.
06:51
So rather than 60 watts, let's change that to maybe 100 watts.
06:57
The initial color is fine.
06:59
But for my color filter, let's change that to a light blue.
07:07
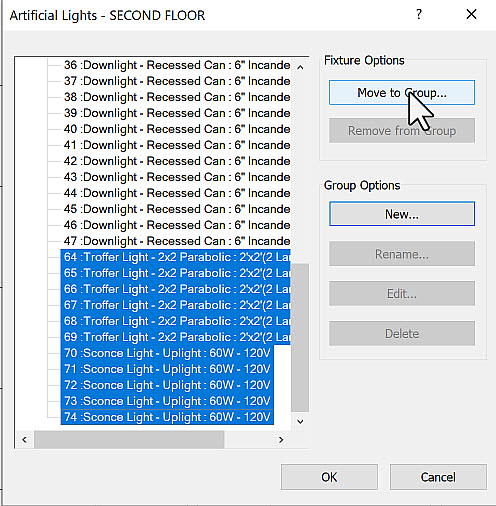
Now, for rendering purposes, it is highly recommended that we create a light group for these lights.
07:14
So, when I render this, only these lights will be affecting the rendering rather than all the lights in the model.
07:22
So, I select one light fixture and in my options bar, I have my light group which is set to none.
07:31
I want to create a new light group.
07:33
So, for my group options, I select "New", SECOND FLOOR - BREAKROOM will be my new light room.
07:42
These are chronologically listed.
07:45
So, I know that the troffer lights and the sconces lights that I just put in will be at the bottom of the list.
07:53
You notice as I select one, it gets highlighted in my model,
07:57
hold the shift key down and I have all the troffer lights and sconce lights that I selected.
08:03
And I want to move this to a group and the group is my SECOND FLOOR - BREAKROOM.
08:11
Let's go up to the top.
08:13
Here's my SECOND FLOOR - BREAKROOM group and it has all the lights.
08:18
Let's move that out of the way and click "OK".
08:25
Okay. We have our materials, and we have our lights.
08:28
What comes next is the action.