Create a factory utility design layout - Exercise
Note: This exercise uses the Packing Machine asset created in the Create Factory Utilities Design Assets exercise from the previous unit. If you have not already done so, you will need to complete that exercise first.
- Using AutoCAD Mechanical or AutoCAD Architectural, open Production C.dwg from the supplied dataset.
- Insert an external reference of the Factory Footprint.dwg, placing the drawing at 0,0 with no adjustment to scale or rotation.
- Note that the Production C drawing is simply a sub-layout of the overall factory facility. Sub-layouts can be established in AutoCAD or Inventor.
- Detach the Factory Footprint reference.
- In the Factory tab>Tools panel, activate the Asset Browser and the Factory Properties palettes from the Palettes drop-down list. Arrange the palettes in a manner that is convenient for you.
- In the Asset Browser, locate the Roller Conveyor (Chain) asset from the Conveyor category. Make sure it is the Chain version of the asset.
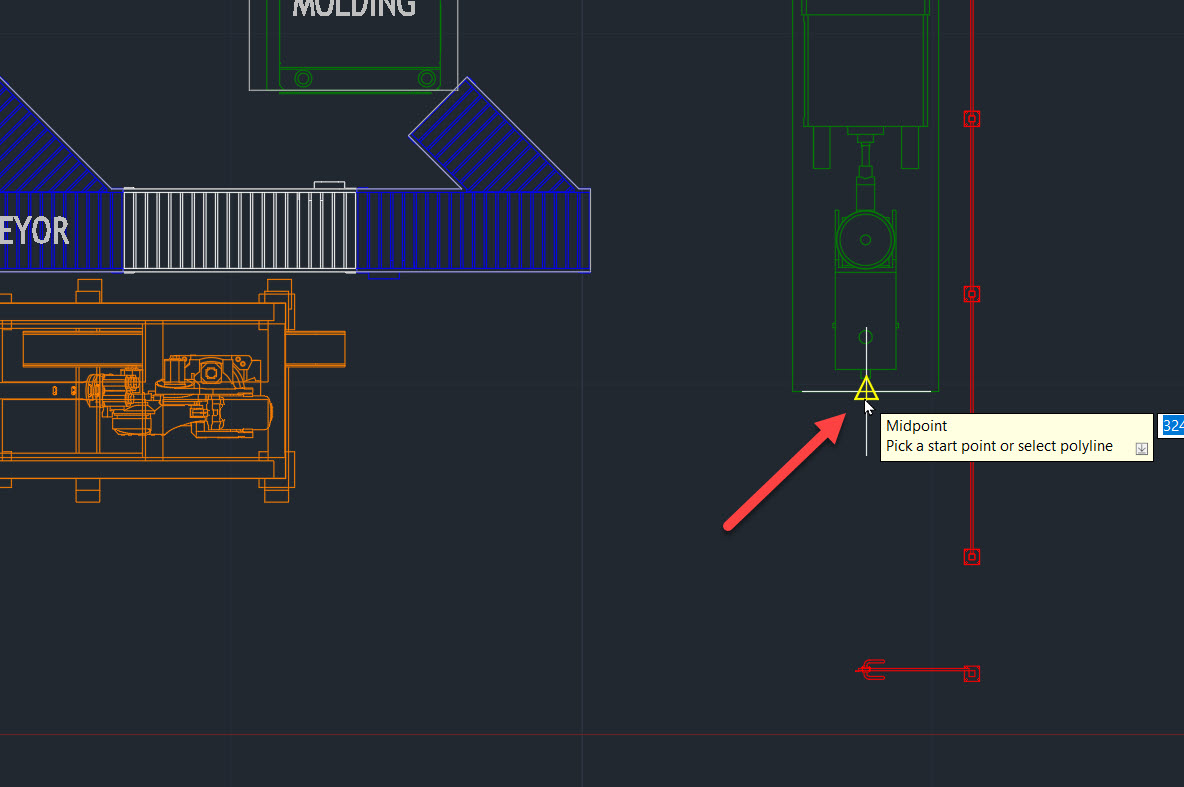
- Click and drag the asset into the drawing window. You will begin by simply drawing a polyline starting at the midpoint shown below.

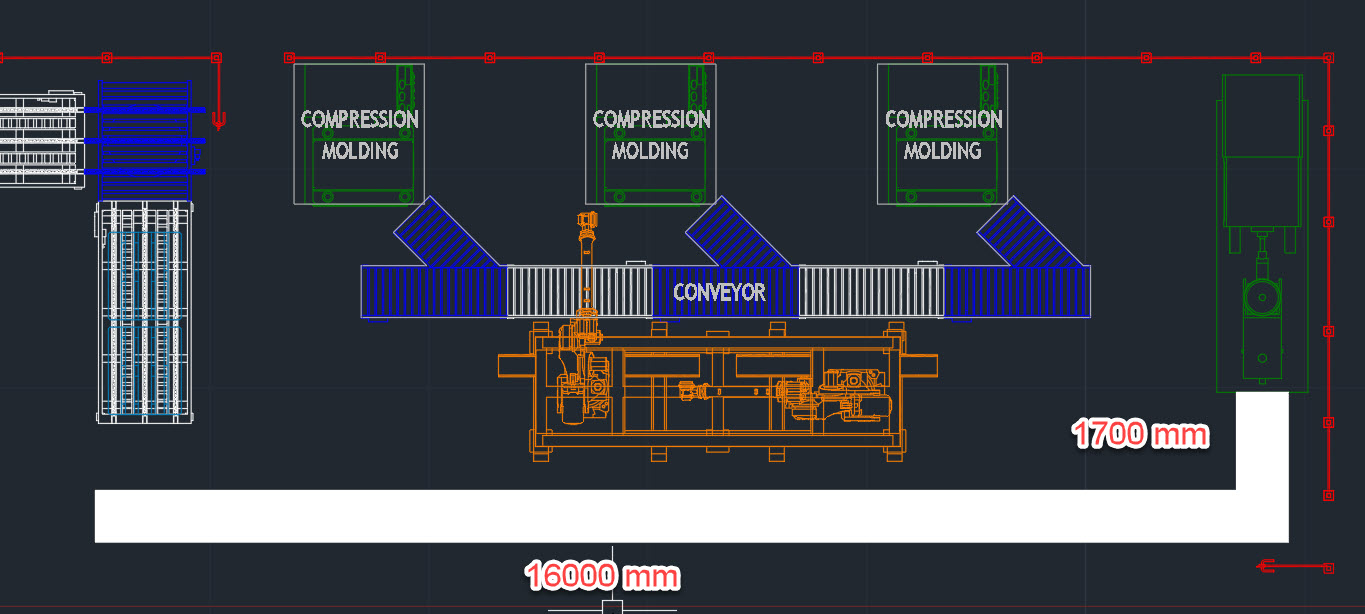
- Draw the polyline down 1700mm and then to the left 16000mm, as shown below.

- Use the Convert Asset Chains command to convert the thick polyline into individual conveyor segments. Start the command and select the thick polyline. Note: The red conveyors are non-standard sizes.
- Save the file.
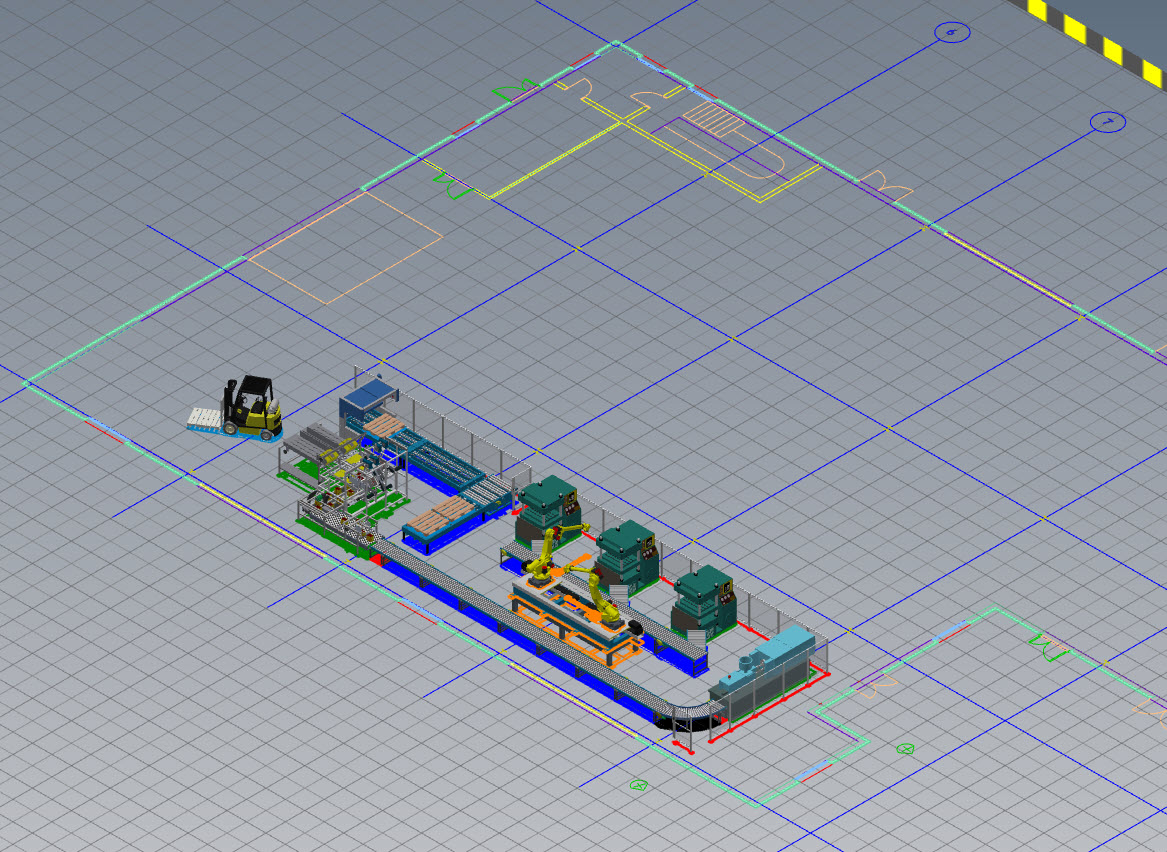
- In the Factory tab>Cross-Products Workflows panel, use the Open in Inventor command to convert these 2D assets to their 3D counterparts. This process may take some time because Inventor has to download the assets in the background.
Note: Steps 11 to 15 are optional.
- Create three folders in your Inventor Browser for Conveyors, Machines, and Fence.
- Expand the Conveyors folder and select all conveyors. Set the layer on the Layout panel to Transportation.
- Expand the Machines folder and select all machines. Confirm that all assets on the Machines layer.
- Expand the Fence folder and select all the fence assets. Confirm that all assets are on the Safety Equipment layer.
- Collapse all folders.
- In the Asset Browser, navigate to your User Asset directory and locate the Packing Machine published in the exercise from the previous unit.
- Click and drag it into the model window, snapping the connector to the end of the previously created conveyor line. Note the height discrepancy.
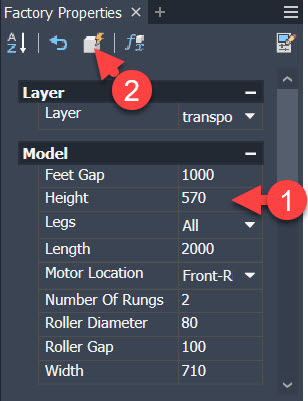
- Select one of the roller conveyors in the line and enter a Height value of 570mm in the Factory Properties palette. Click the Update button in the Factory Properties palette to update the height of the entire conveyor line.

- Confirm that the Packing Machine is on the Machines layer.
- In the Factory tab>Cross-Products Workflows panel, click Open in AutoCAD to update the AutoCAD drawing. Select Yes to save the assembly when prompted.
- Save the updated AutoCAD drawing.
- Click Open in Inventor to update the Inventor footprint to match.
- Save and close all files.
- In Inventor, start a new Factory Layout using the Metric Factory Layout template located in the Factory folder.
- In the Factory tab>Layout panel, click Add DWG Underlay. Select Factory Footprint.dwg from the dataset. The drawing will be added to the floor.
- Use the typical Inventor assembly Place command to add the Production C sub-layout assembly created previously to the layout. Make sure to place the sub-layout grounded at the origin.

- You may choose to save this overall assembly or simply close all files without saving.


